Using Shipmate with WooCommerce
Introduction
The Shipmate plugin for WooCommerce allows quick and easy integration between your Shipmate account and WooCommerce store, giving access to all the carriers and delivery services Shipmate provides, directly inside WooCommerce.
This guide explains how to set up the Shipmate WooCommerce plugin and configure your accounts to start despatching your orders in WooCommerce using delivery labels from Shipmate.

Requirements
Before you are able to start printing shipping labels using Shipmate with WooCommerce, you will need the following:
- A self-hosted WooCommerce store running WooCommerce 3.0 on WordPress 4.0 or later. Supports HPOS enabled stores.
- PHP 5.6 or later with the cURL module enabled
- (S)FTP access to your WordPress installation either through WordPress itself or on your server
- A Shipmate account
- At least one active Carrier and Delivery Service
- A compatible printer
In order to print labels directly within WooCommerce using Shipmate WebPrint™ you will also need to download the Shipmate Desktop Application for Windows or macOS.
If you need any assistance ensuring you have everything you need to link your Shipmate account with WooCommerce, please contact support@shipmate.co.uk.
Setup - WooCommerce
Install Shipmate Plugin
Installing the Shipmate WooCommerce Plugin is straightforward but you might need a hand from your web developer, depending on how your store has been set up. The plugin is installed much like any other WordPress plugin, so if you are familiar with this - you should be up and running in no time.
Firstly, Download the Shipmate WooCommerce Plugin here.
Upload the contents of the Zip file to the /wp-content/plugins/shipmate directory on your web server, then navigate to the Plugins area inside your WordPress Dashboard.
Here you should see the WooCommerce Shipmate plugin - click Activate to install the plugin.
Connecting Shipmate
To connect your Shipmate account your WooCommerce store, simply take the following steps:
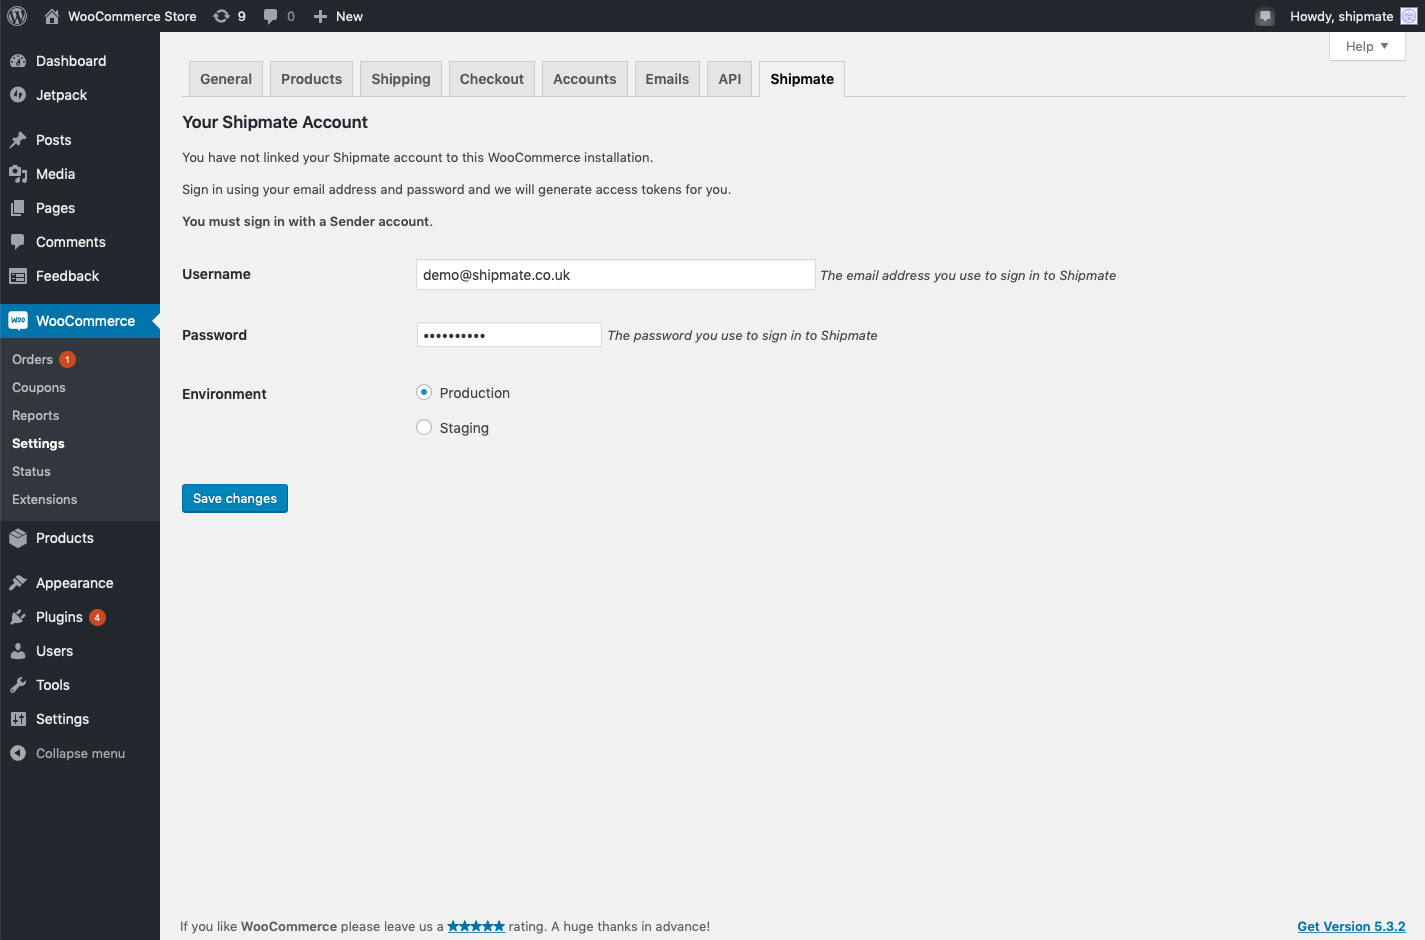
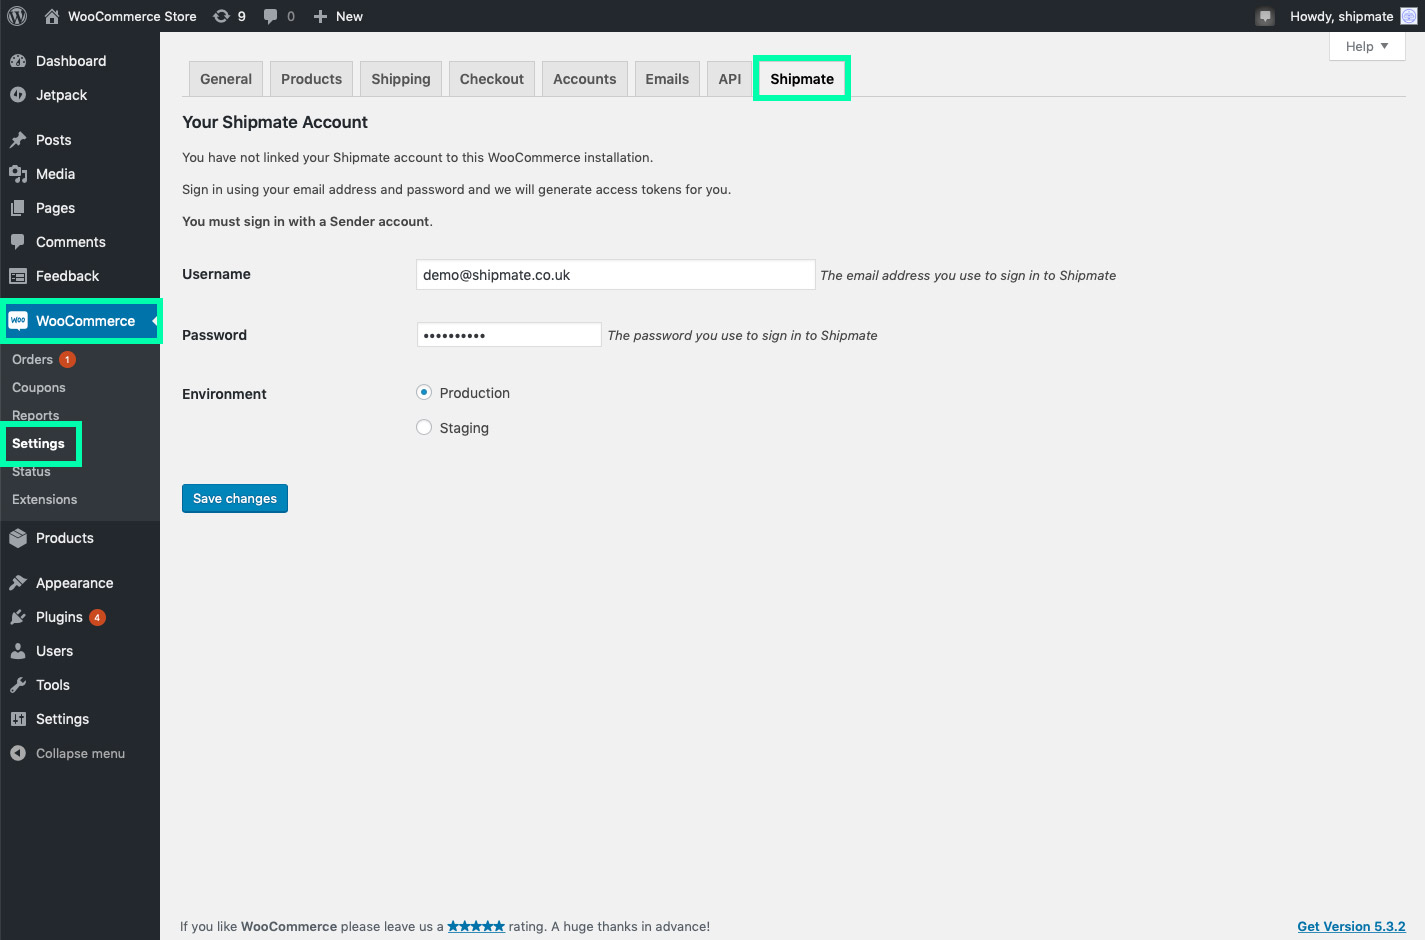
1. Click the Settings option from within the WooCommerce section of the WordPress Dashboard.
2. Click the Shipmate tab along the top of the WooCommerce Settings screen.
3. Enter your Shipmate account details - these are the details you usually use to log in to your Shipmate account.
Ensure the correct environment is selected - in most cases simply leave this as 'Production'.
4. Click the 'Save changes' button. If all your details are correct, you will see the line Your WooCommerce installation is connected to your Shipmate account. This means your Shipmate account is now linked to your WooCommerce store and you will see your Shipmate account name and access token.
If you made any mistakes, simply repeat the above steps, checking your details carefully until you see the success message.
Enabling Label Generation
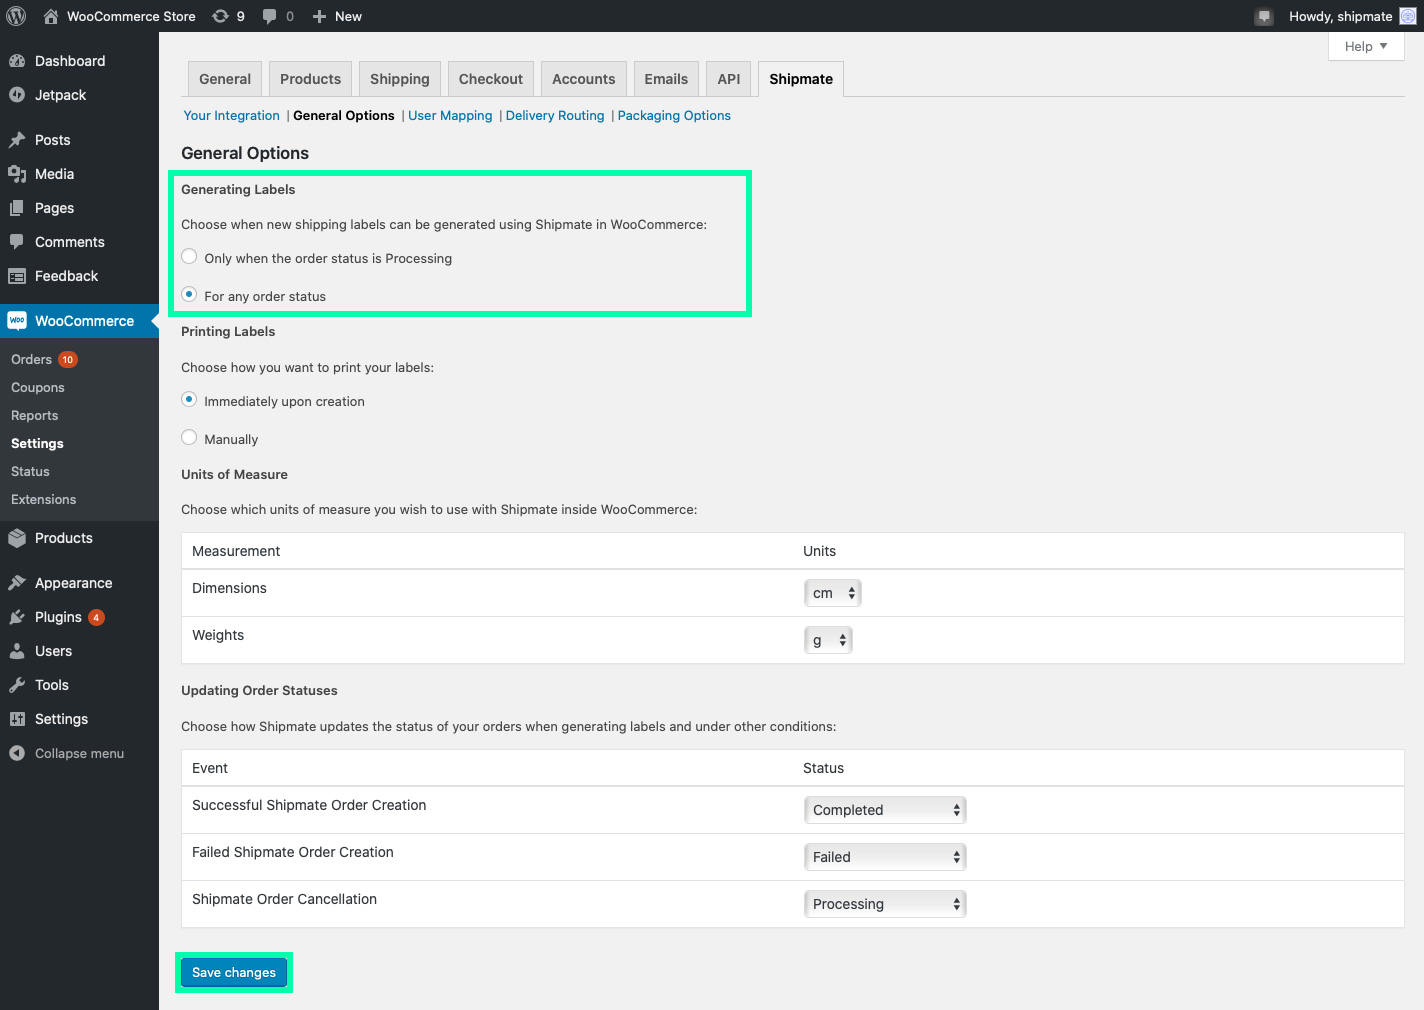
From the General Options tab inside the Shipmate WooCommerce settings, you can choose when the WooCommerce plugin allows you to generate new shipping labels using Shipmate. In most cases you will want to leave the default option of 'Only when the order status is Processing' - however if you use custom order statuses, it might be useful to switch the option over to 'For any order status'.
Once you are happy with your choices, click the ‘Save changes’ button. These settings will apply when you next process an order.
Printing Method
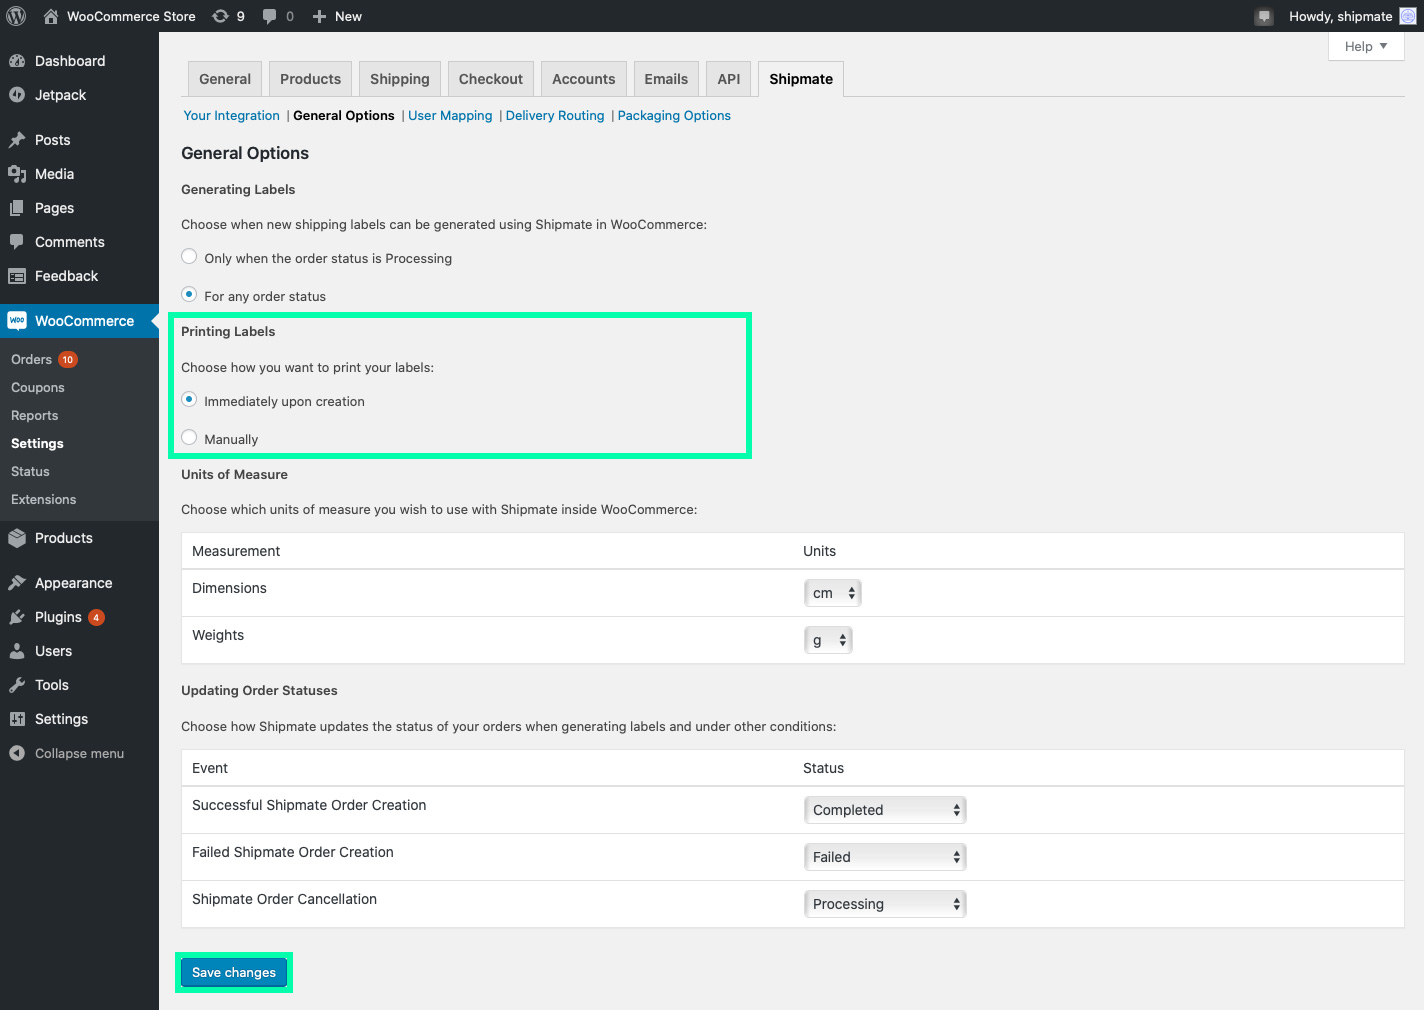
You have the option to choose when your shipping labels are printed - either immediately upon generation automatically, or you can generate the labels but print them later, either using the Shipmate Desktop App Scan & Print feature, or from the Shipmate Web Portal.
Simply choose the method you want to use from the Printing Labels section of the General Options tab inside the Shipmate WooCommerce settings.
Once you are happy with your choices, click the ‘Save changes’ button. These settings will apply when you next process an order.
Parcel Handling
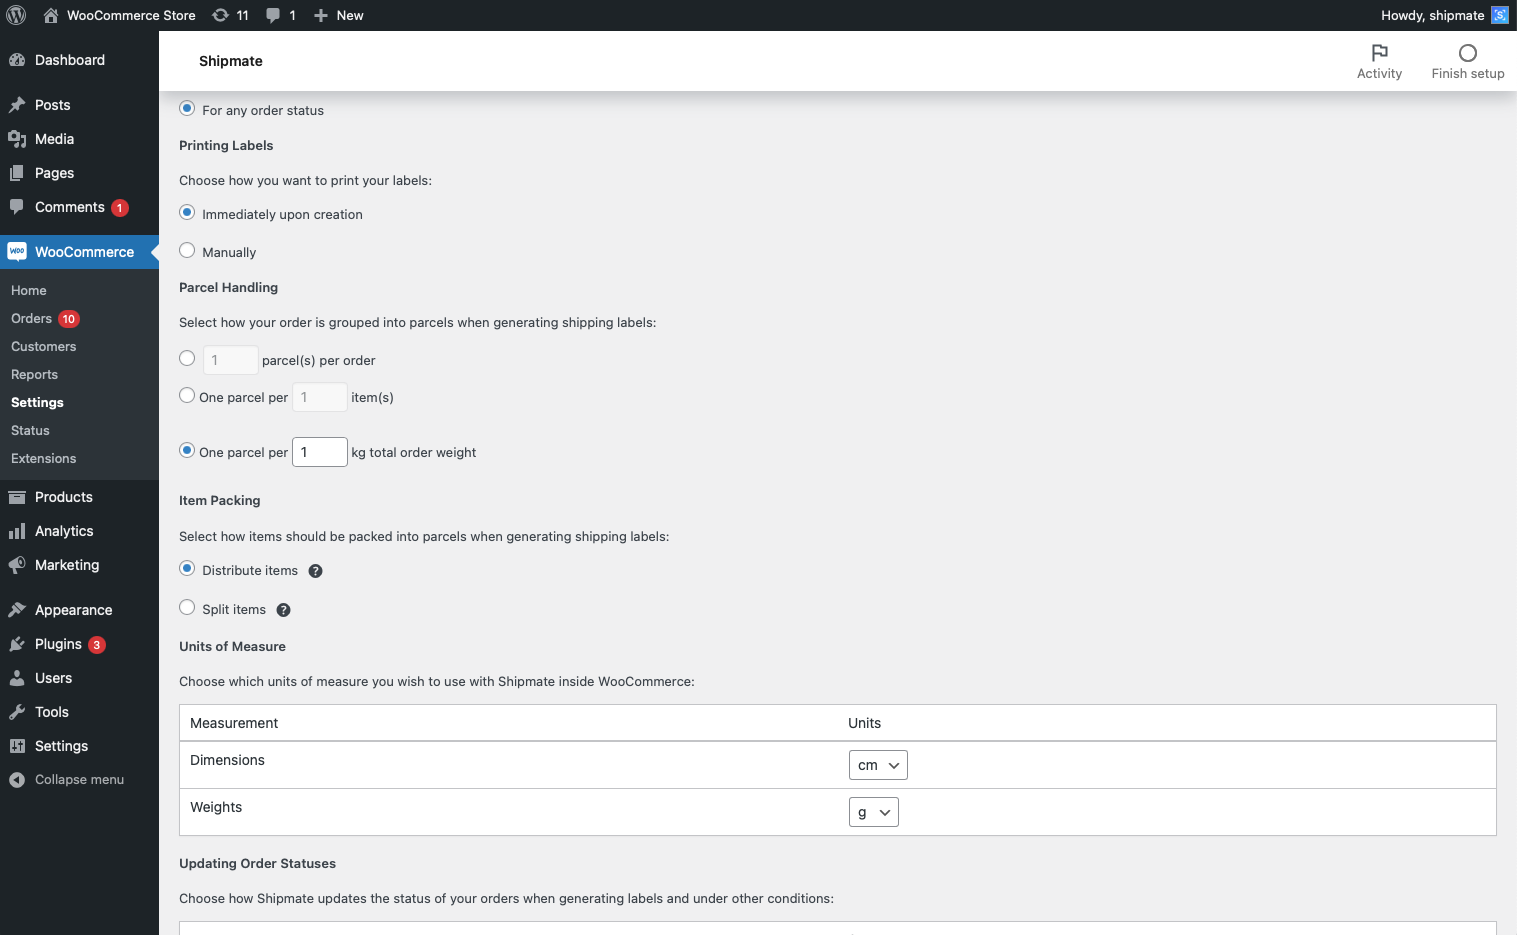
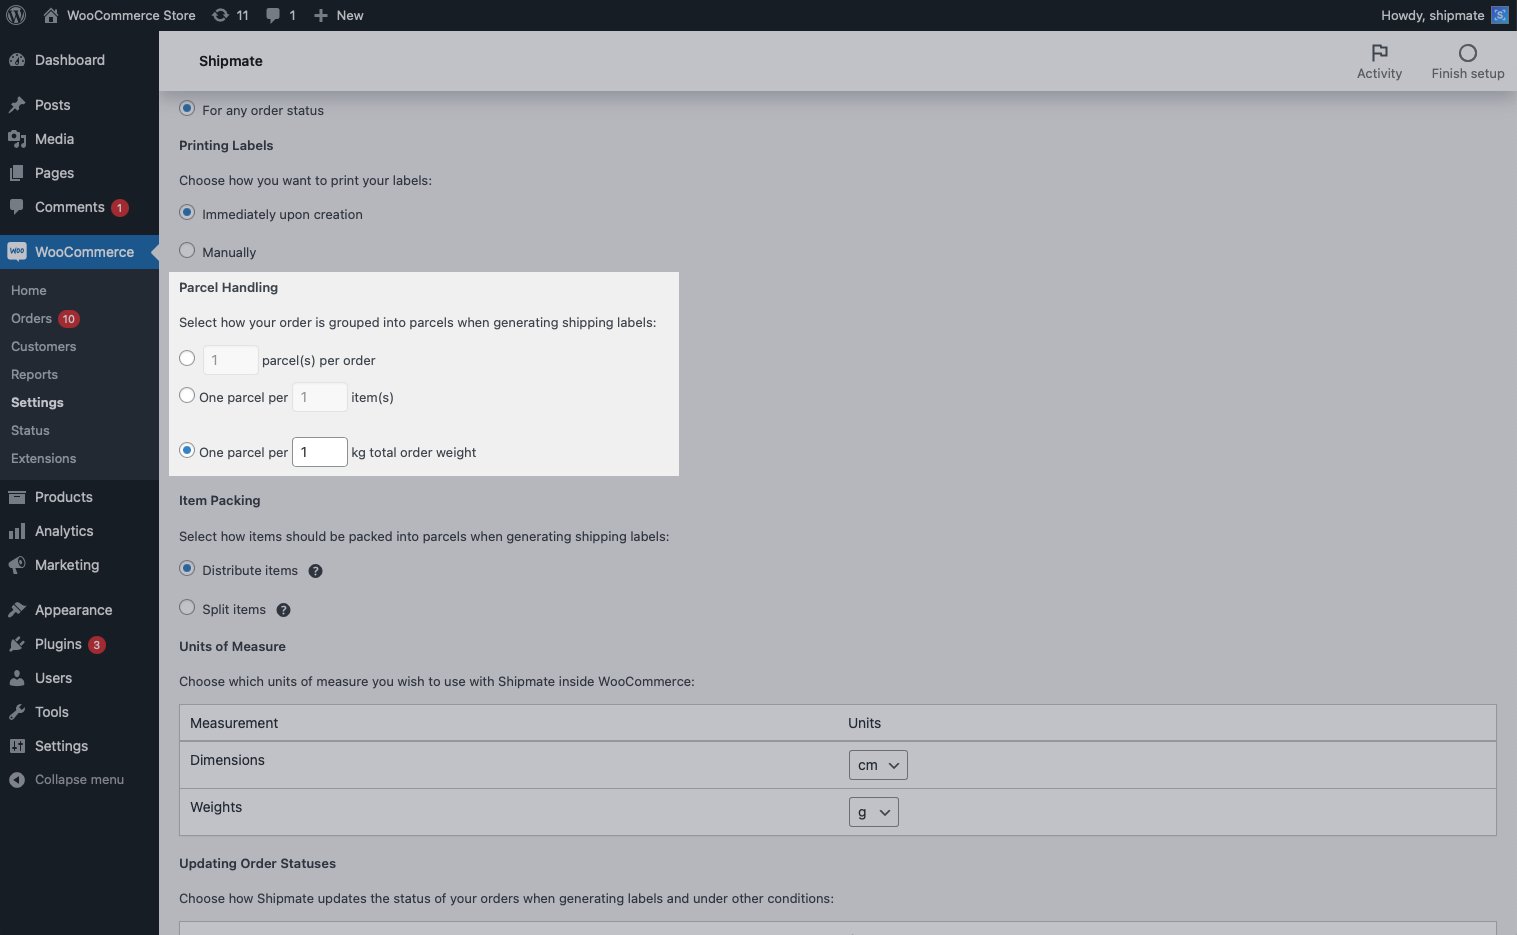
You can configure how many parcels are calculated when shipping each order, as your starting point. You can always change the number and size of parcels, but by choosing the Parcel Handling option that best suits the products you sell, you minimise the likelihood of having to change how many parcels you are sending for each order.
Simply choose the option that best suits your requirements, from the following options:
- X parcel(s) per order – ideal if you know most orders are sent in the same number of parcels
- One parcel per X item(s) – ideal if you know on average how many items fit in each parcel
- One parcel per X.X kg total order weight – ideal if you sell your product by weight
Once you are happy with your choices, click the ‘Save changes’ button. These settings will apply when you next process an order.
Item Packing
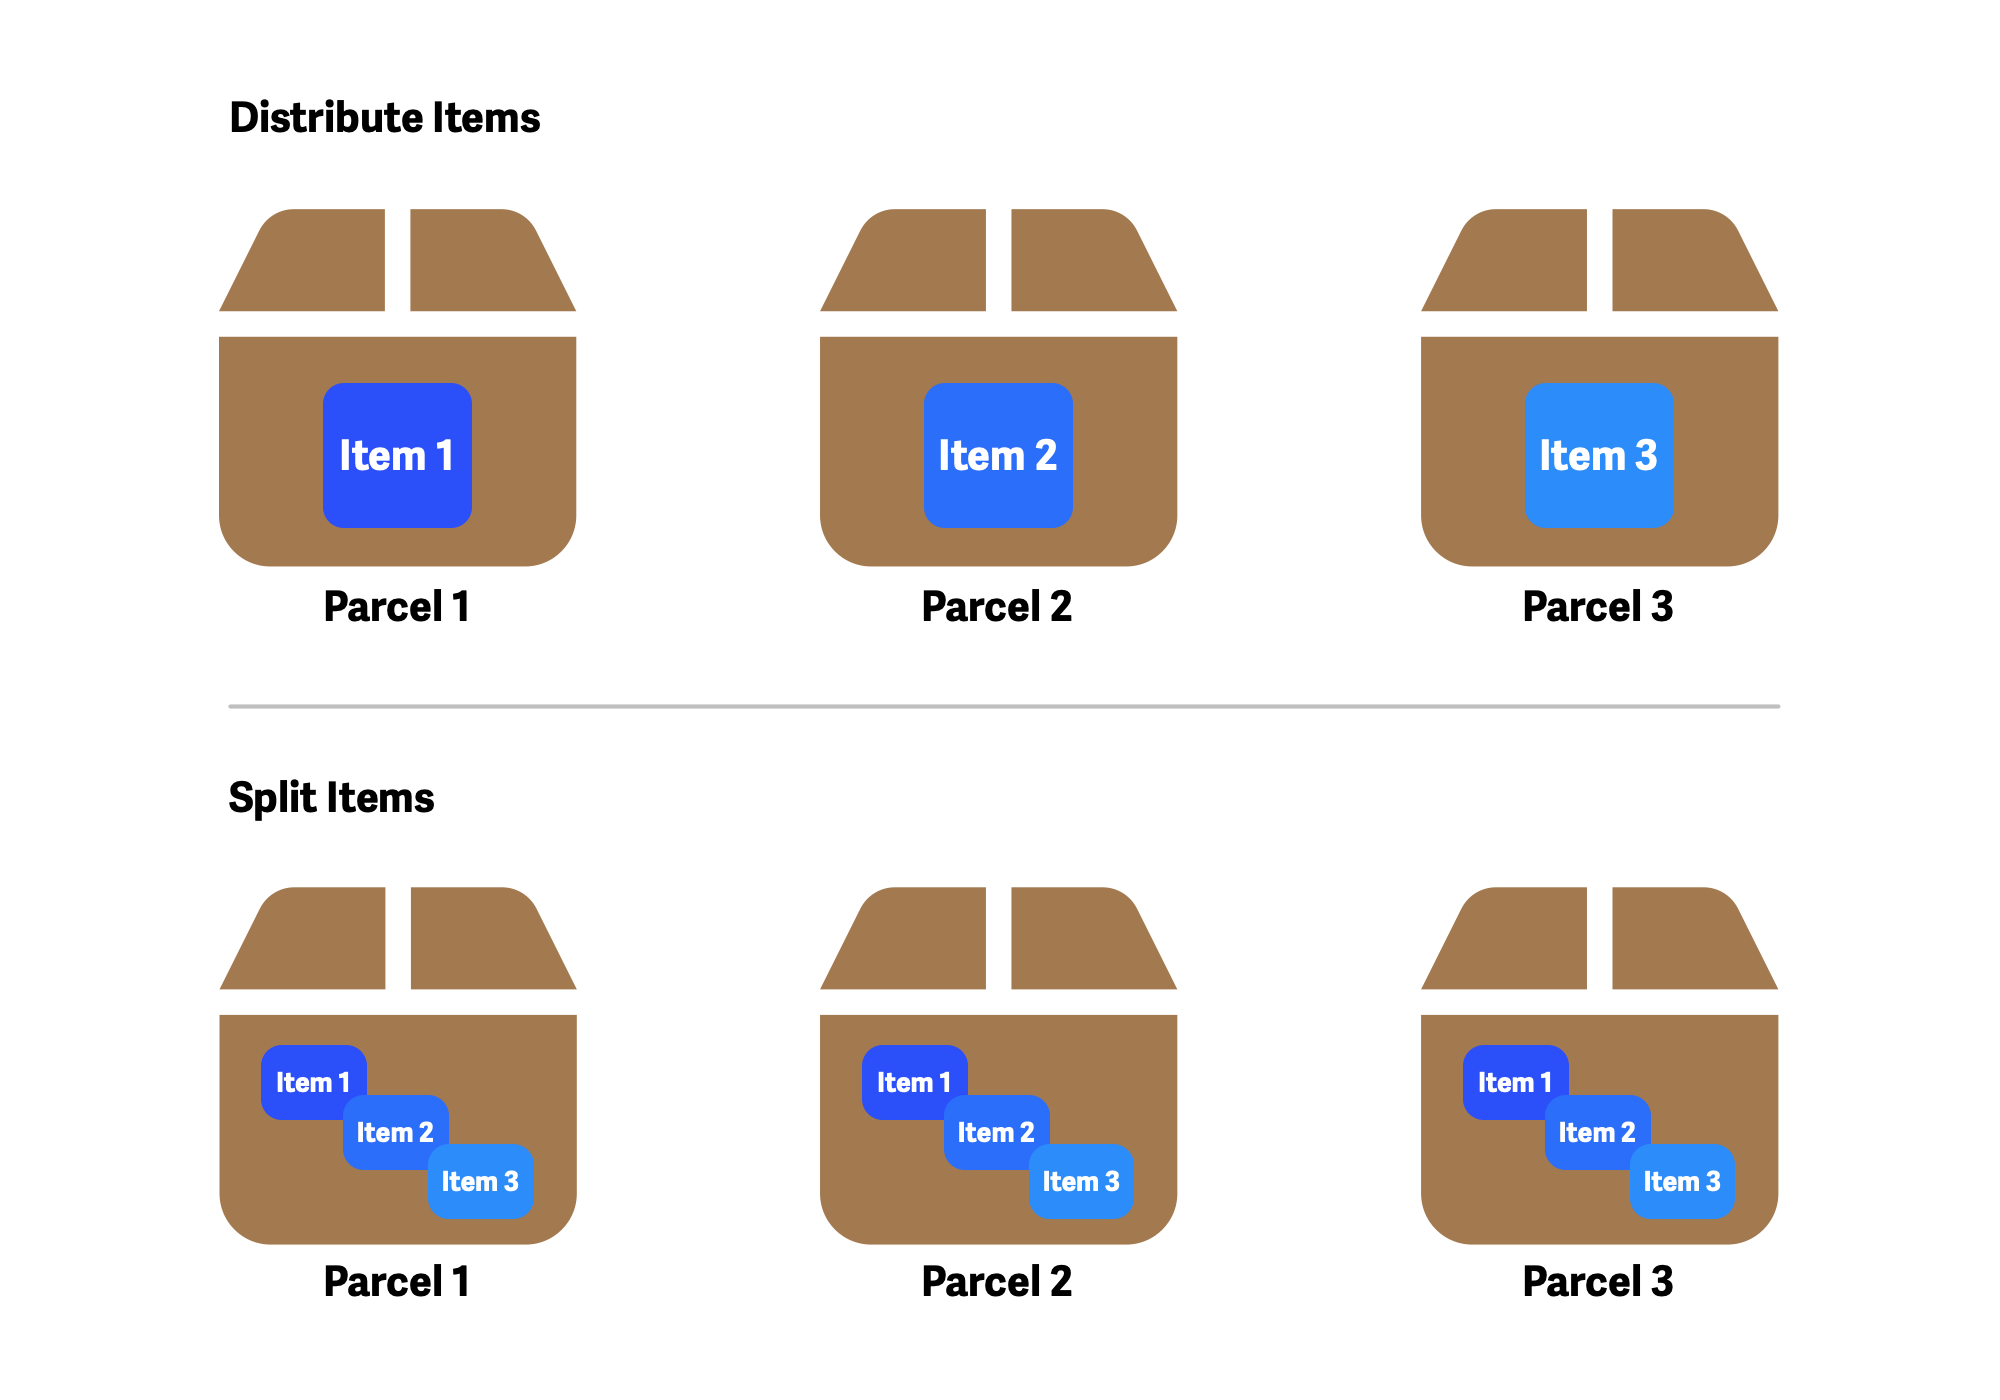
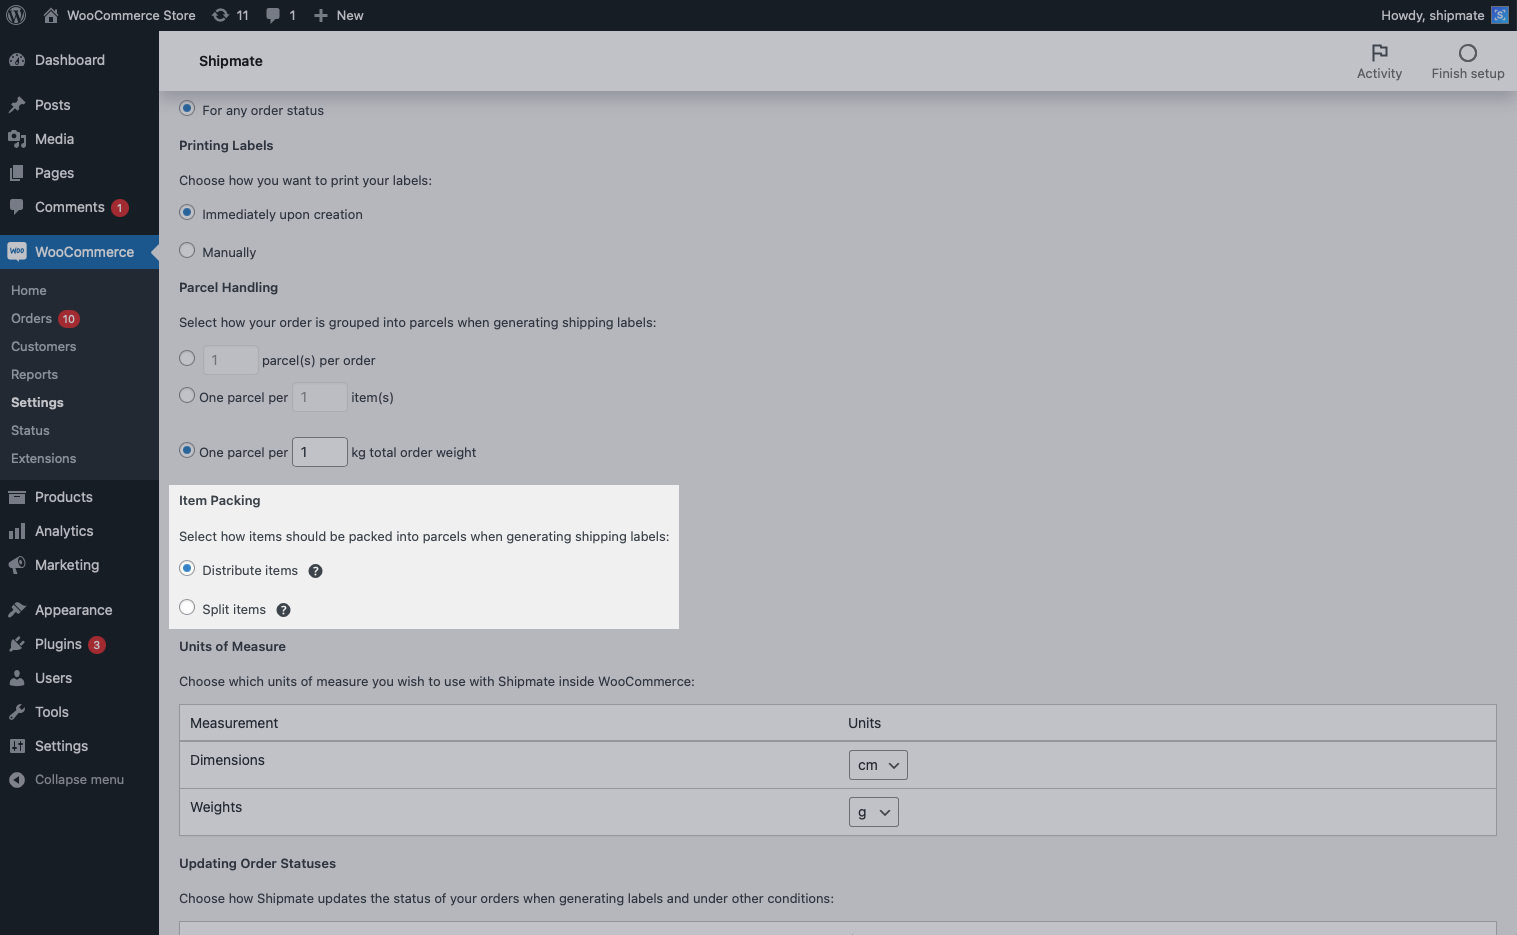
You can configure how the items in your order are packed into parcels automatically.
Simply choose the option that best suits your requirements, from the following options:
- Distribute items – this will place entire items into single parcels according to the selected Parcel Handling option. Ideal for most situations whereby products are shipped as a whole unit.
- Split items – this will place a copy of each item in the order in each parcel, with the value and weight divided by the total number of parcels. Ideal for loose product or when it isn't necessary to state exactly which item is in which parcel.
Once you are happy with your choices, click the ‘Save changes’ button. These settings will apply when you next process an order.

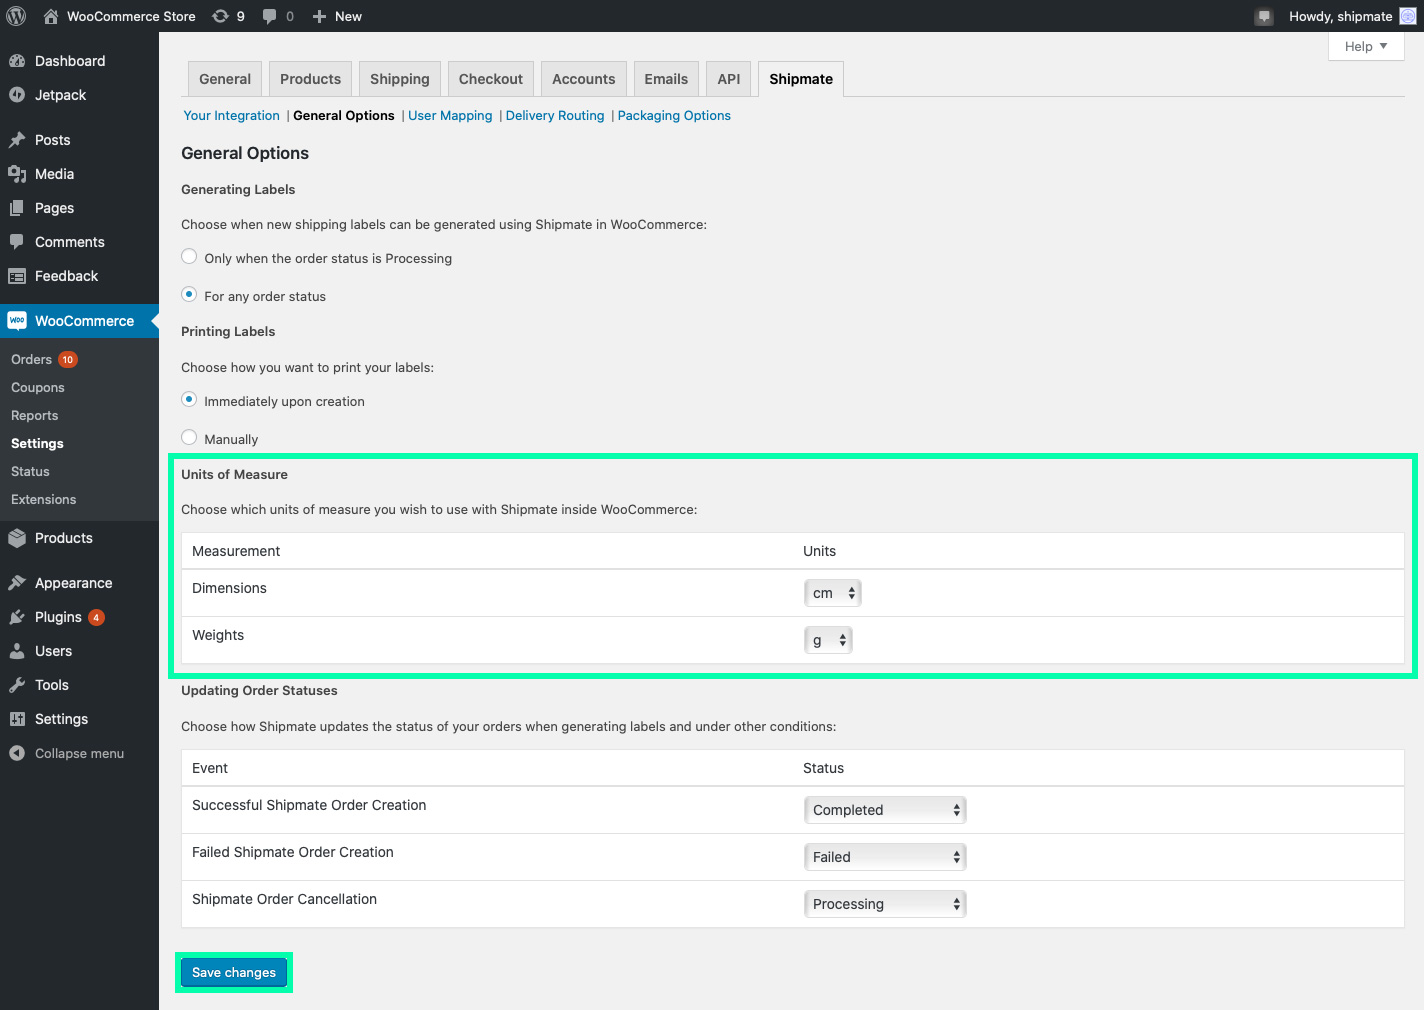
Units of Measure
By default, Shipmate works in centimetres and grams, however we understand this might not match the units of measure you commonly use, or those otherwise stored on your WooCommerce store. You can select from millimetres, centimetres and metres (sorry, no imperial measurements!) for dimensions and grams and kilograms for weights.
Simply choose the units you want to use from the Units of Measure section of the General Options tab inside the Shipmate WooCommerce settings.
Once you are happy with your choices, click the ‘Save changes’ button. These settings will apply when you next process an order.
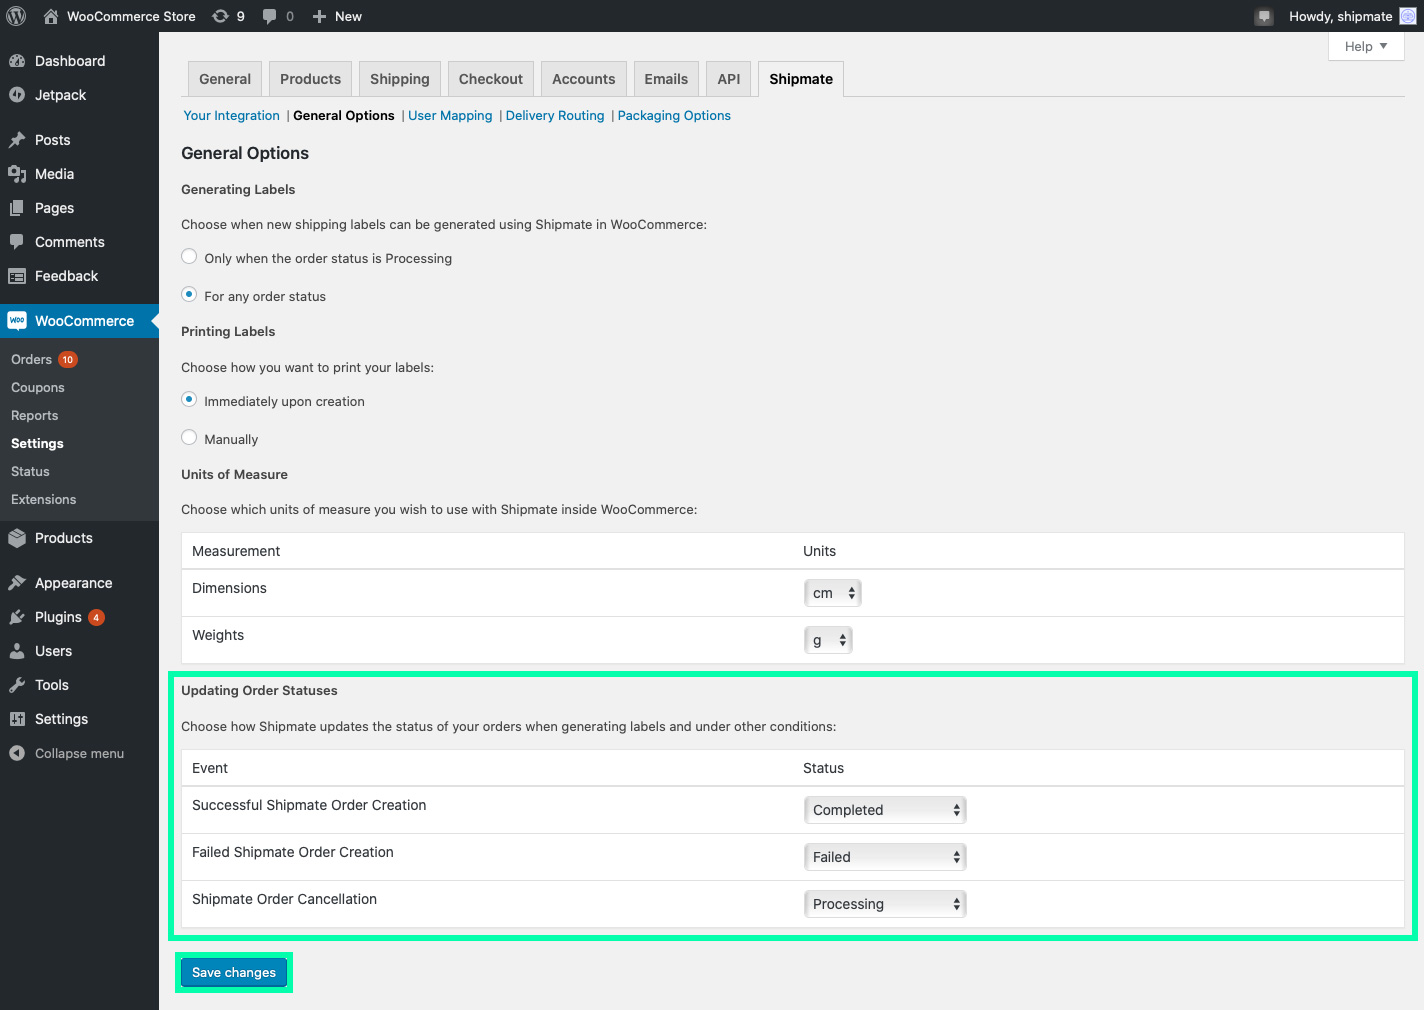
Updating Order Statuses
The Shipmate WooCommerce plugin is able to automatically update the status of your orders when labels are created, cancelled or if there’s a problem with creating shipping labels.
To configure these statuses, simply click the ‘General Options’ tab from within the Shipmate WooCommerce Settings tab. Under the 'Updating Order Statuses' heading you will see the three events you are able to configure - simply drop down the menu and select the status you wish to apply in each situation.
If you don’t want Shipmate to update the order status, leave or set the option to ‘Don’t change status’.
Once you are happy with your choices, click the ‘Save changes’ button. These settings will apply when you next process an order.
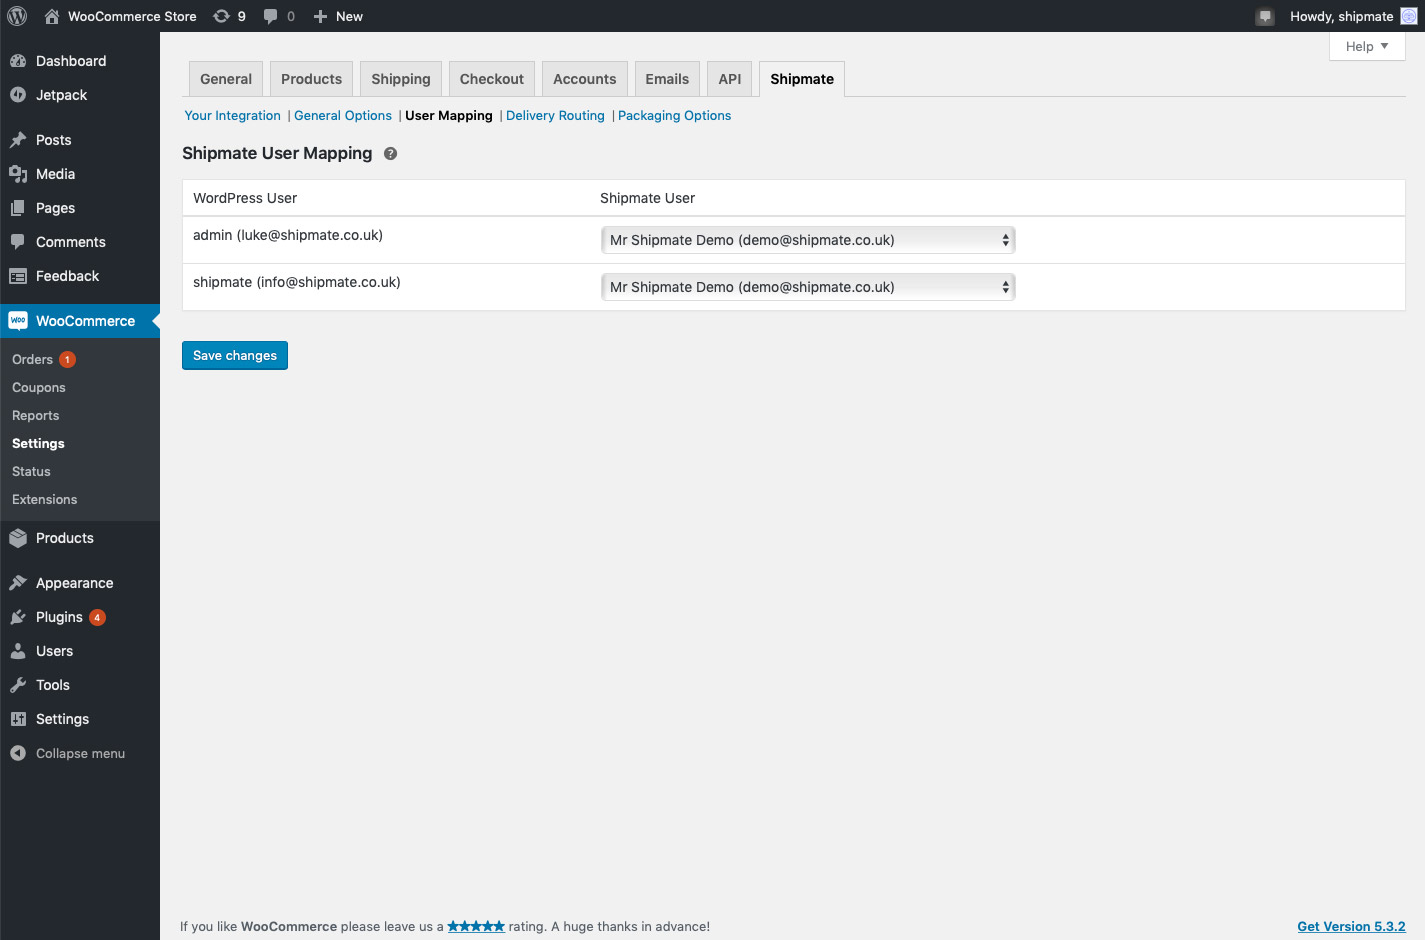
User / Printer Mapping
You can link users on your WooCommerce store to users on your Shipmate account through the User Mapping setting. This means that when your users print labels using the Shipmate Plugin, the labels are sent to their printer, facilitating multi-user shipping label printing.
To configure your user mappings, simply click the ‘User Mapping’ tab from within the Shipmate WooCommerce Settings tab.
On this screen you will see a list of all of your WordPress users, with a drop-down menu next to each of them. Simply select the Shipmate user you wish to assign to each of your WordPress users.
If you don’t want to assign a user to Shipmate, simply leave the Shipmate User drop-down set to ‘Not Assigned’.
Once you are happy with your choices, click the ‘Save changes’ button. These settings will apply when you next process an order.
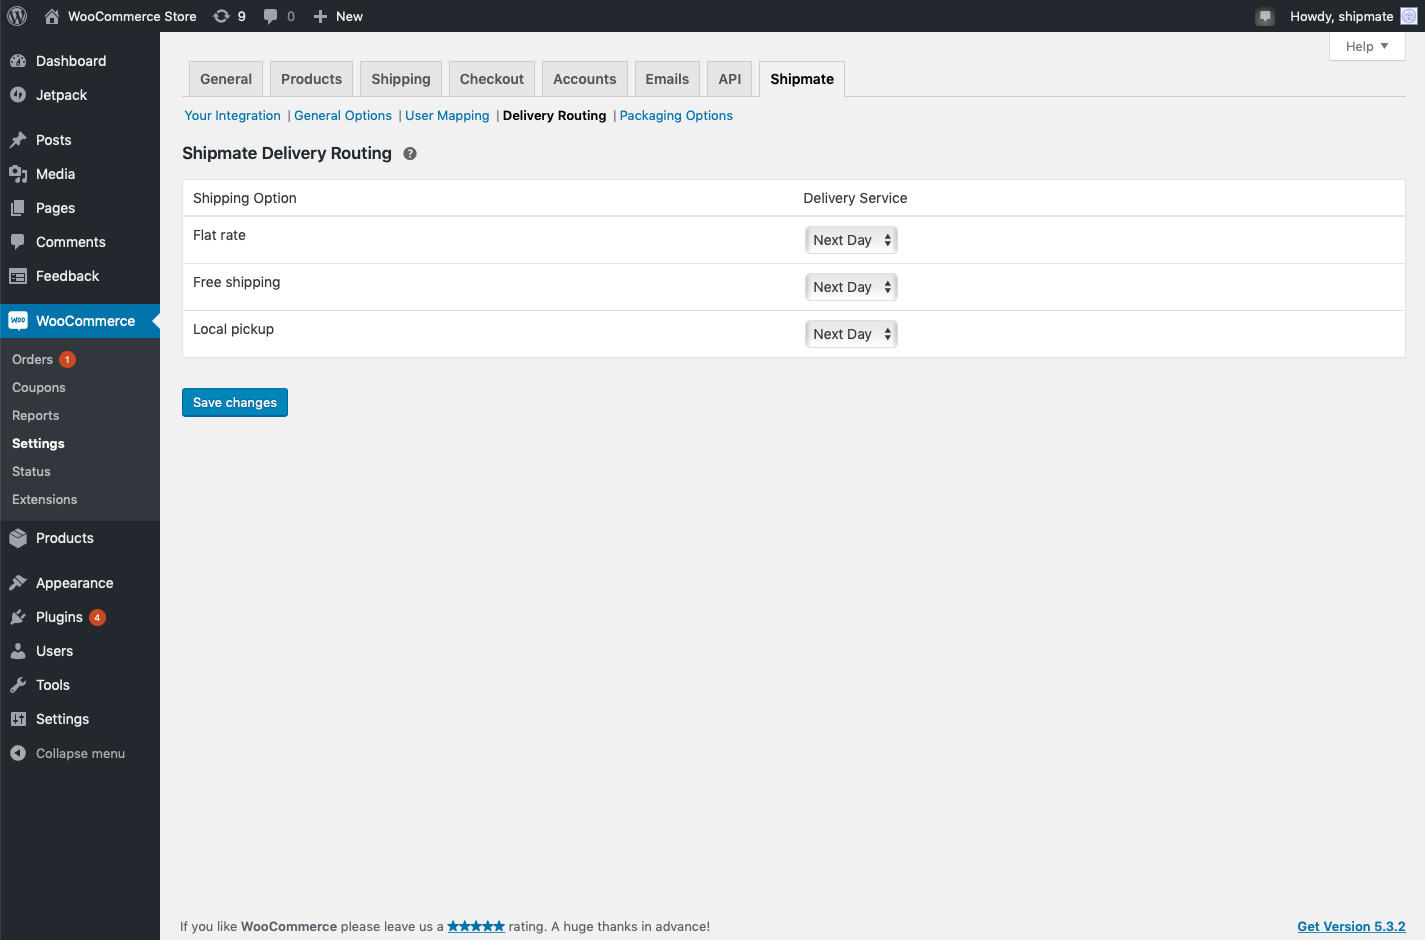
Delivery Routing
You can map Shipping Options within your WooCommerce store to Delivery Services on your Shipmate account through Delivery Routing settings. This means that when your customers select a particular Shipping Option when they place their order, Shipmate will automatically pre-select the equivalent service for you when creating your shipping labels.
To configure your Delivery Service Mappings, simply click the ‘Delivery Routing’ tab from within the Shipmate WooCommerce Settings tab.
On this screen you will see a list of all of your WooCommerce Shipping Options, with a drop-down menu next to each of them. Simply select the corresponding Shipmate Delivery Service you wish to assign to each of your Shipping Options.
If you don’t want to assign a Shipping Option to a particular Delivery Service, simply leave the Delivery Service drop-down set to ‘Any’.
Once you are happy with your choices, click the ‘Save changes’ button. These settings will apply when you next process an order.
Packaging Options
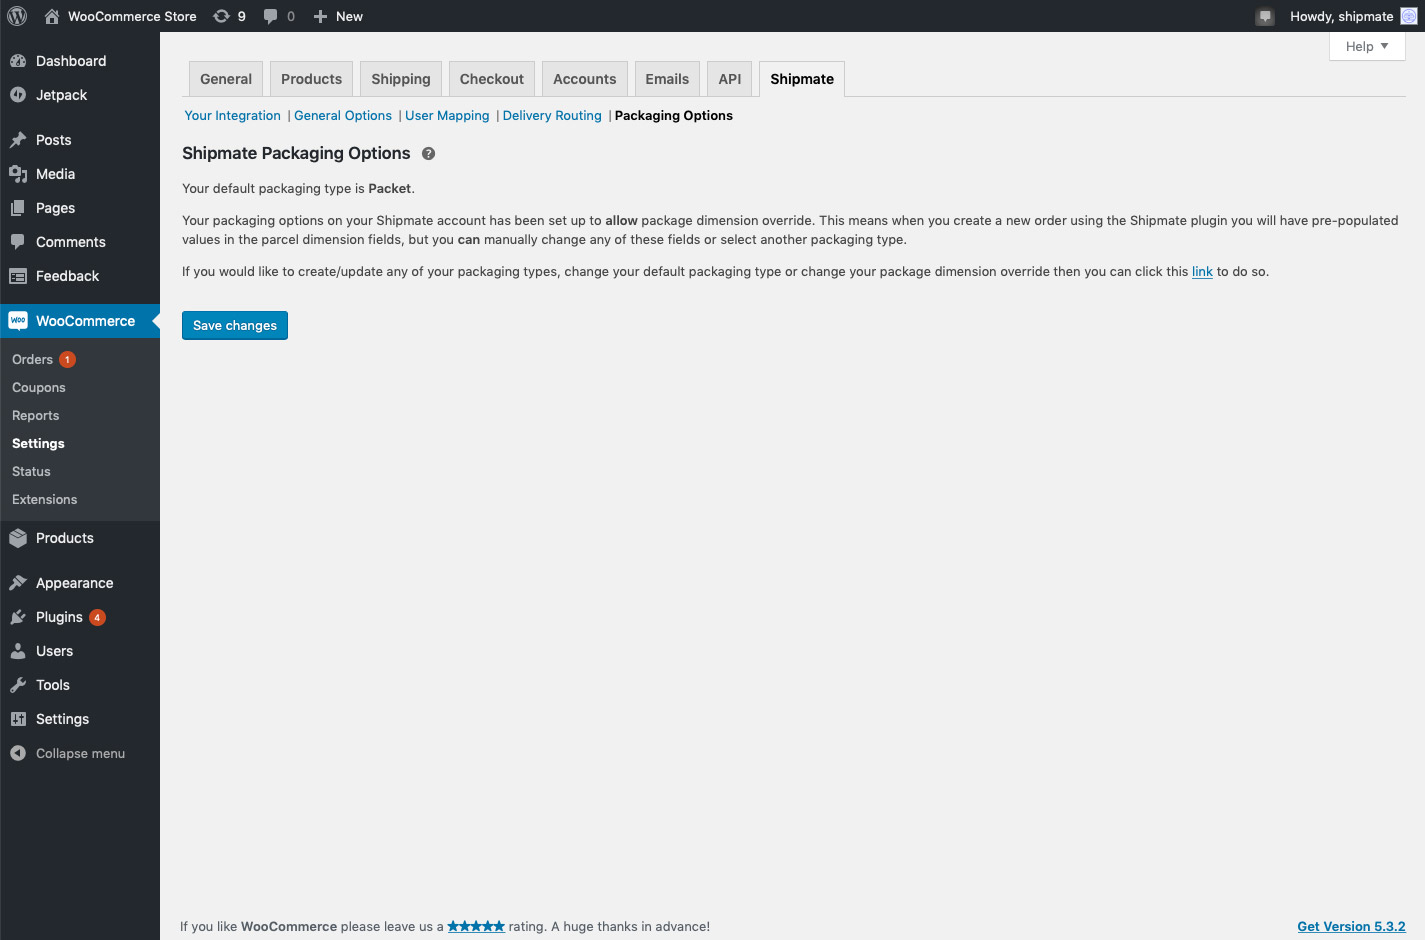
The Shipmate WooCommerce plugin will automatically pull through all of your Packaging Options configured on Shipmate for selecting whenever creating your parcels.
It is also possible to configure a default Packaging Option that is automatically applied to all parcels, which is especially handy when you standardise on only a few packaging types.
To view the current default Packaging Option, simply click the ‘Packaging Options’ tab from within the Shipmate WooCommerce Settings tab.
This screen shows you the current configuration with a handy link to the relevant settings on your Shipmate account. Any changes made on your Shipmate account will be automatically reflected when processing new orders in WooCommerce.
International Shipments
The Shipmate WooCommerce plugin adds six additional custom fields to the Shipping section of each of your WooCommerce products - enabling you to provide the necessary customs declaration details for your shipments. The six fields are:
- Shipmate HS Code - this is the Harmonised Code or Tariff Code
- Shipmate Product Short Description
- Shipmate Product Full Description
- Shipmate Item Value (£)
- Shipmate Item Quantity
- Shipmate Country of Origin
To edit these values, simply navigate to the WooCommerce Products page, then click Edit for the product you wish to update. These additional fields can be found inside the Shipping section of the Product Data area.
These attributes must be present in order to send your products outside of mainland UK.
You can find out more information about Tariff Codes on the UK Government website - GOV.UK.
If you need to update many products at the same time, you may wish to explore using a CSV uploader rather than editing each individual product. Ask your web developer for further details.
Disconnecting Shipmate
If you no longer wish to associate your WooCommerce store with your Shipmate account, simply click the ‘Your Integration’ tab from within the Shipmate WooCommerce Settings tab, then click the ‘Disconnect from Shipmate’ button.
This will close the connection between your WooCommerce store and Shipmate account. This does not affect any other settings on your Shipmate account.
Setup - Shipmate
Channel Settings
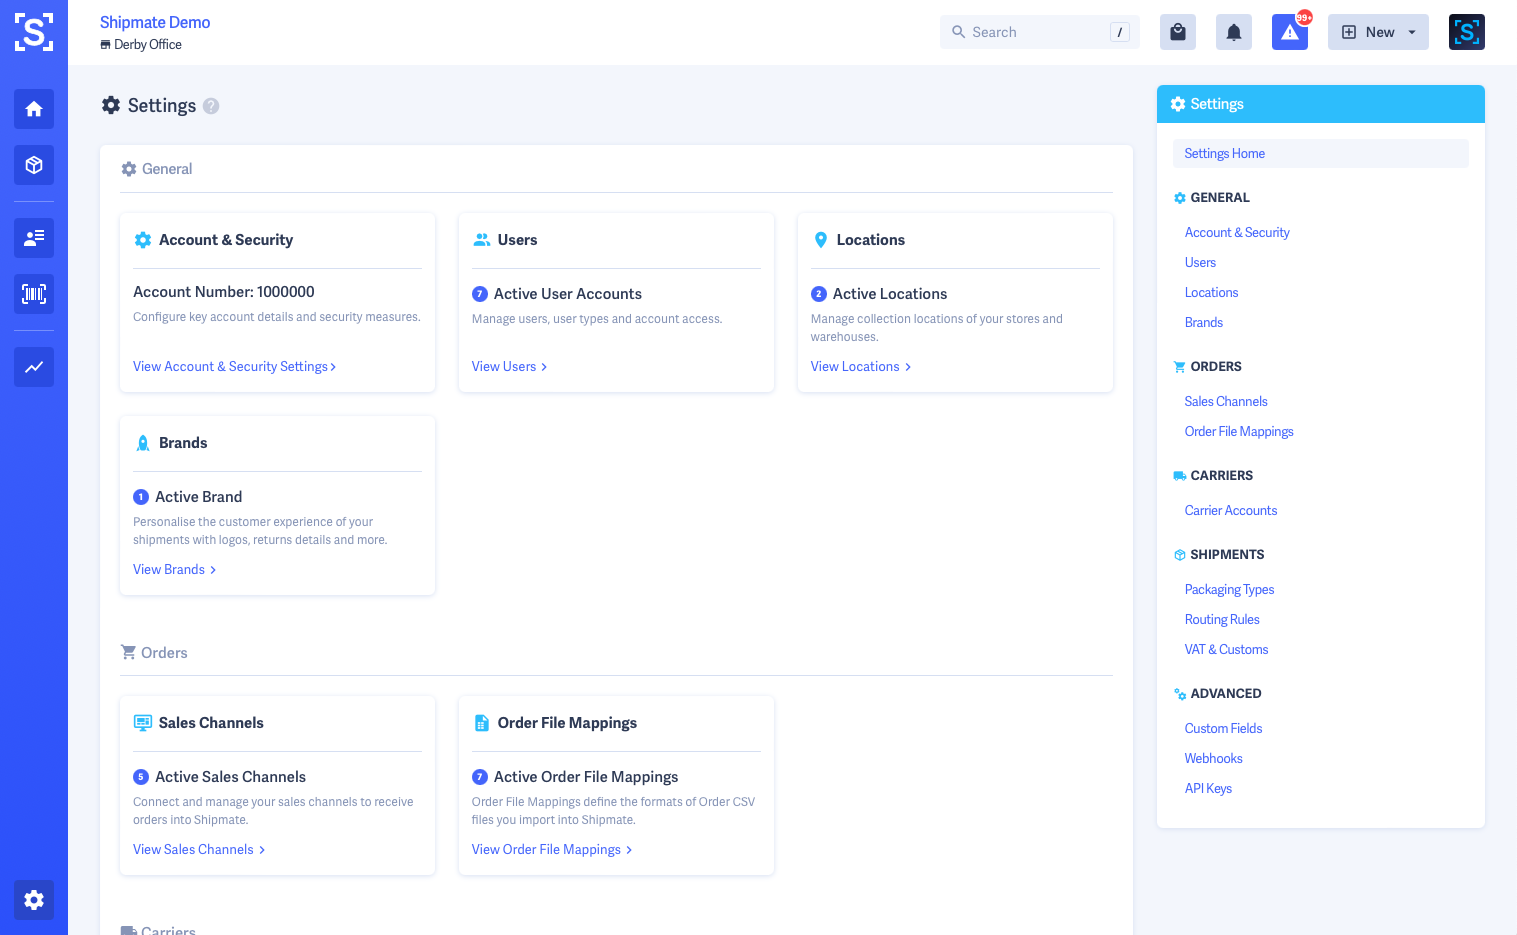
To amend your WooCommerce Channel settings inside Shipmate, you need to be logged in as an administrative user on your account, then simply navigate to your profile menu then click Settings.
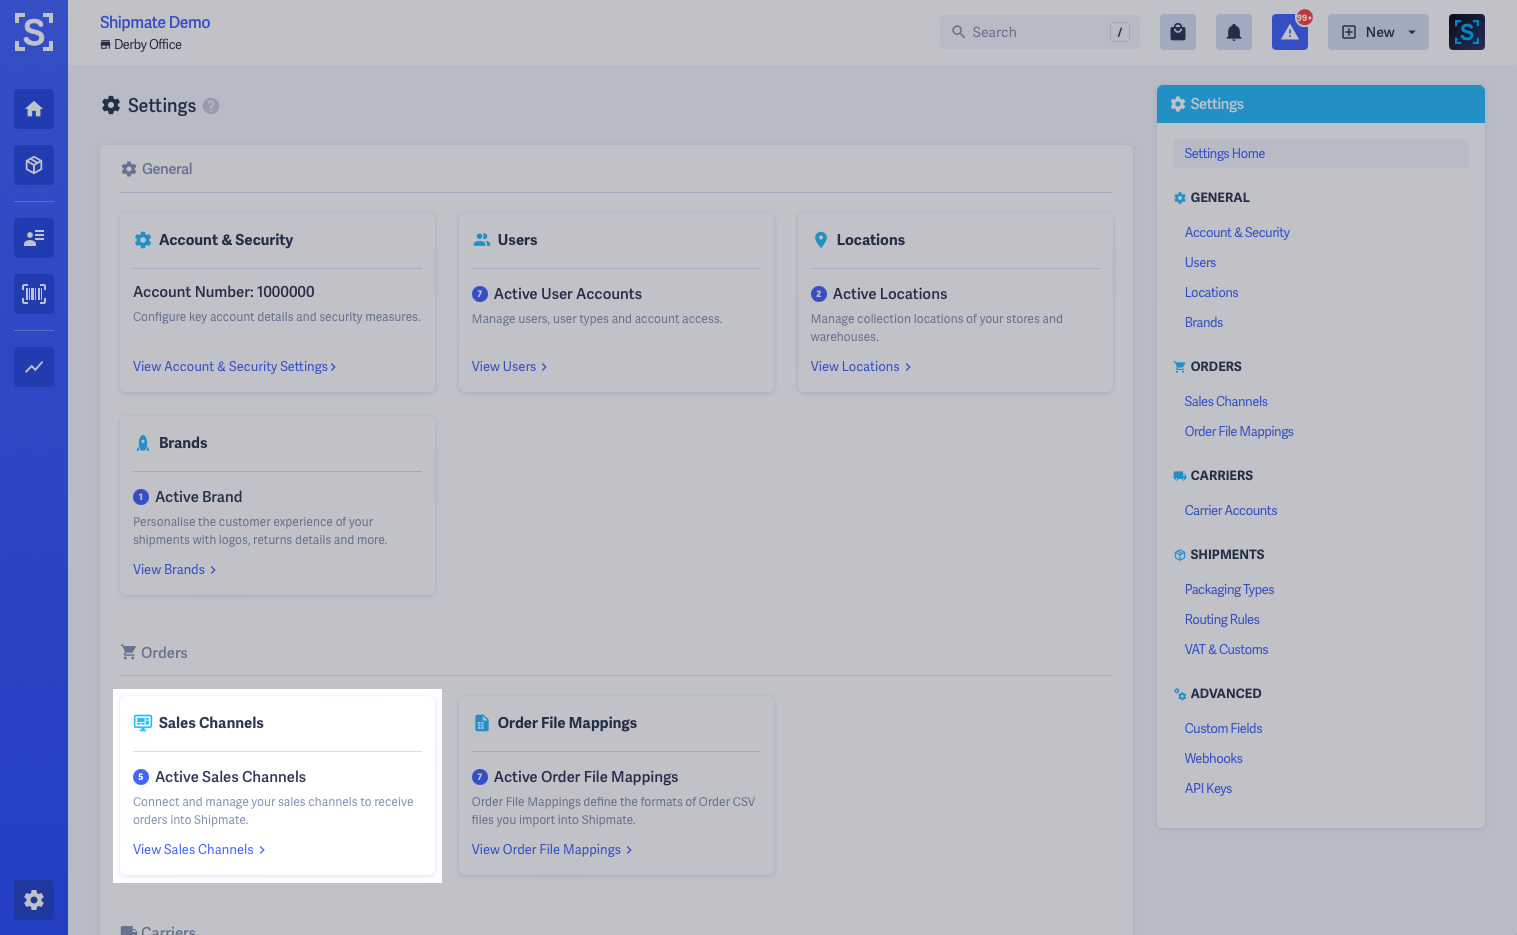
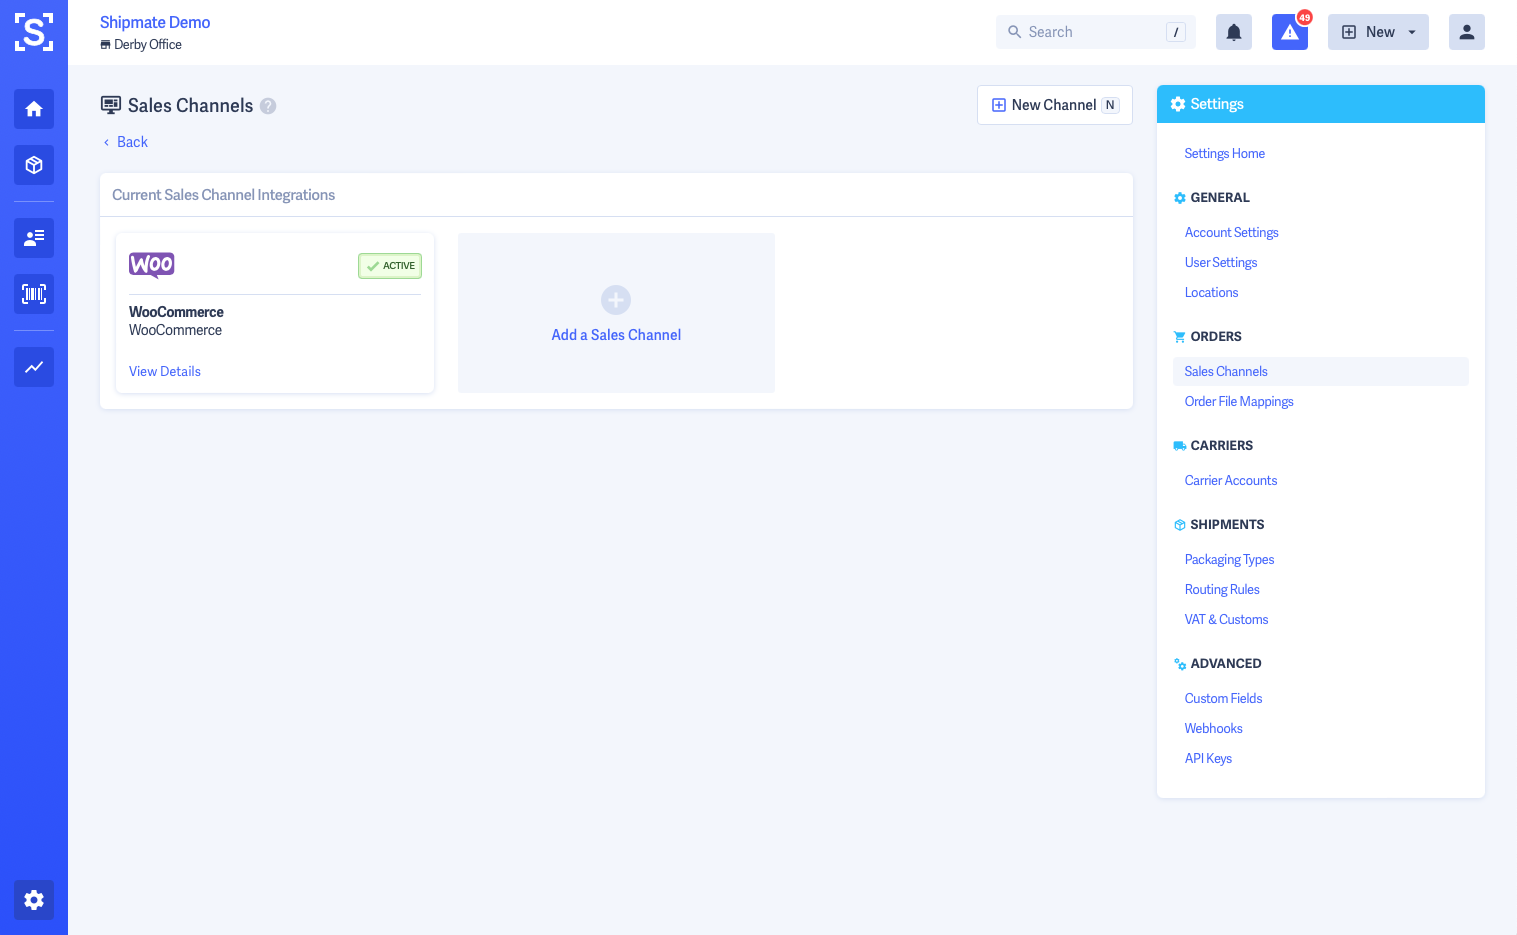
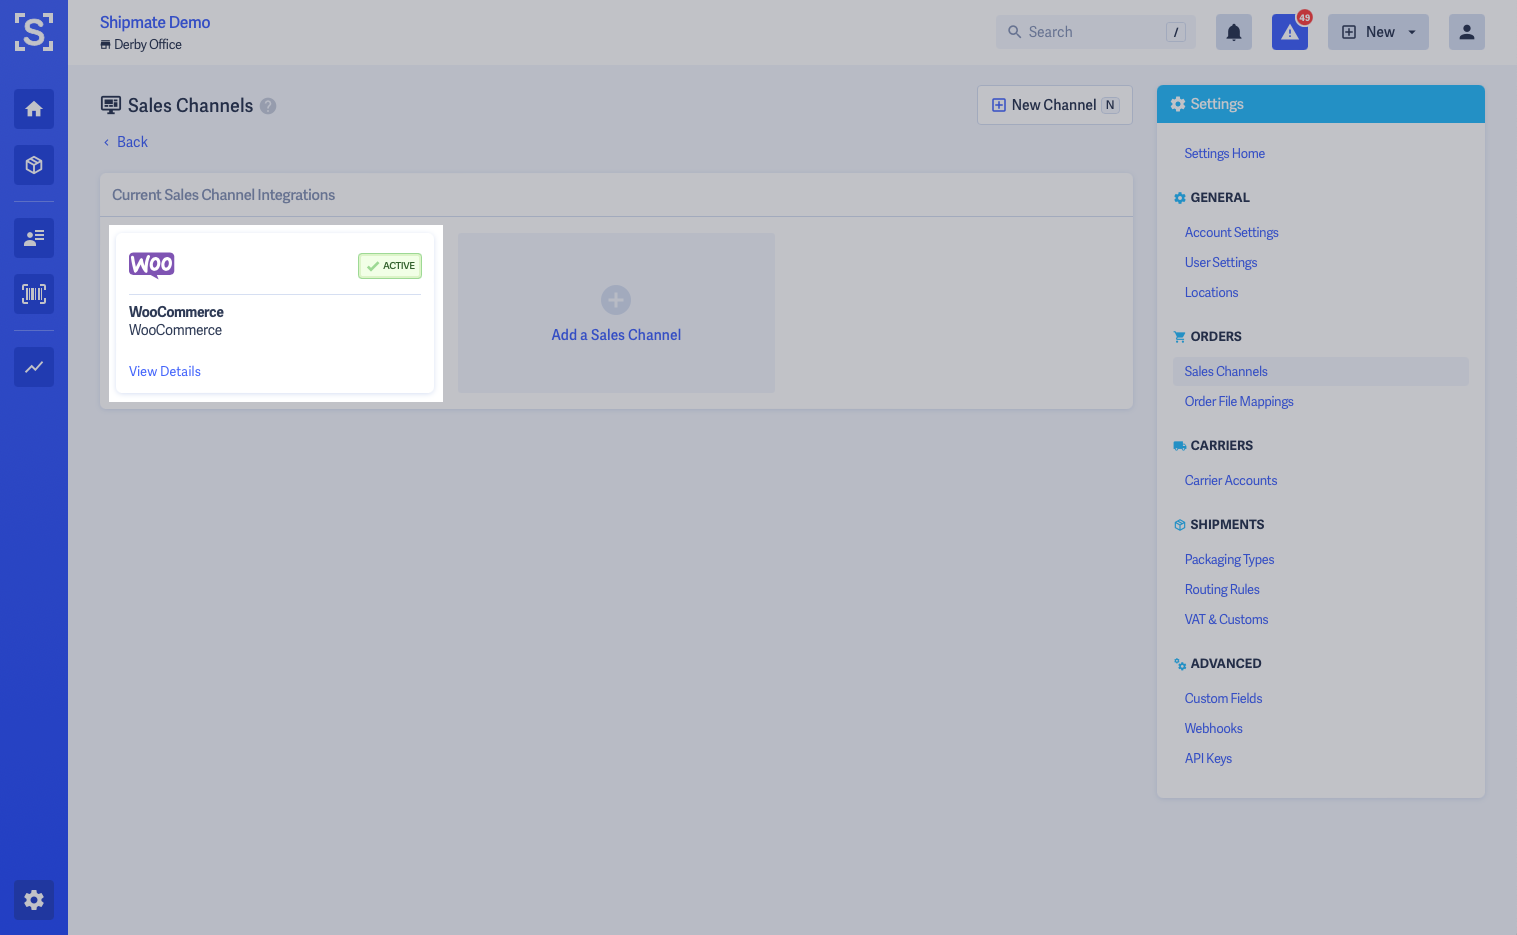
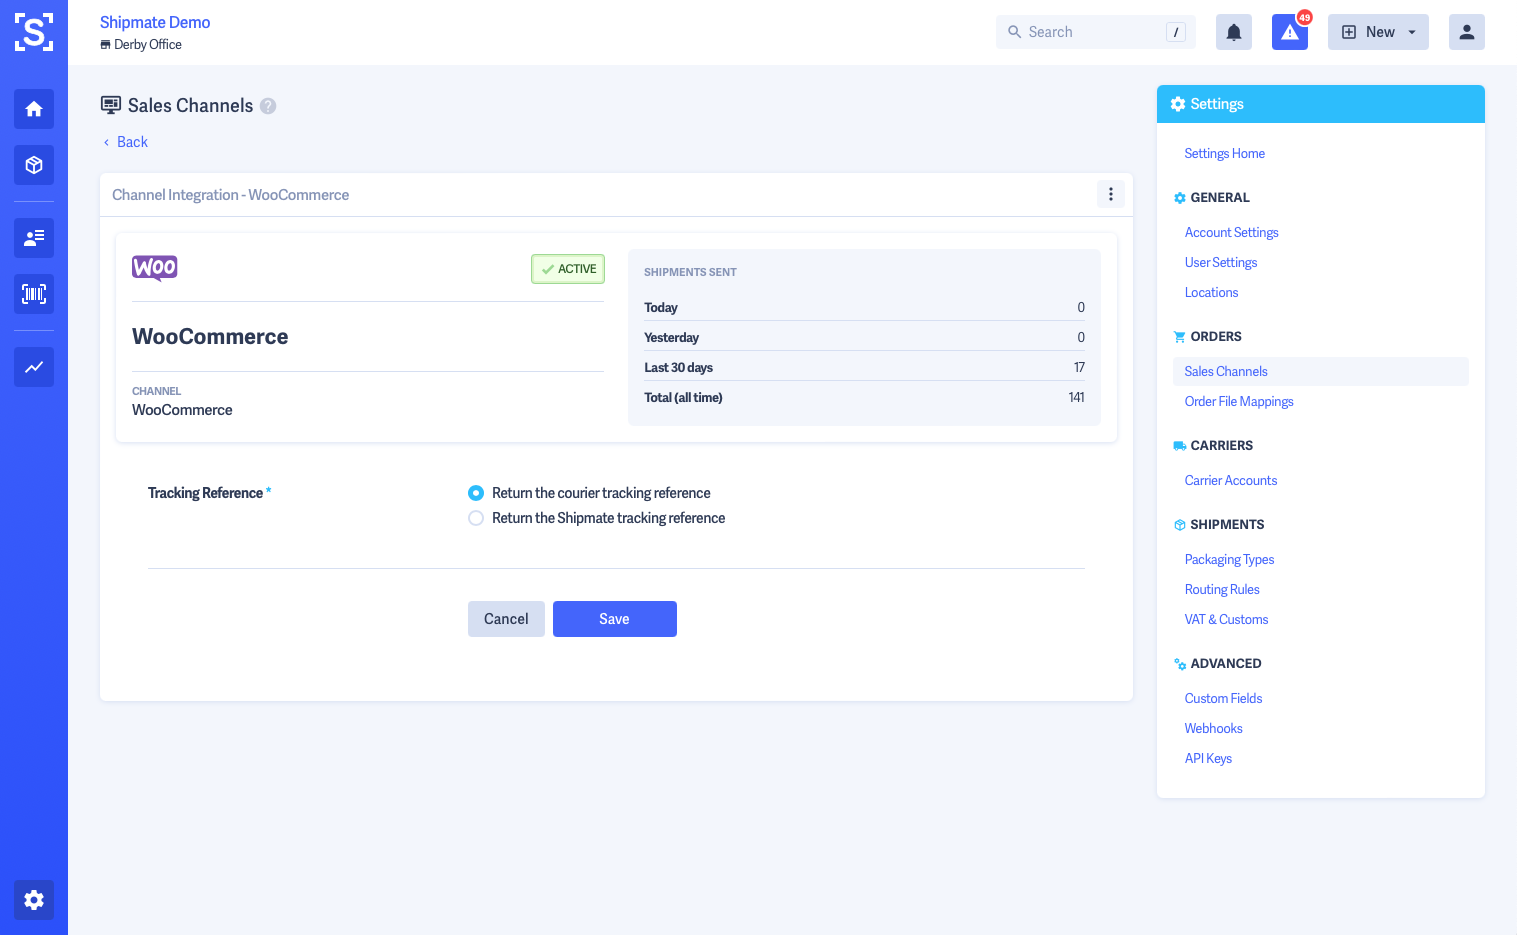
From the Settings menu select Sales Channels. This will open a page listing all of the available channels on your account. Simply click the WooCommerce channel you wish to amend. This will open the WooCommerce Channel Settings page.
Tracking References
Shipmate is able to return either the carrier’s tracking reference, or the Shipmate Unified Tracking Reference, which you can use to notify your customers so they are able to track the progress of their orders.
If you opt for the Carrier’s tracking reference, customers will have the direct tracking reference for the carrier however if you subsequently make any changes to their delivery, they might not be informed automatically.
If you use the Shipmate Tracking Portal, it’s most likely that you should opt for the Shipmate Unified Tracking Reference, as this will provide you with the Unified Tracking Reference needed to link to the Tracking Portal.
To choose which tracking reference you’d like to use with WooCommerce, simply select the relevant option from the Tracking Reference section of the Channel Settings, then click ‘Save’.

Shipmate Desktop App
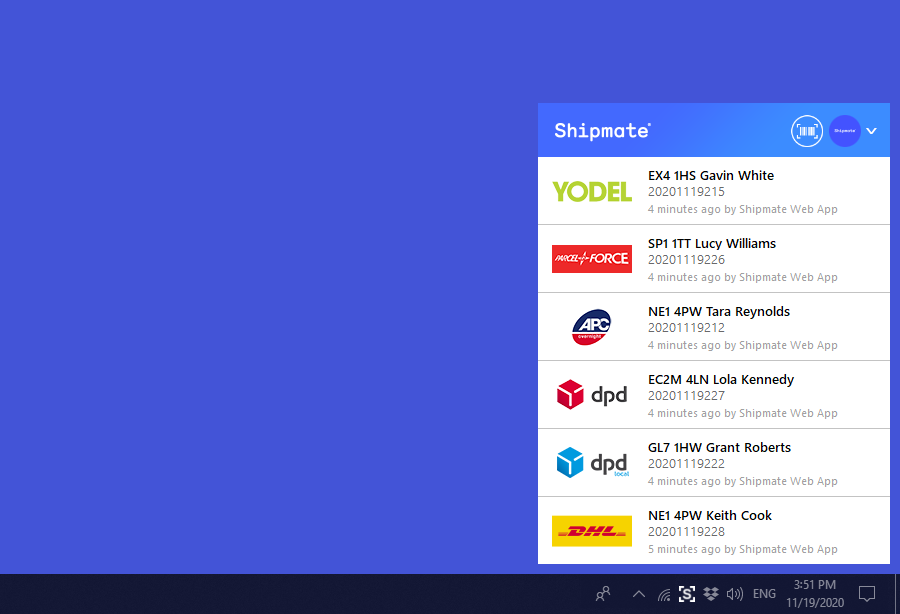
In order to print shipping labels directly using Shipmate with WooCommerce, you must download the Shipmate Desktop App and configure the app to use your label printer.
You can find out more about installing and configuring the Shipmate Desktop App for Windows or macOS in these user guides.
Disconnecting your Store
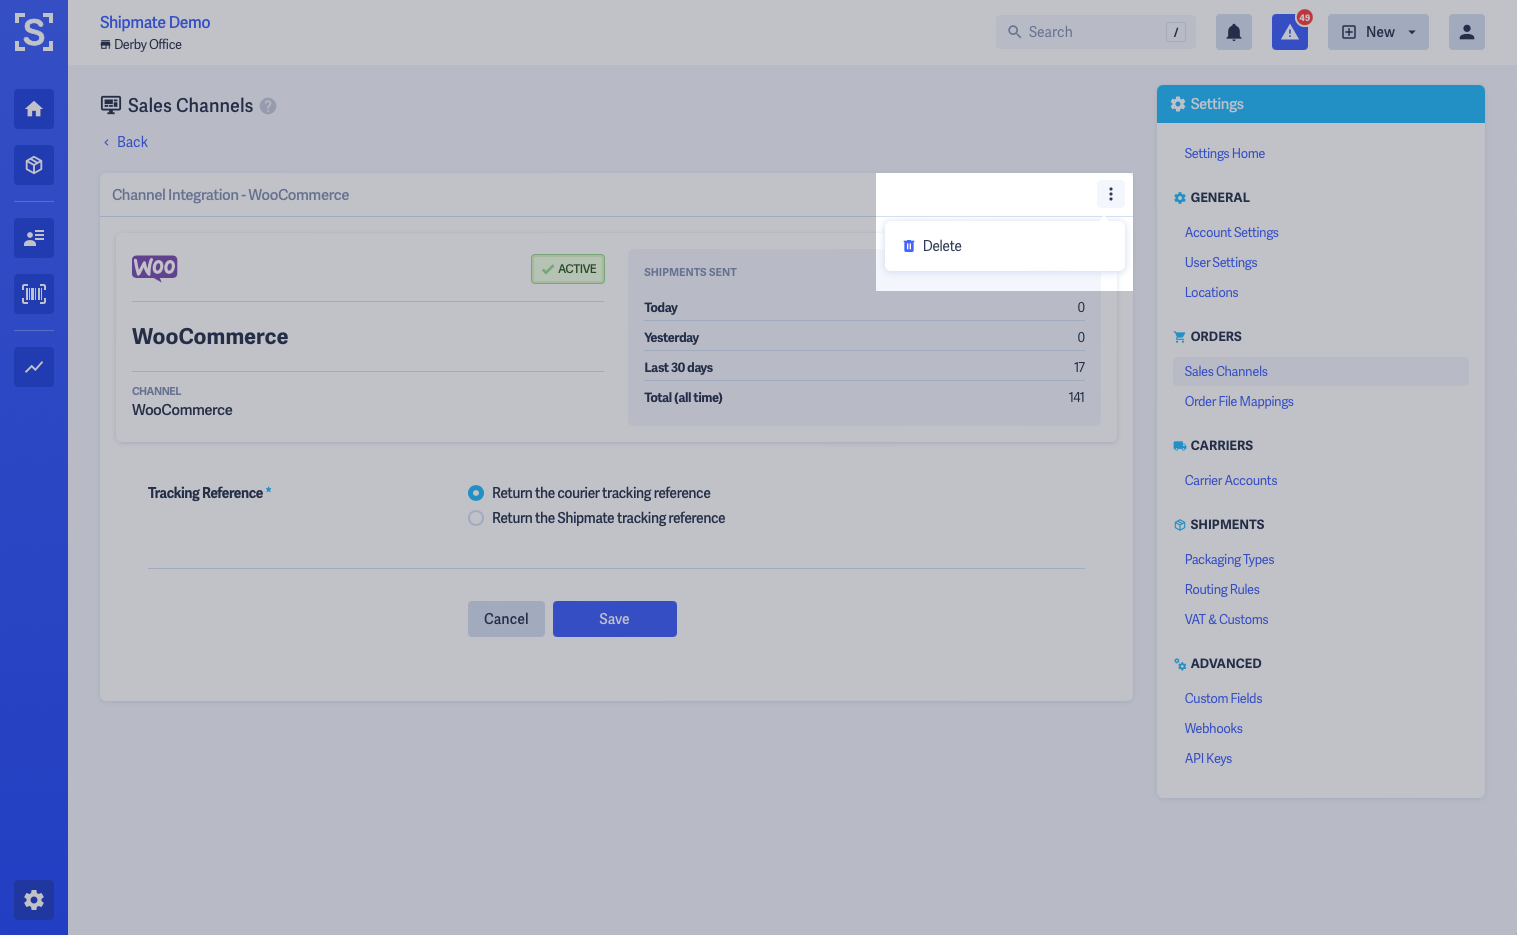
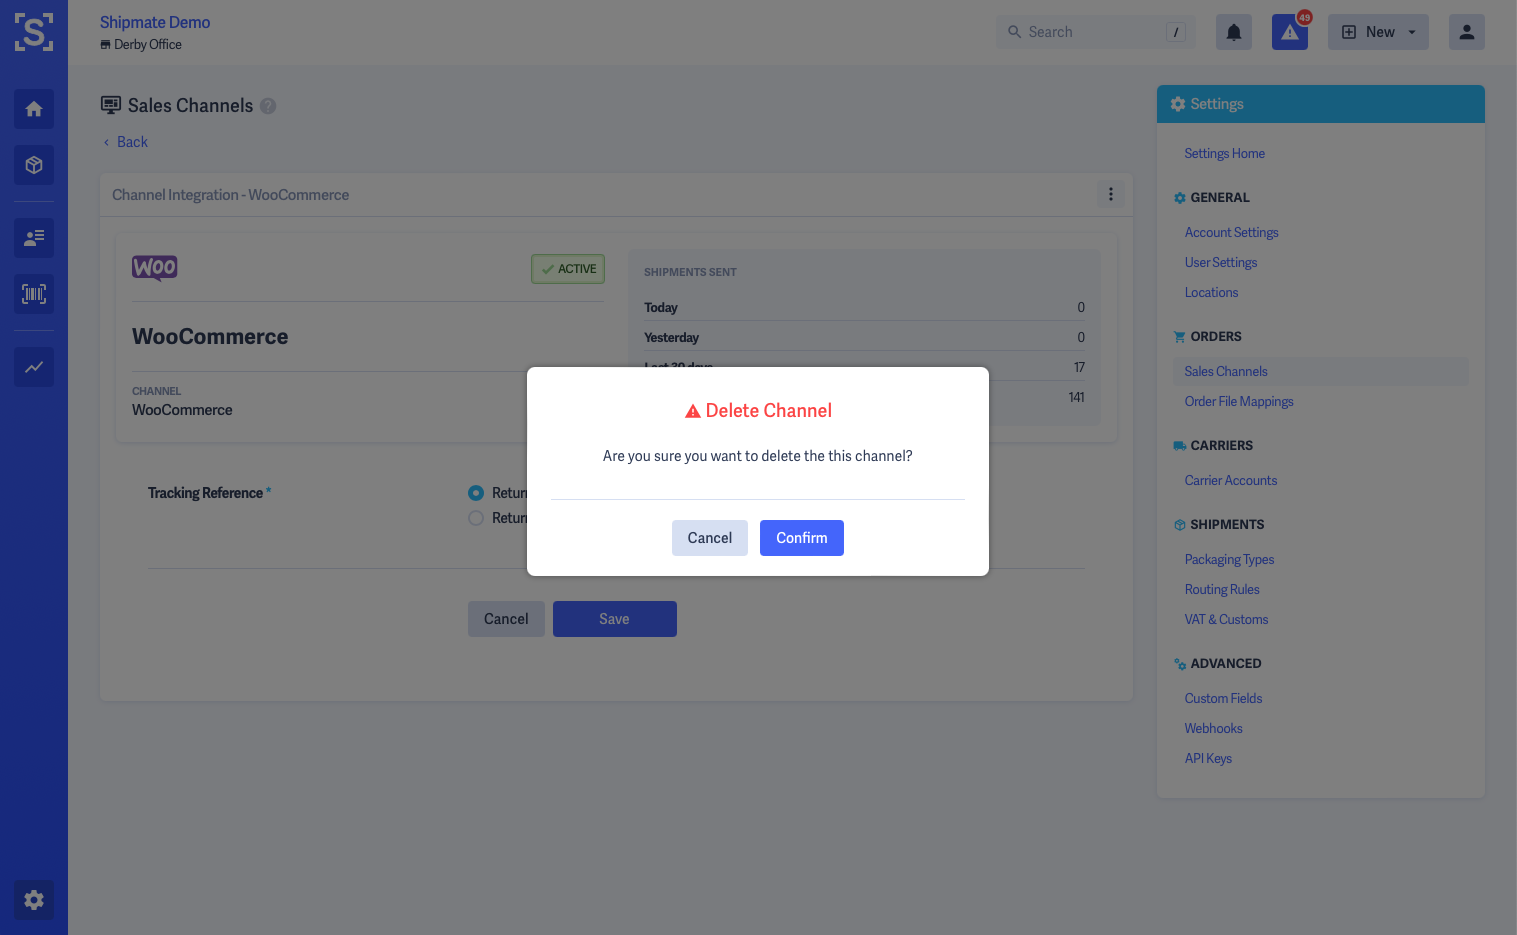
If you no longer wish to associate your Shipmate account with your WooCommerce store, simply click the ‘Delete’ button on the WooCommerce Channel Settings page.
This will close the connection between your Shipmate account and WooCommerce store. This does not affect any other settings on either your Shipmate account or WooCommerce store.

In Use
Shipping an Order
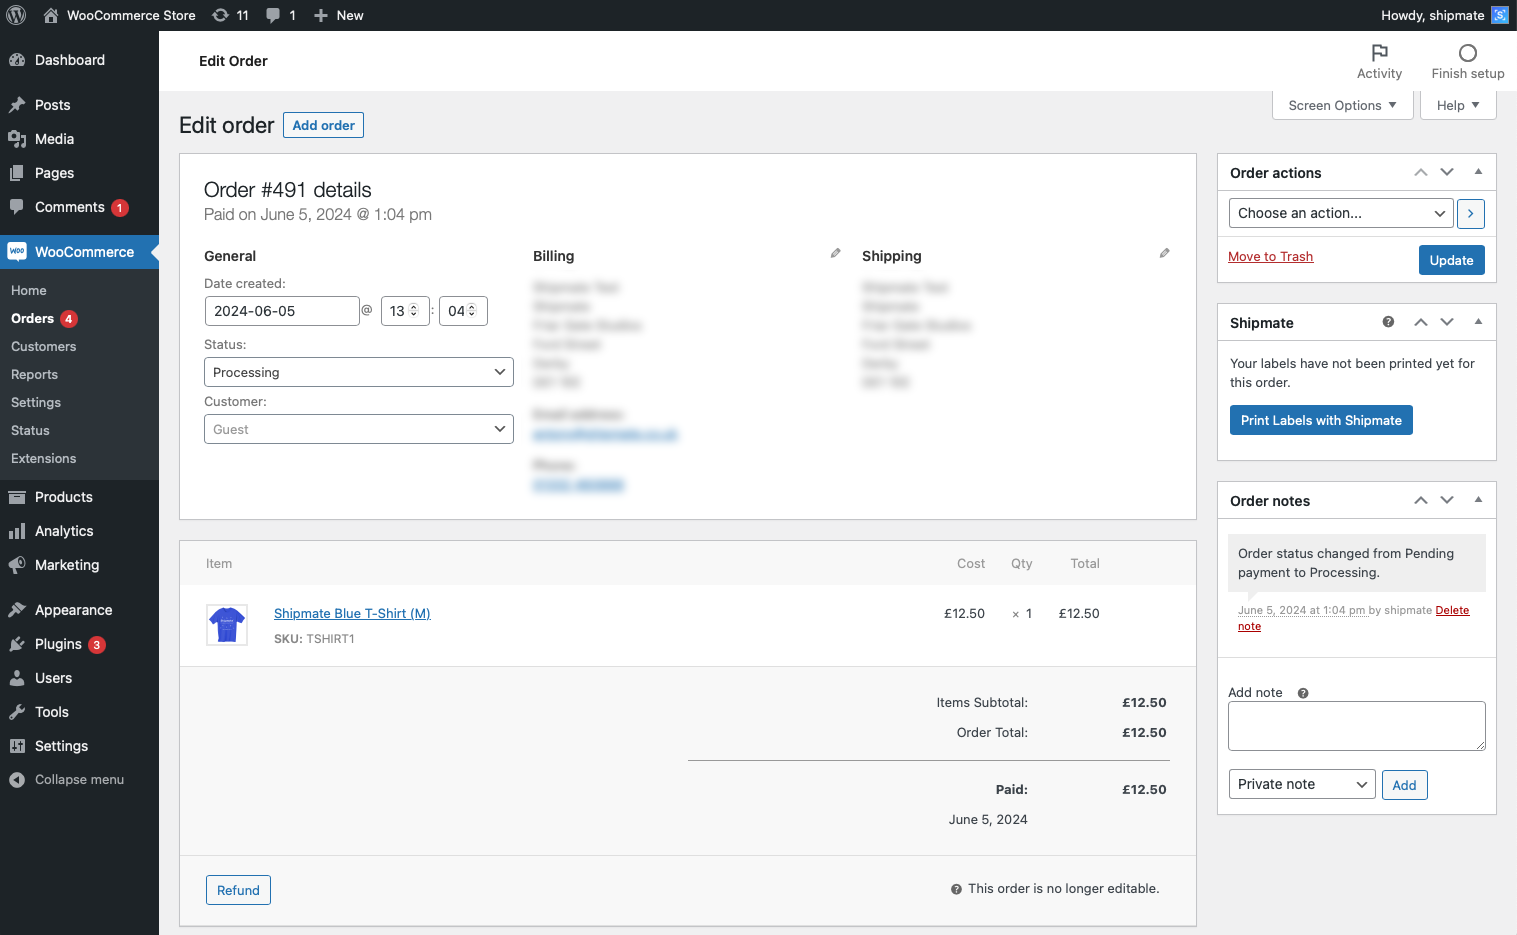
To ship an individual order, first head to the individual Order screen inside WooCommerce admin.
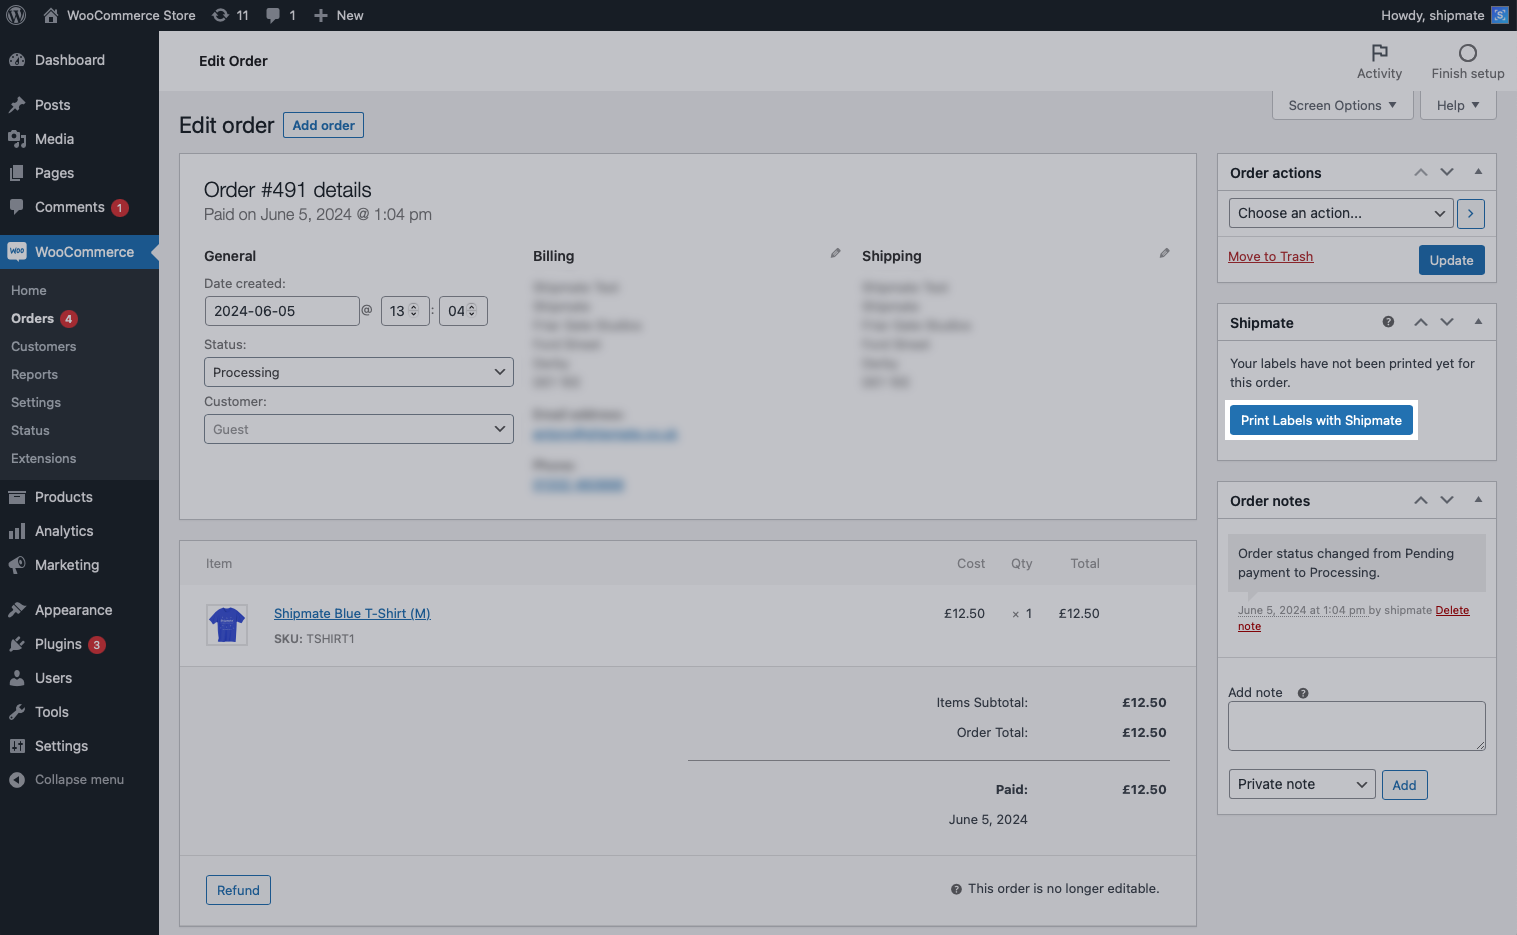
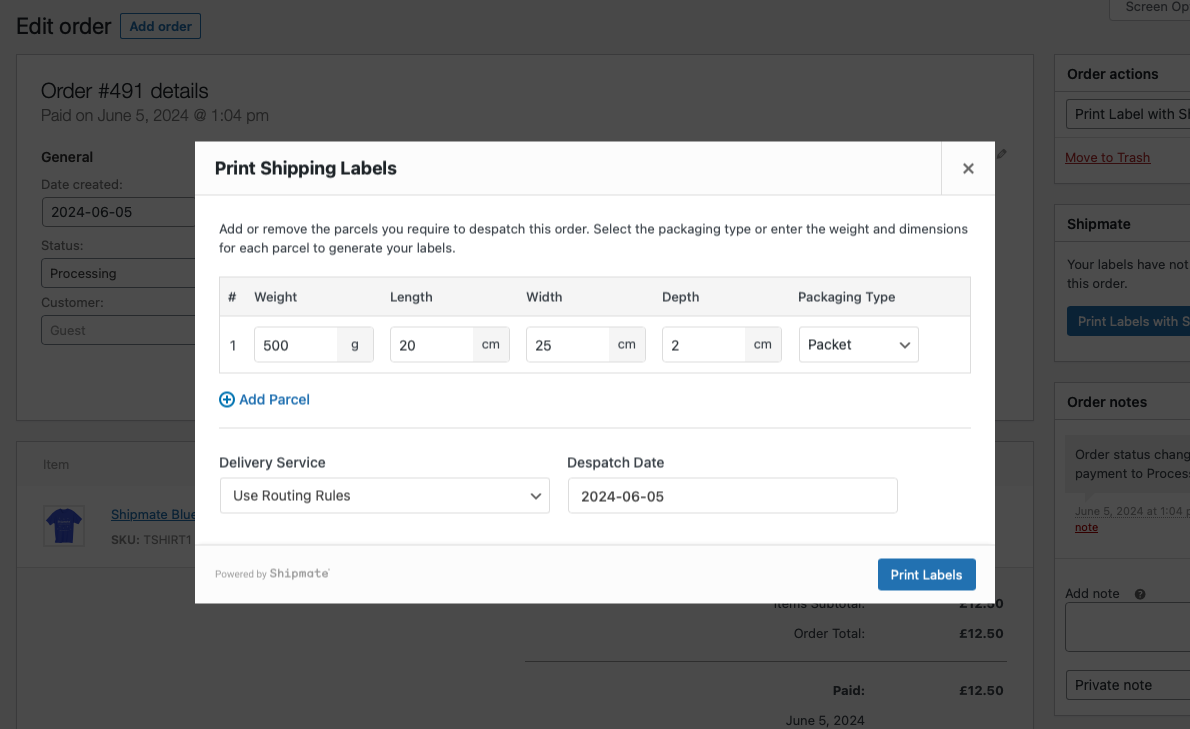
Click the 'Print Labels with Shipmate' button to open the Print Shipping Labels dialogue box.
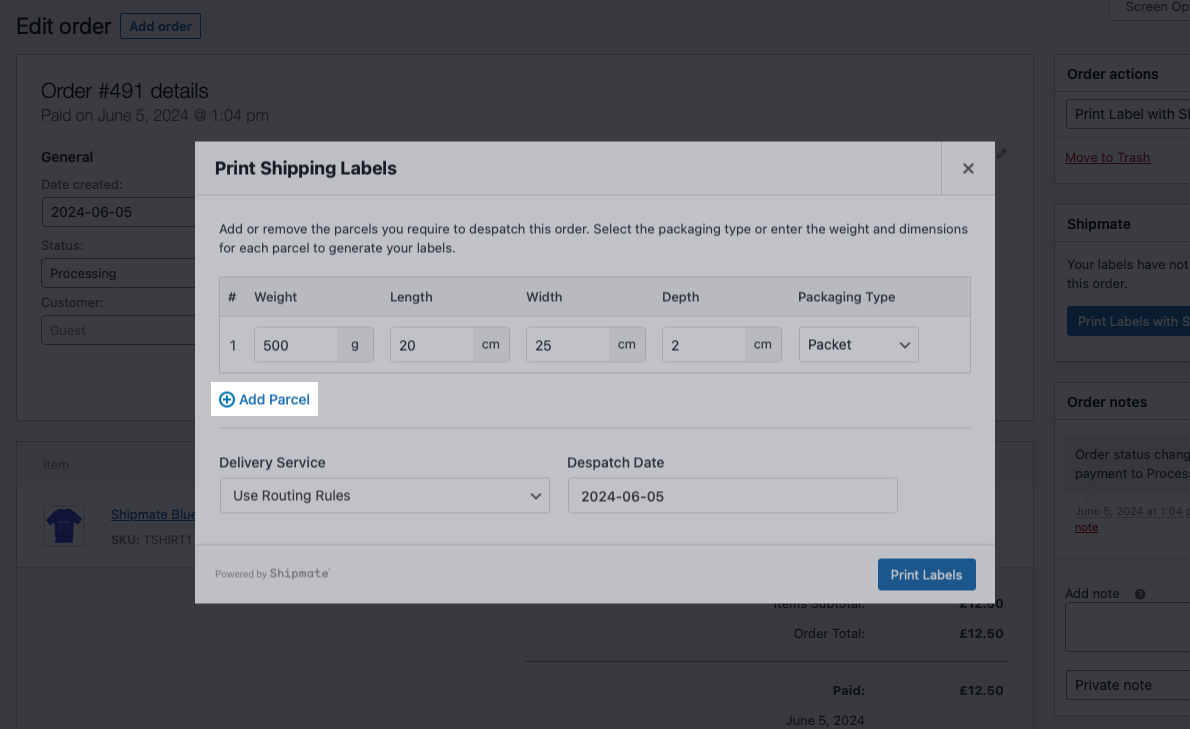
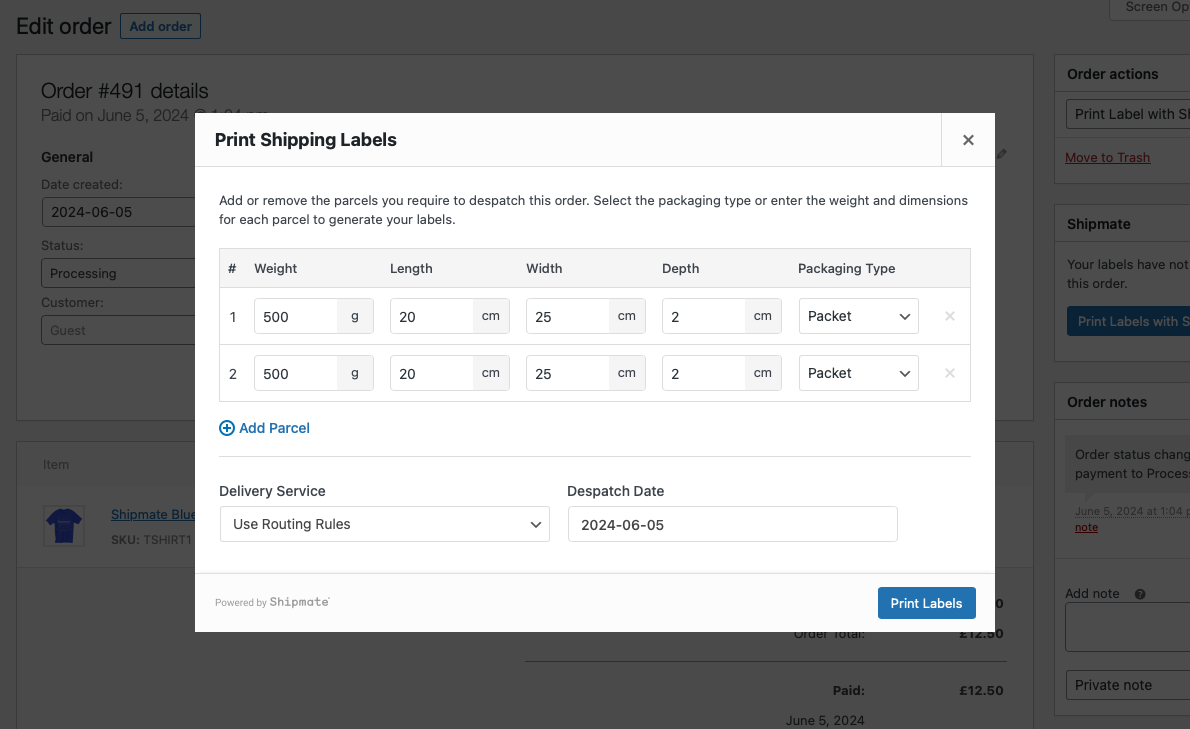
Here you can add as many parcels as you like to fulfil your order. If you have configured a default Packaging Type, the weight and dimensions will have already been pre-populated with these values. You can overwrite these values if you wish, or select another Packaging Type to change all the values accordingly.
If you wish to add more parcels, simply click the ‘Add Parcel’ link and repeat the steps above. To remove a parcel, simply click the ‘x’ on the right-hand side of the parcel row.
Beneath the parcel details you are able to select the Delivery Service and Despatch Date, which will automatically be set as today’s date. If you set the Delivery Service to ‘Use Routing Rules’, Shipmate will apply the rules configured on your account for the given parcel details - otherwise, select the specific delivery service you wish to use.
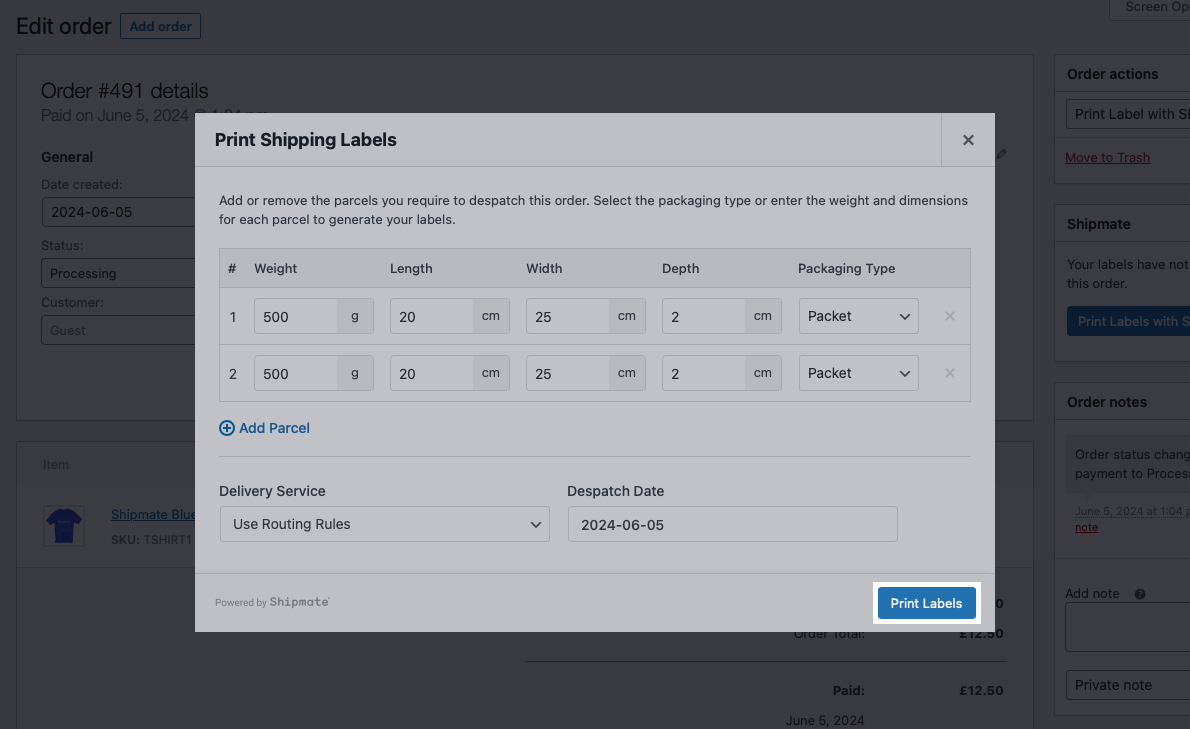
Once you are happy with your selections, click the ‘Print Labels’ button. This will generate the labels and send them to your printer, while saving the tracking references against the order in WooCommerce. The order status will also be updated according to the settings you have configured.
Shipping Multiple Orders
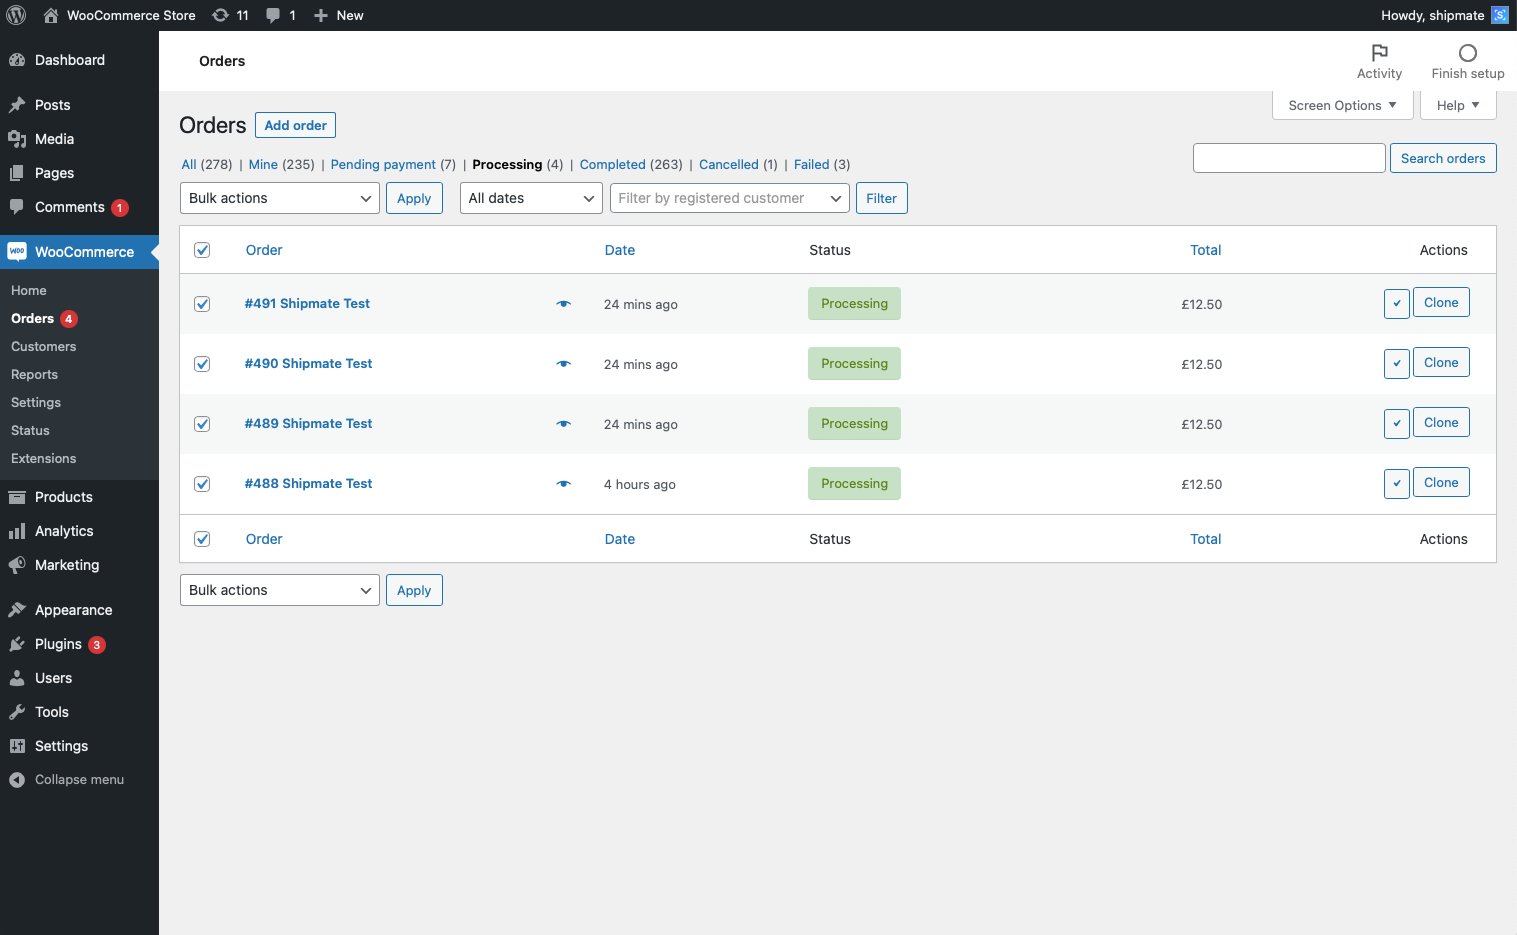
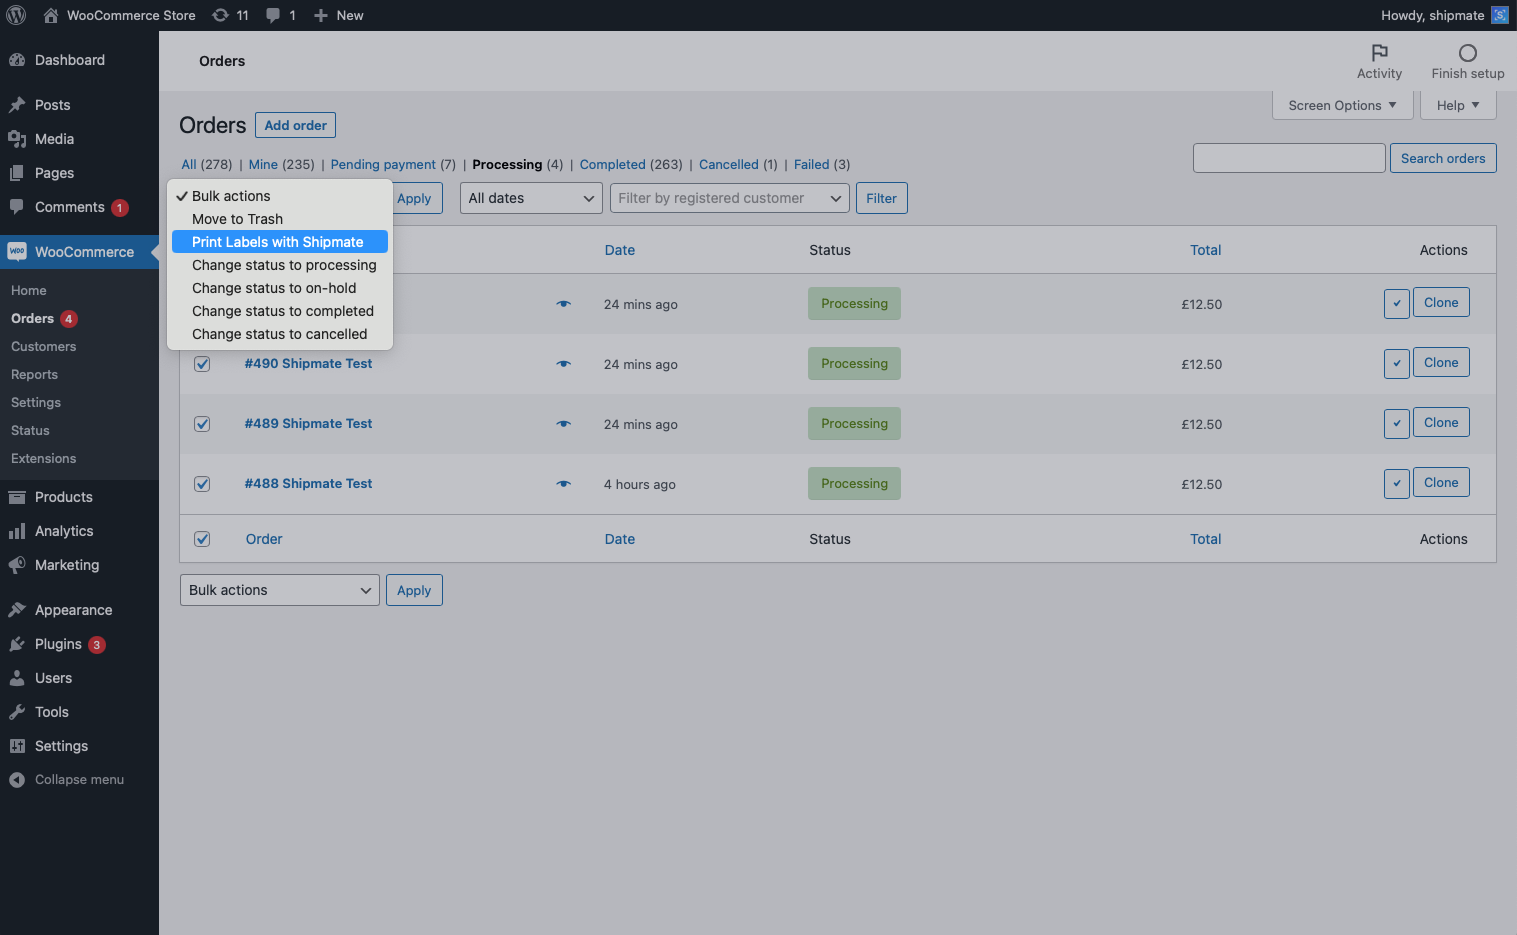
To ship multiple orders, first head to the Orders list screen inside WooCommerce admin and filter the page to the orders you want to ship.
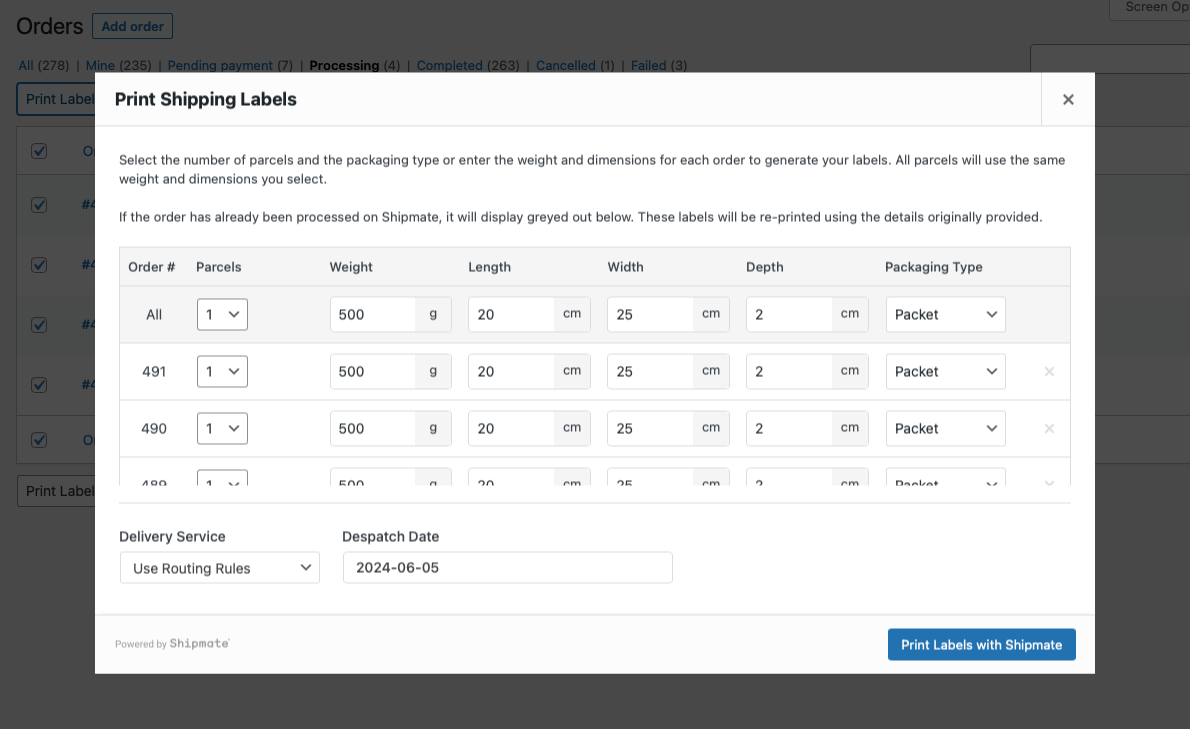
Check all the orders you wish to despatch then click the 'Print Label with Shipmate' option from the ‘Bulk Actions’ drop-down menu to open the Print Shipping Labels dialogue box. This allows you to generate shipments for each selected order.
Here you can confirm the number of parcels, weight and dimension of each order. If you have configured a default Packaging Option, the weight and dimensions will have already been pre-populated with these values. If your Packaging Options settings allow, you can overwrite these values if you wish, or select another Packaging Option to change all the values accordingly.
You can apply the number, weight and dimensions of parcels for all selected orders by modifying the selections in the All row.
If you wish to remove an order from the bulk print, simply click the ‘x’ on the right-hand side of the order’s row.
Any orders that have previously been processed will show greyed out. These orders won’t be regenerated in Shipmate, but instead Shipmate will reprint the label(s) originally requested.
Beneath the parcel details you are able to select the Delivery Service and Despatch Date, which will automatically be set as today’s date. If you set the Delivery Service to ‘Use Routing Rules’, Shipmate will apply the rules configured on your account for the given parcel details - otherwise, select the specific delivery service you wish to use.
Once you are happy with your selections, click the ‘Print Labels with Shipmate’ button. This will generate your shipments and send the labels to your printer, while saving the tracking references against the orders in WooCommerce. The status for each order will also be updated according to the settings you have configured.
Developer Information
Updating Email Templates
If you want to include tracking details on Order Completion emails, the Shipmate WooCommerce plugin adds four Post Meta Data attributes to your WooCommerce Orders:
_shipmate_carrier– Carrier Name_shipmate_service– Delivery Service Name_shipmate_tracking_reference– Tracking Reference Number_shipmate_parcel_reference– Shipmate-generated Parcel Reference
To add these details to your Order Completion email template, you can use the standard $order->get_meta(); function, for example
$order->get_meta('_shipmate_tracking_reference');
Alternatively, if you have a Shipmate Tracking Portal, you can build up your own branded tracking link in the format https://tracking.yourdomain.com/track/:order_number/:postcode
To obtain the order number and postcode, you can use the following code in your WooCommerce email templates:
$order_number = $order->get_order_number();
$address = $order->get_address('shipping');
$postcode = $address->postcode;
Then use $order_number and $postcode to build up your tracking URL.
The Order Completion email template is typically found in the WooCommerce theme directory, such as woocommerce/emails/plain/customer-completed-order.php
Once updated, make sure you have configured the WooCommerce Shipmate plugin to automatically update the Order Status to Completed on successful label generation.
This will then trigger WooCommerce to send the email automatically to the customer when you print your labels.
Further Information
Version History
Version 2.12.0 - September 2025
Download
Added Item Packing Options:
- Distribute Items across Parcels
- Split Items in all Parcels
Version 2.11.0 - August 2025
Added Parcel Handling Options:
- Parcels Per X Items
- Parcels Per X.X kg Weight
- X Parcels Per Order
Version 2.10.0 - March 2025
- Adds support for switching between Post ID and Order Reference when creating shipments
Version 2.9.0 - June 2024
- WooCommerce High Performance Order Storage (HPOS) Compatibility
- Ability to state number of parcels when shipping multiple orders
- Ability to bulk apply parcels and metrics when shipping multiple orders
Version 2.8.0 - February 2023
- User Interface improvements and bug fixes
Version 2.7.0 - December 2022
- Bug fix for reprinting labels
- Bulk printing packaging options bug fix
- UI wording change based on the user print settings
Version 2.6.0 - October 2022
- Adds support for Product Variants using Variant Item Regular Price to calculate contents value
Version 2.5.0 - May 2022
- Swapped billing telephone to delivery telephone if present
Version 2.4.0 - April 2022
- Removed double slash in base URL for all endpoints
- Sorted delivery services to be listed alphabetically
Version 2.3.0 - April 2022
- Added SKU listing
- General bug fixes and improvements
Version 2.2.0 - March 2021
Following customer feedback we have made the following improvements to the WooCommerce plugin:
- Improved printing workflow - choose when your labels are printed
- Delivery Services now listed alphabetically
- Improved error messages
- General bug fixes and improvements
Version 2.1.0 - June 2020
- Ability to configure units of measure
- Improved compatibility with custom order statuses
- Ability to allow label printing in any order status
- Improved error messages
- General bug fixes and improvements
Version 2.0.0 - February 2020
- A brand new, stylish User Interface
- Print shipping labels for multiple orders on the Orders screen in WooCommerce
- Ability to process International orders
- General bug fixes and improvements
Version 1.5.0 - January 2020
- Ability to quickly populate weights and dimensions using Packaging Types
- Configure a default Packaging Type to minimise data entry
- Configure order statuses based on key events when using Shipmate
- Added support for WooCommerce 2.0
- General bug fixes and improvements
Version 1.0.0 - August 2018
Initial version facilitates integration between Shipmate and WooCommerce. Features include:
- Print shipping labels within the Order screen in WooCommerce
- Map your store’s delivery services to those in Shipmate
- Add multiple parcels per order
- State the weight and dimension for each parcel
- Print shipping labels directly within WooCommerce using WebPrint
- Map WooCommerce and Shipmate users for simplified label printing
- Stores carrier tracking numbers inside WooCommerce
- Multi-User label printing
- Sets order status to “Complete” when label is generated