Using Shipmate with Shopify
Introduction
The Shipmate plugin for Shopify allows quick and easy integration between your Shipmate and Shopify accounts, giving access to all the carriers and delivery services Shipmate provides, directly inside your Shopify account.
This guide explains how to set up the Shipmate Shopify plugin and configure your accounts to start despatching your orders in Shopify using delivery labels generated by Shipmate.

Requirements
Before you are able to start printing shipping labels using Shipmate with Shopify, you will need the following:
- A Shopify account
- A Shipmate account
- At least one active Carrier and Delivery Service
- A compatible printer
In order to print labels directly within Shopify using the Shipmate Desktop App; you will also need to download the Shipmate Desktop Application.
If you wish to use Shipmate’s routing rules, you will also need to ensure your inventory inside Shopify has accurate and up-to-date weights and dimensions.
If you send parcels outside the UK, you will also need to ensure your product data in Shopify contains all customs details, including harmonised codes and country of origin.
If you need any assistance ensuring you have everything you need to link your Shopify and Shipmate accounts, please contact support@shipmate.co.uk.
Setup - Shipmate
Accessing Shopify Settings
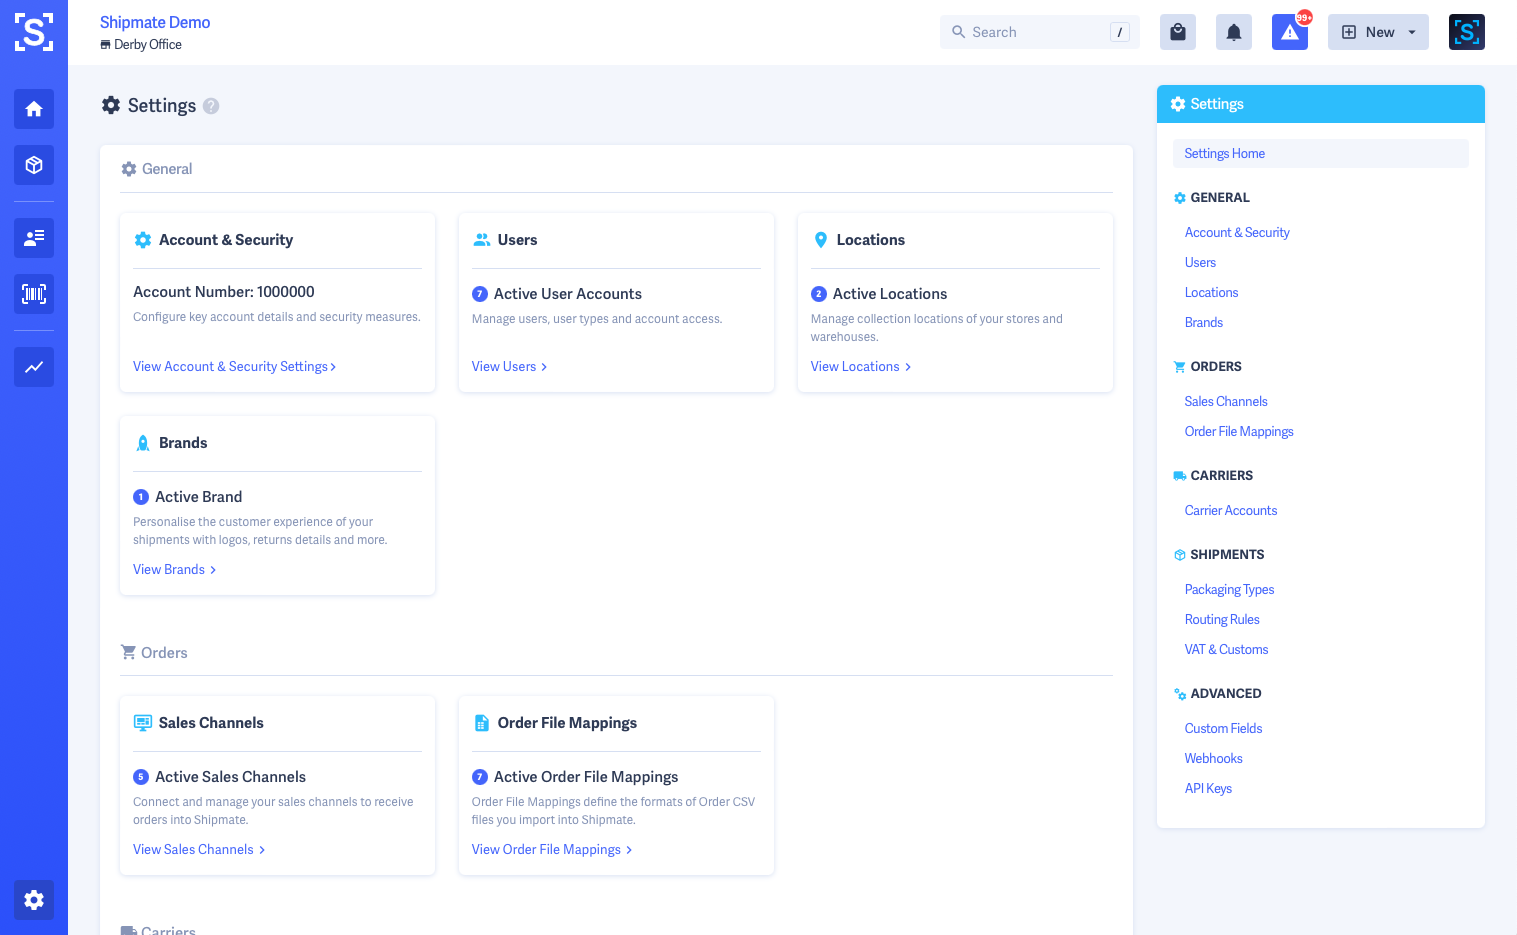
To amend your Shopify Channel settings inside Shipmate, you need to be logged in as an administrative user on your account, then simply click the Settings icon in the lower-left corner.
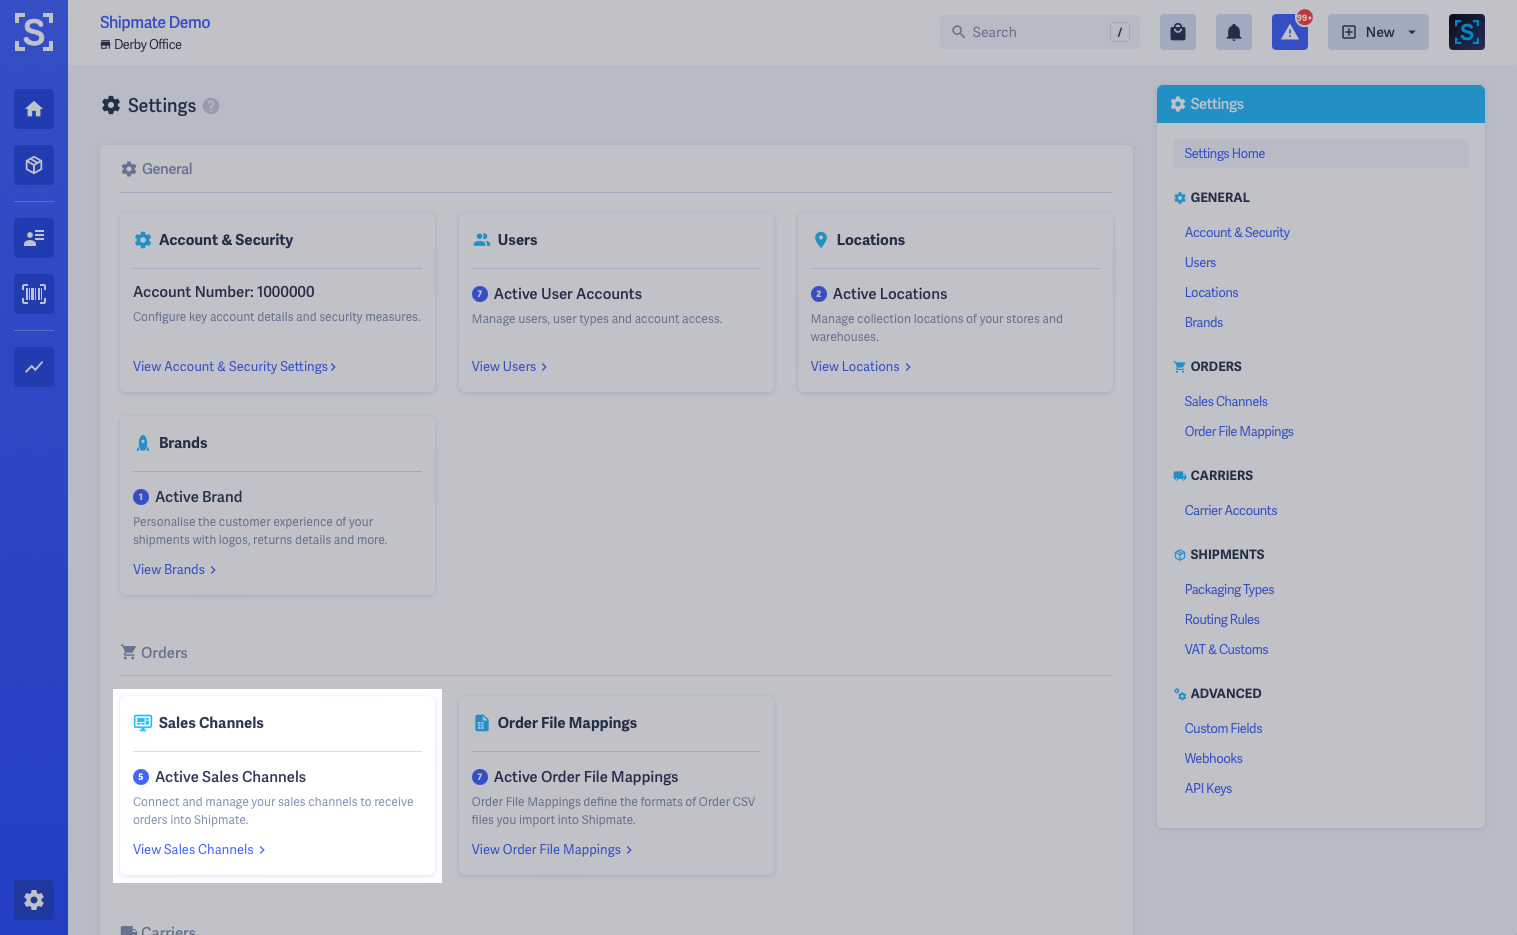
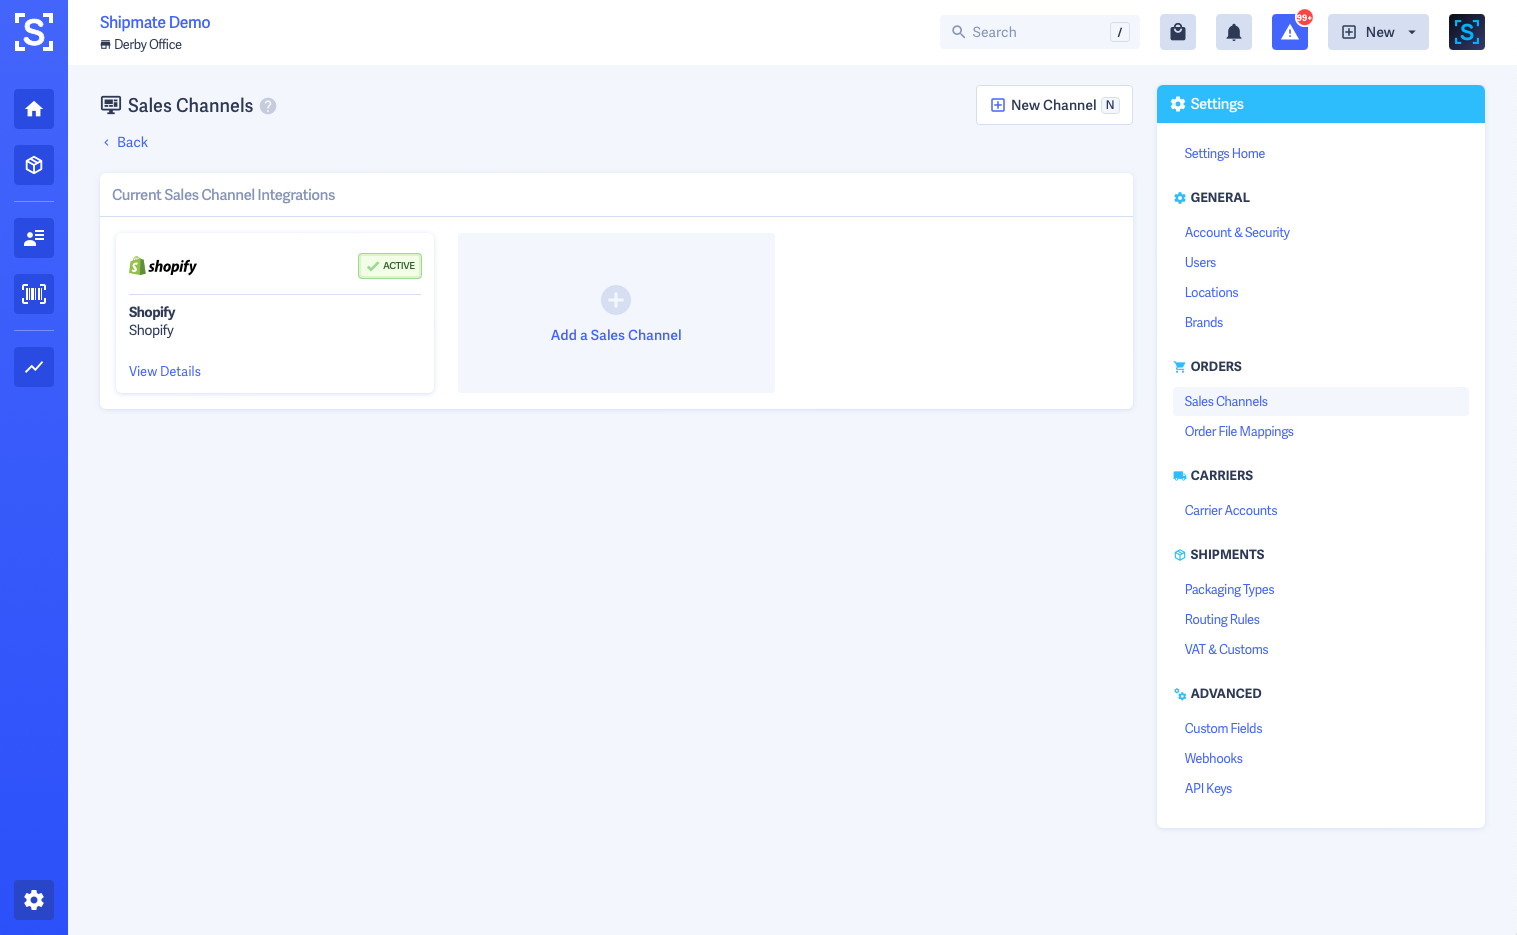
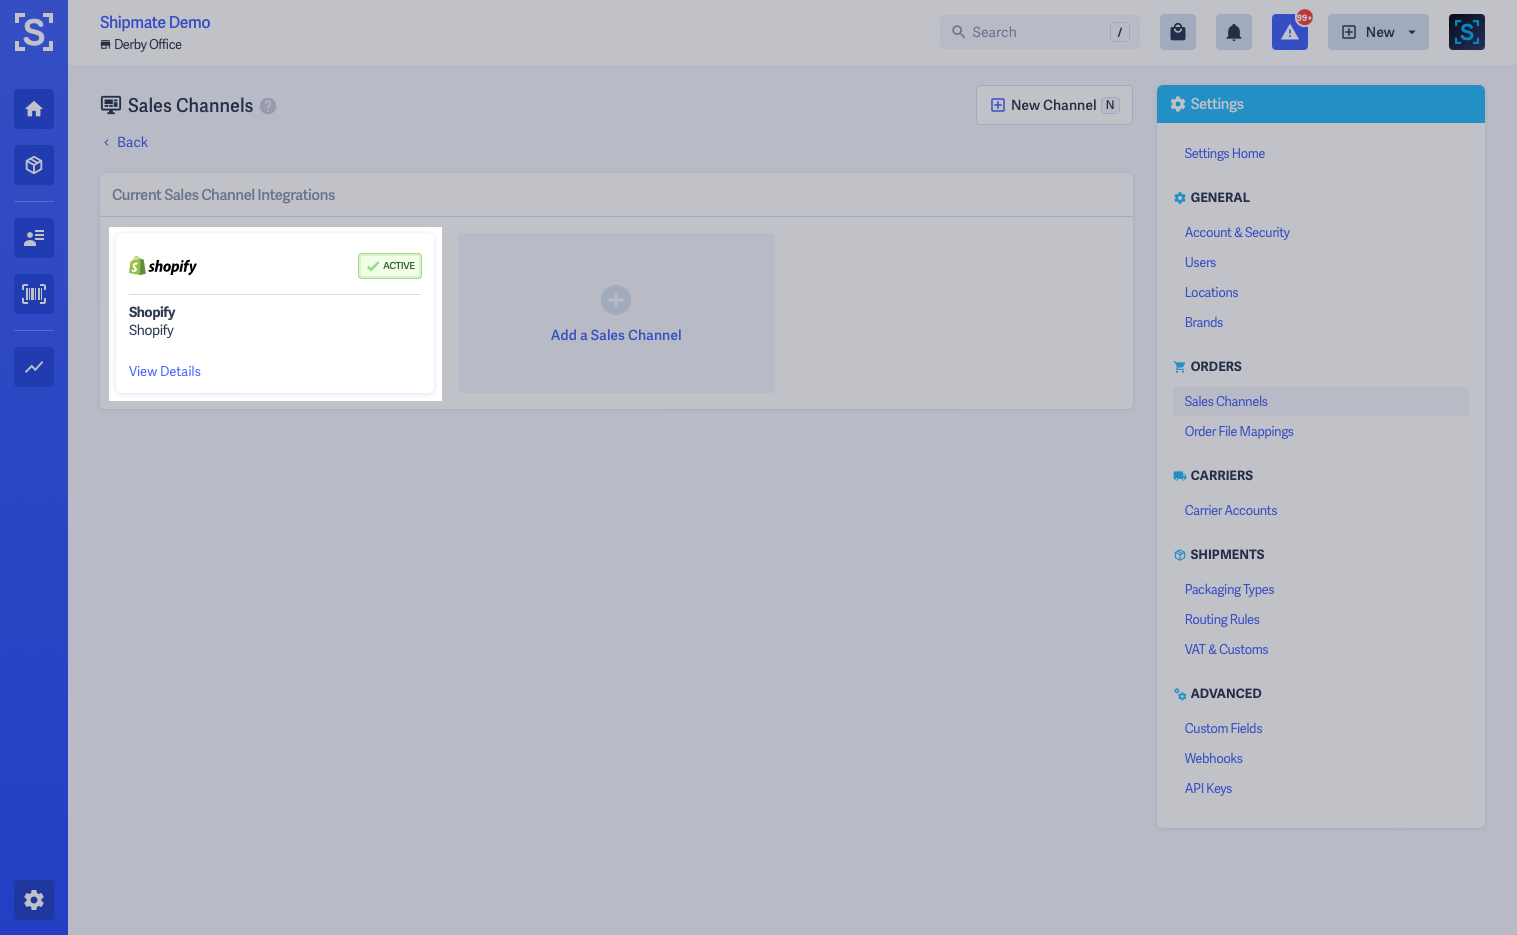
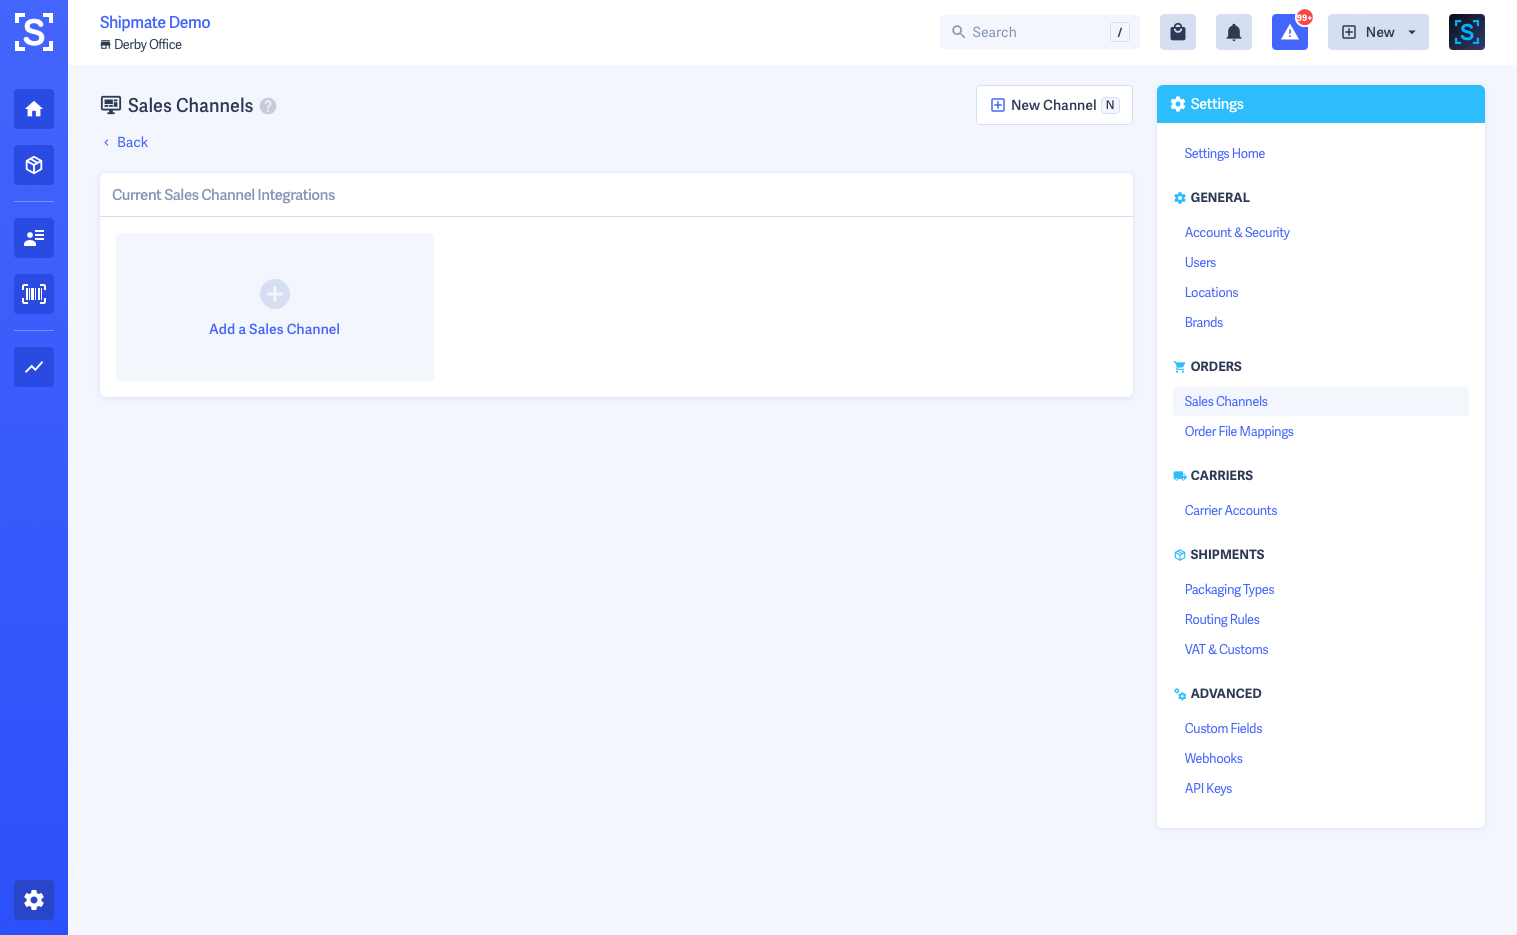
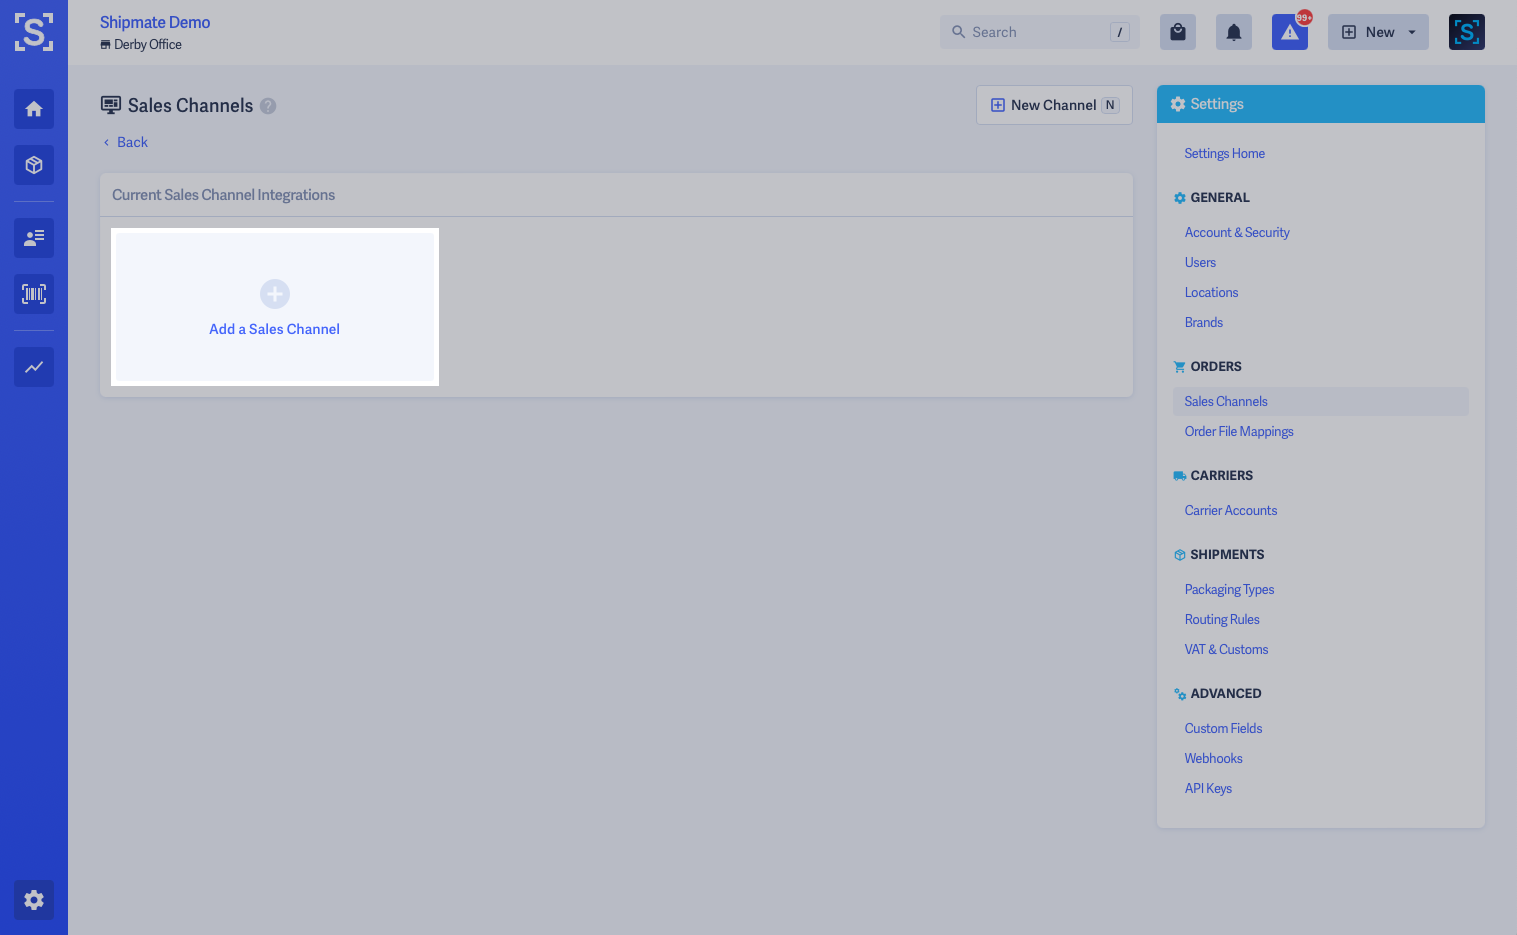
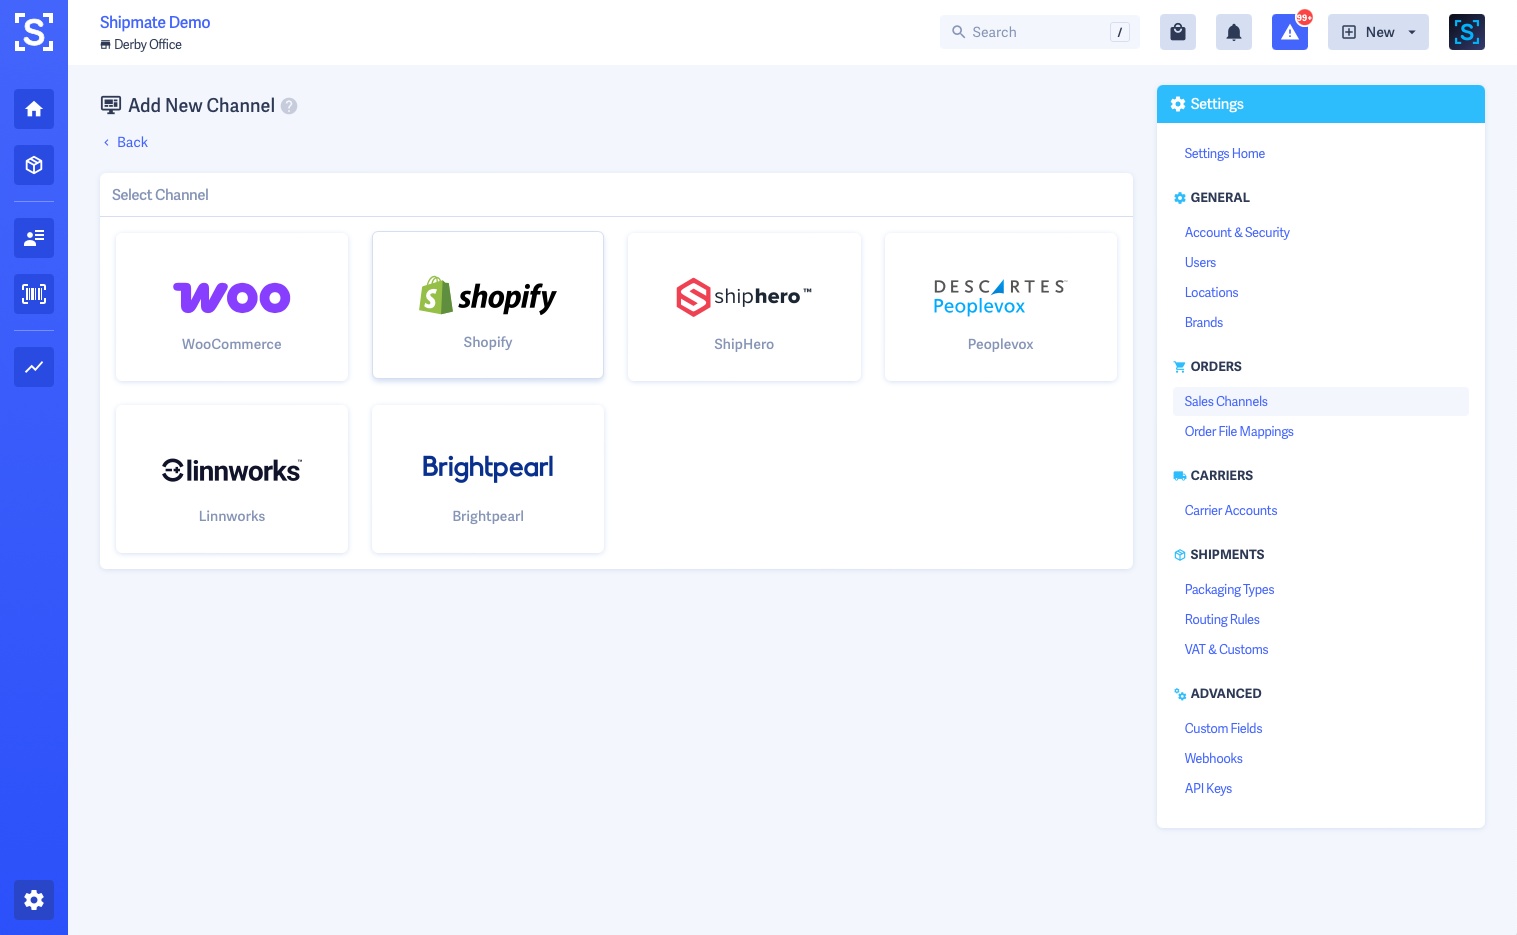
From the Settings menu select Sales Channels. This will open a page listing all of the available channels on your account. Simply click the blue ‘Settings’ link next to the Shopify logo. This will open the Shopify Channel Settings page.
Install Plugin
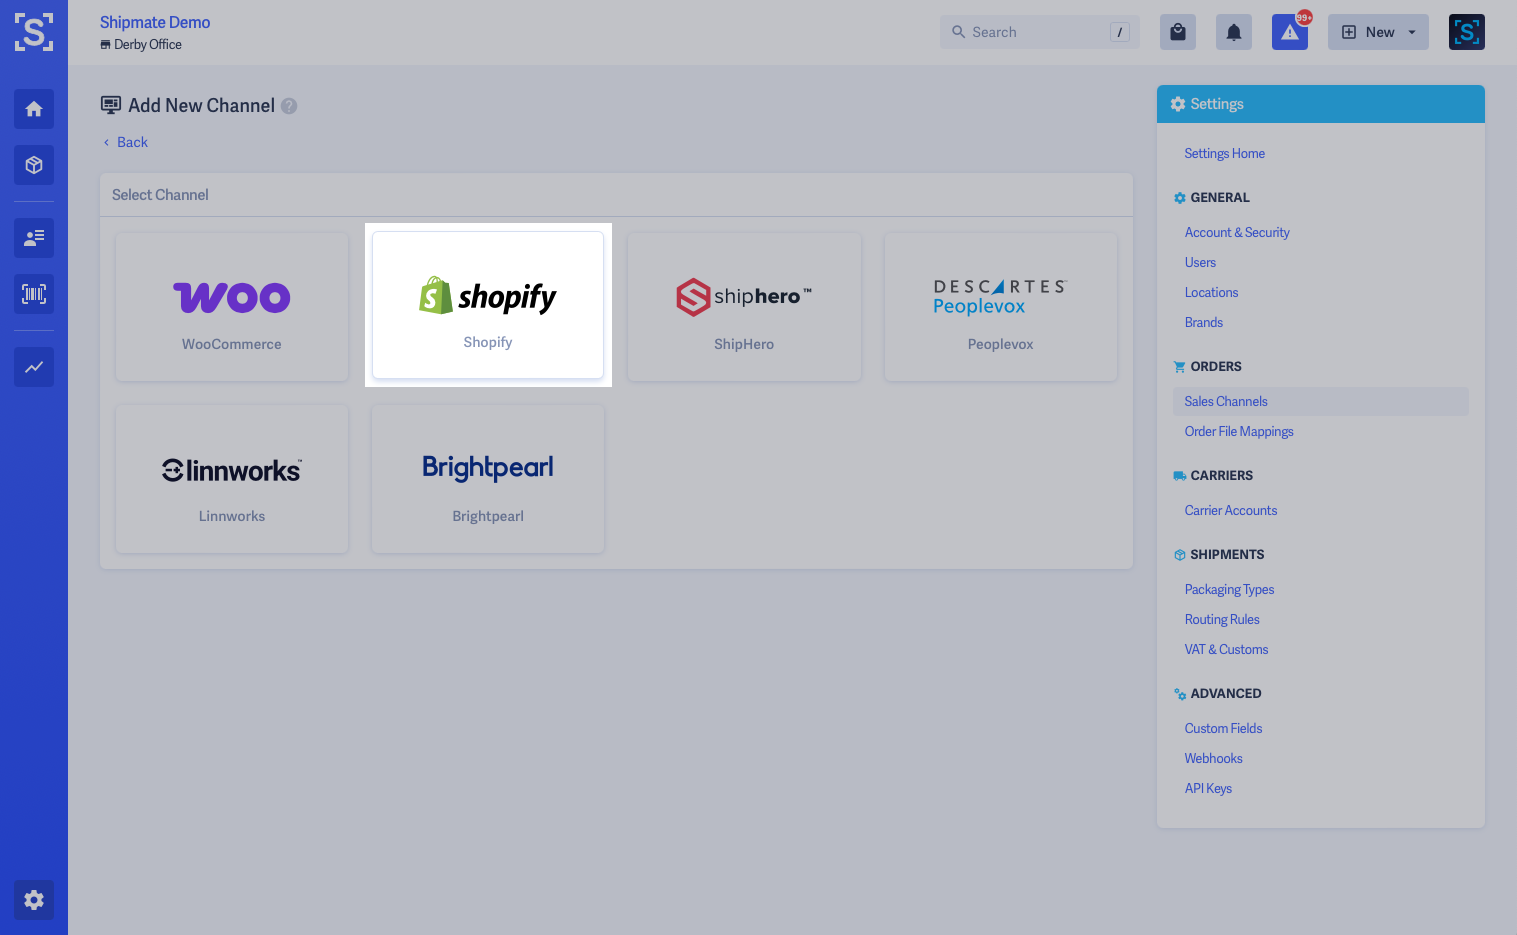
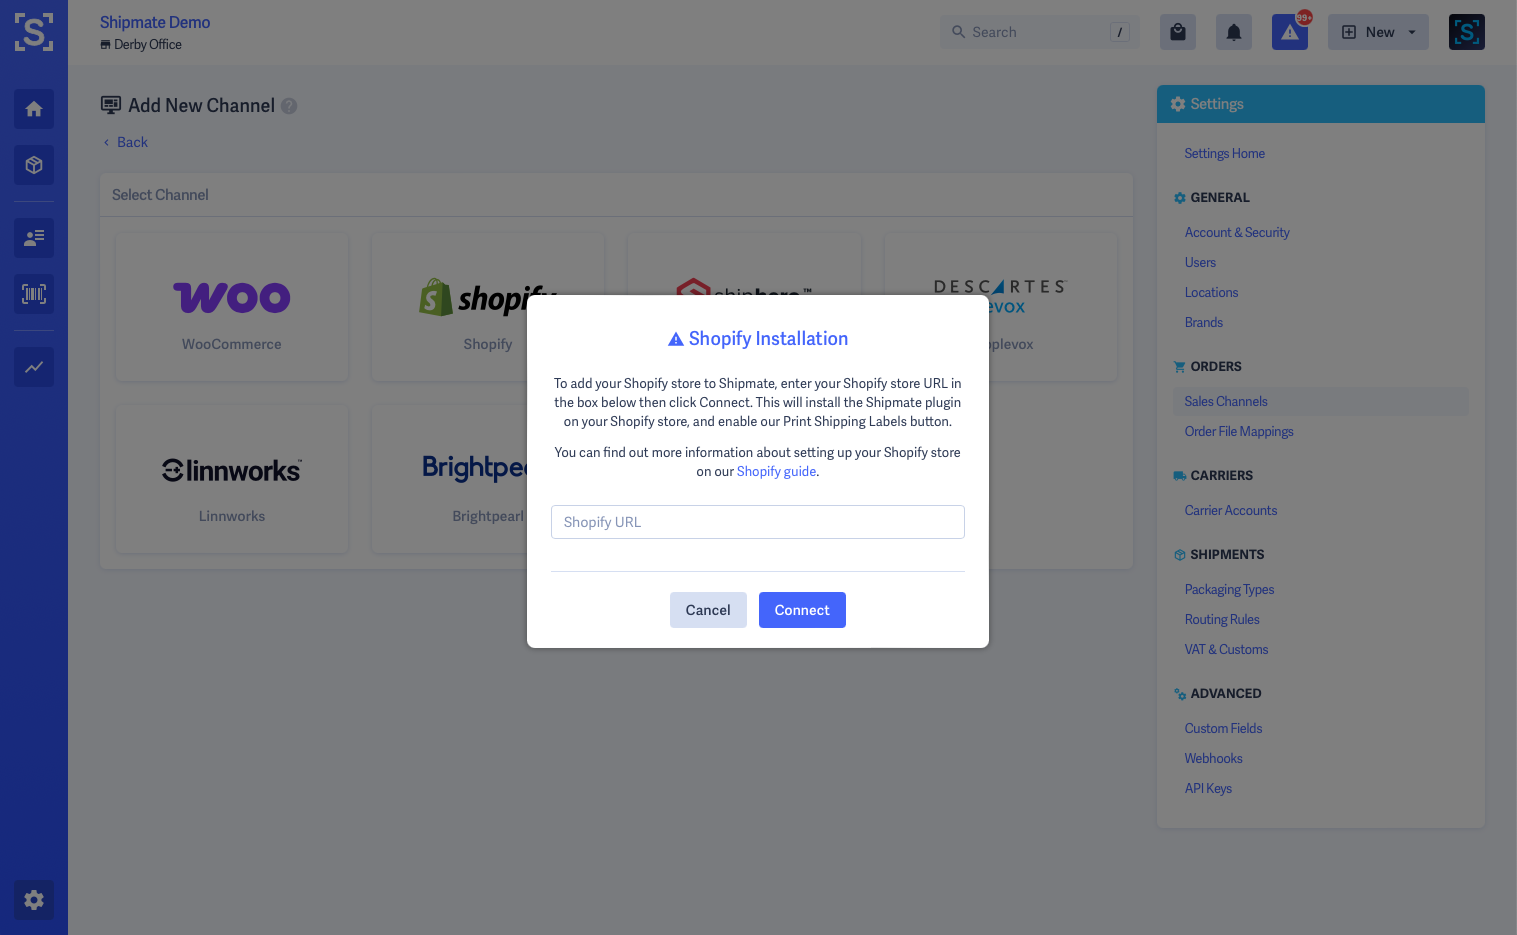
Installing the Shipmate Shopify Plugin is simple - click the Enable button next to the Shopify channel inside Channel Settings, provide the URL to your Shopify store and click Connect.
Shopify will then take you through an authorisation process to link your Shopify store to your Shipmate account.


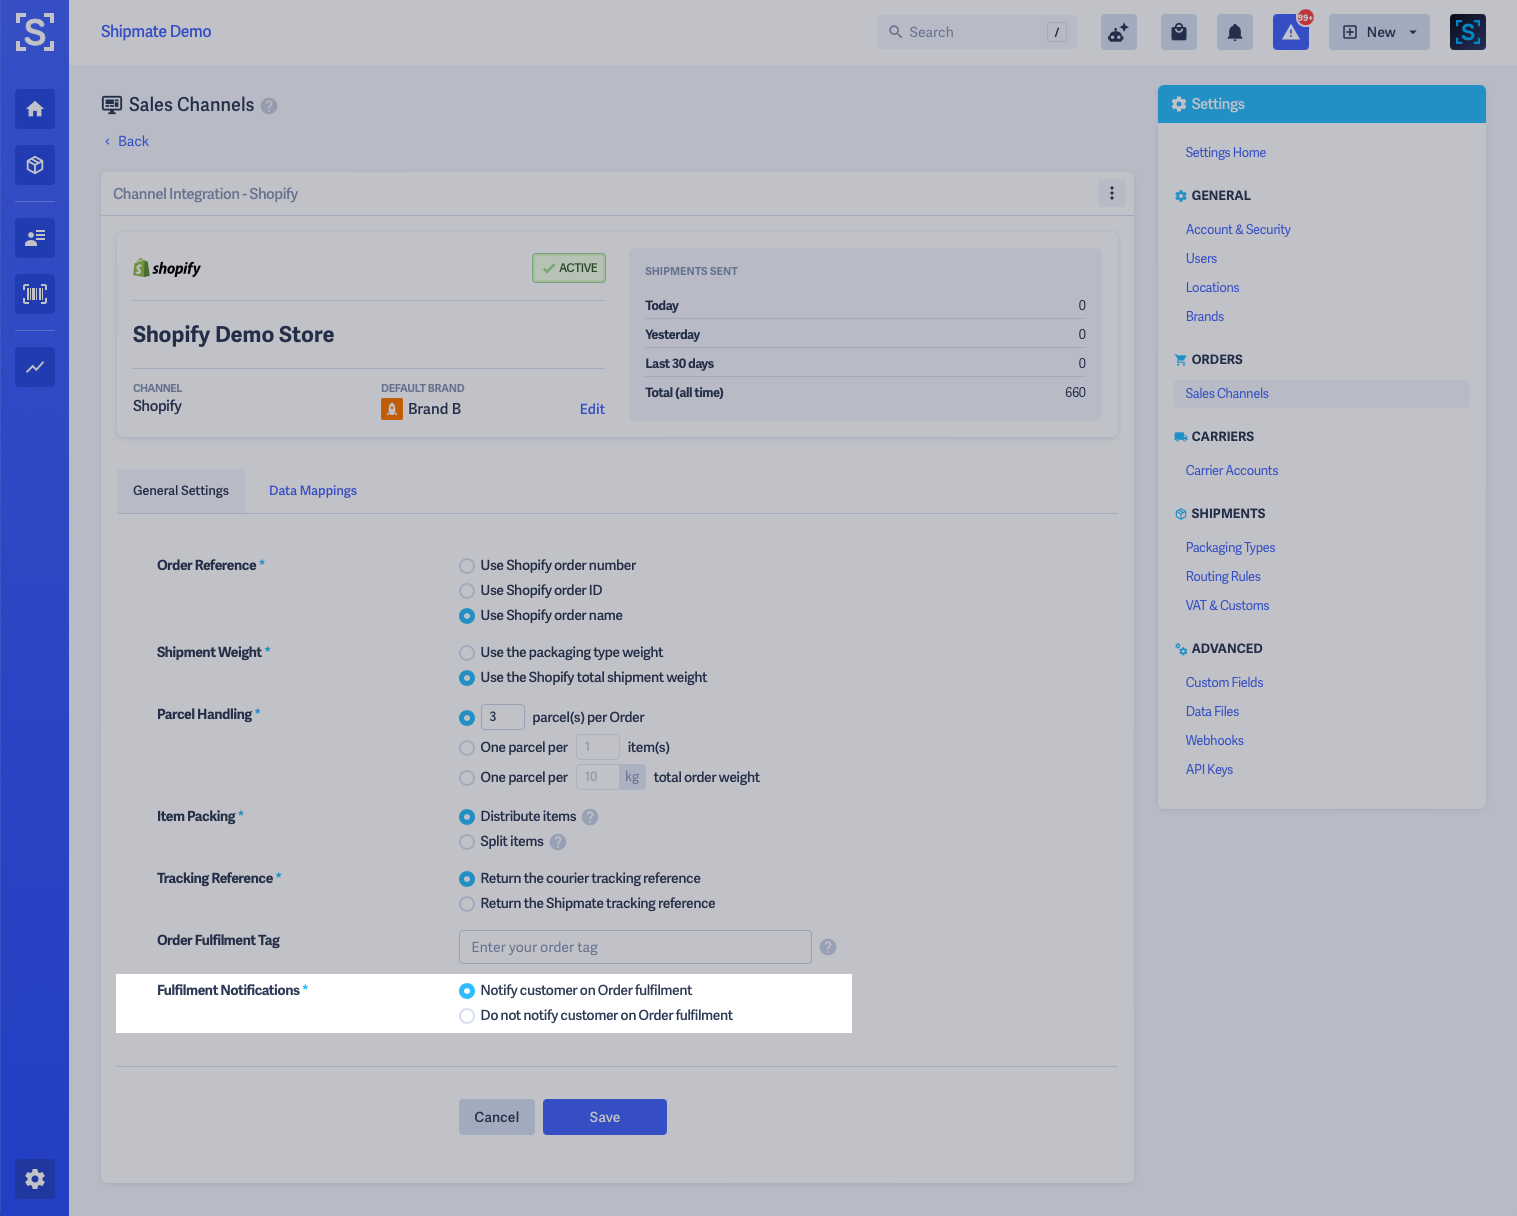
Order References
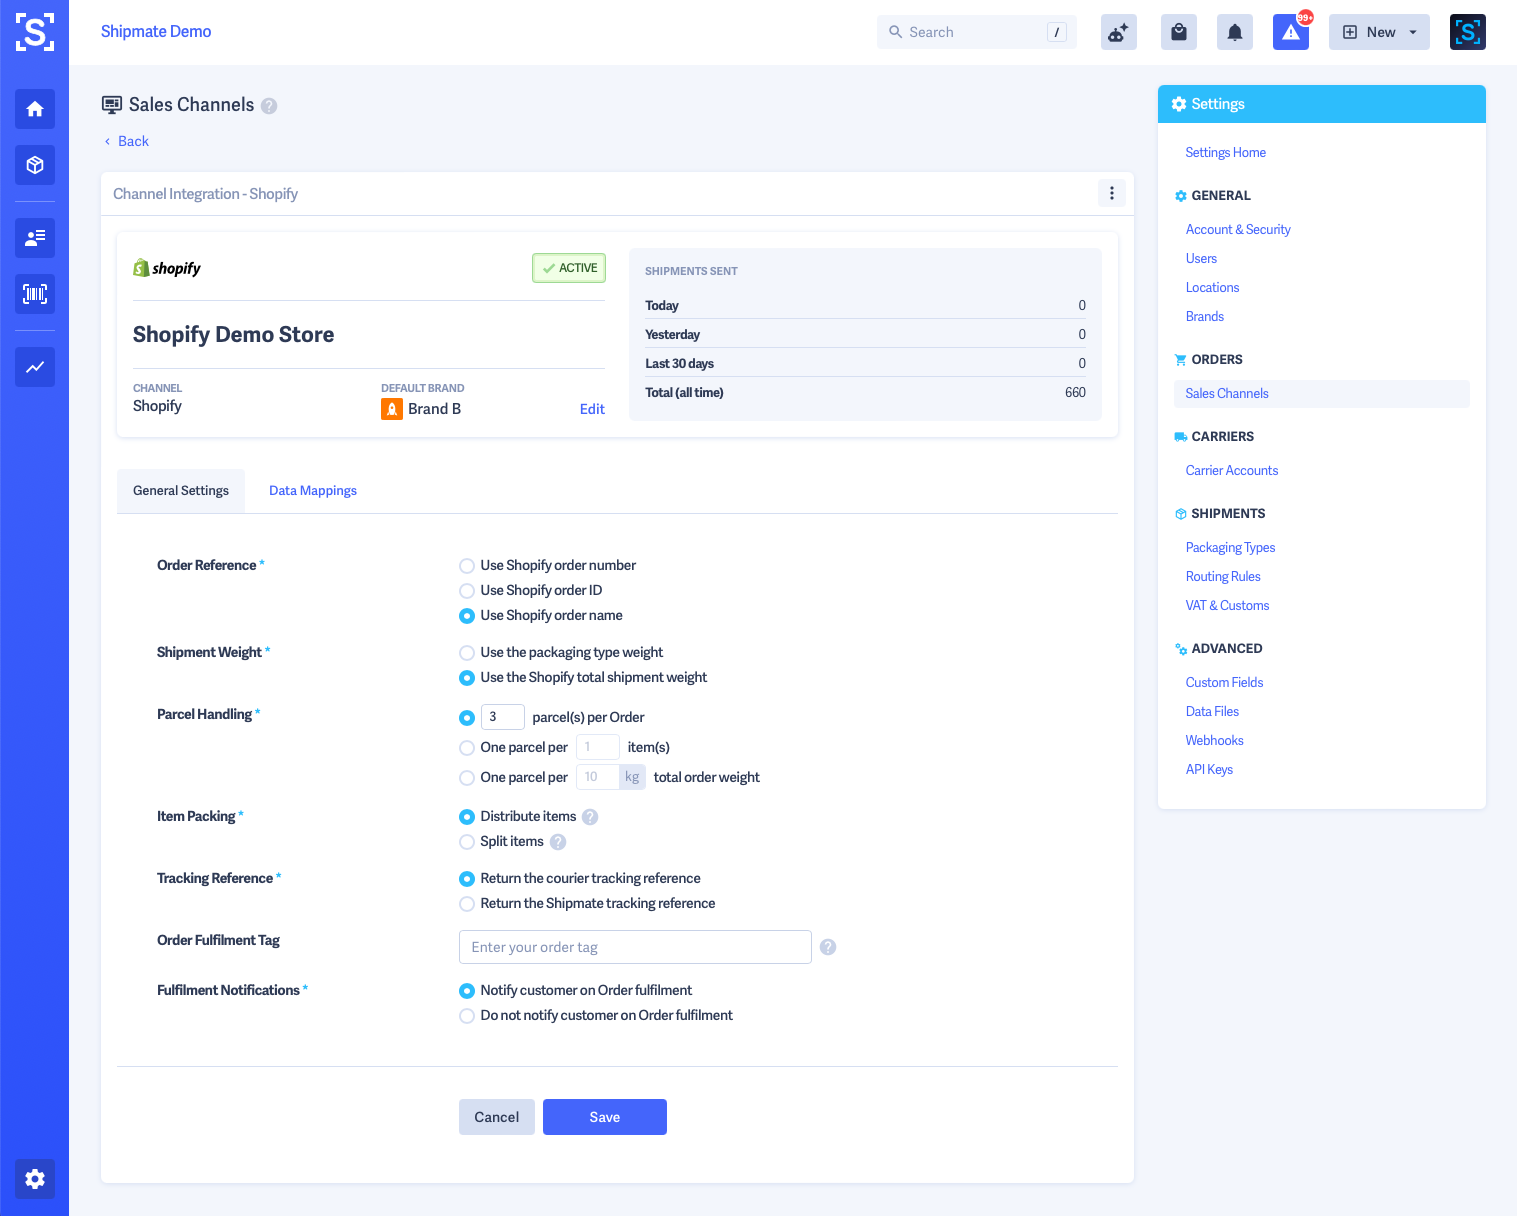
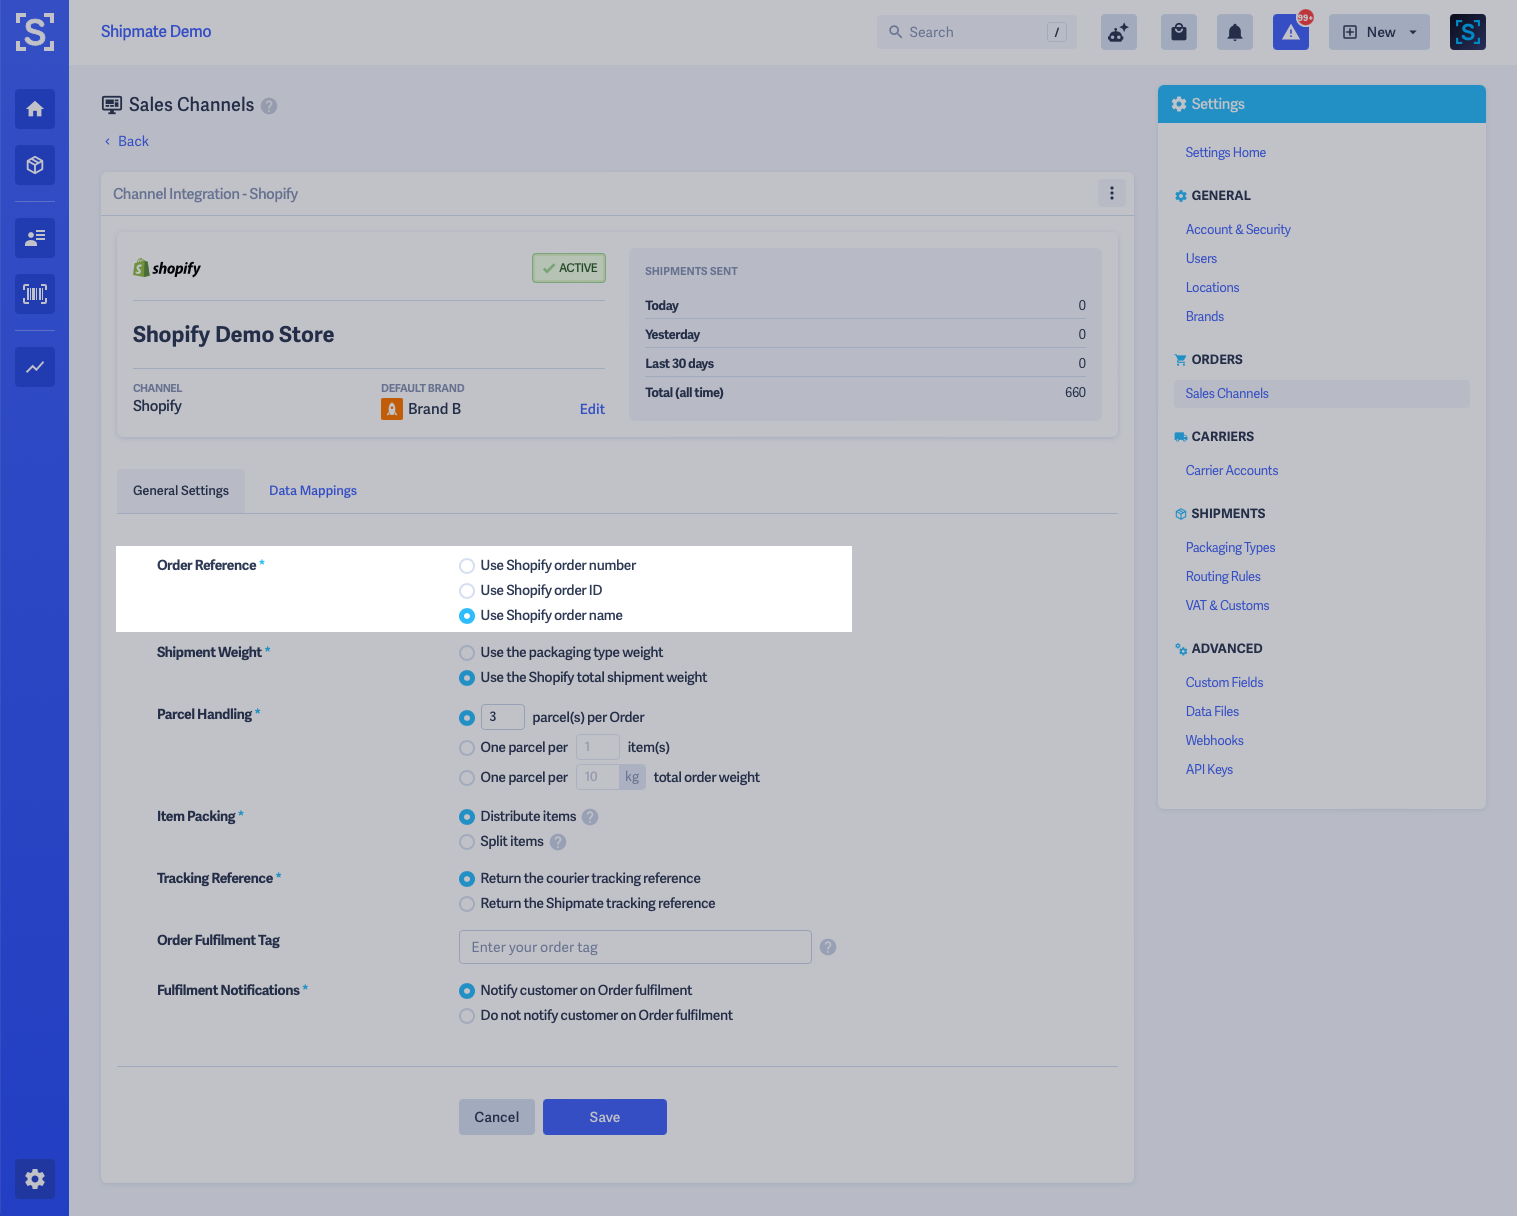
Shipmate is able to use the Shopify Order Number, Shopify Order Name or Shopify Order ID as a reference for your Shipments and Parcels.
By default new installations use the Shopify Order Number - this is the same as the order number you see inside Shopify. In most circumstances this does not need to be changed. If however you would like to choose a different option, the following options apply the order references as follows:
- Shopify Order Number - this is the customer-facing order number without any prefixes, suffixes or formatting applied - e.g., 1234
- Shopify Order Name - this is the customer-facing order number with any prefixes, suffixes or formatting applied - e.g., #MYSHOP-1234
- Shopify Order ID - this is the internal Shopify Order ID / long ID used to uniquely reference each order
To choose which reference you wish to use, simply select the relevant option from the Parcel Reference section of the Channel Settings, then click ‘Save’.

Shipment Weight Handling
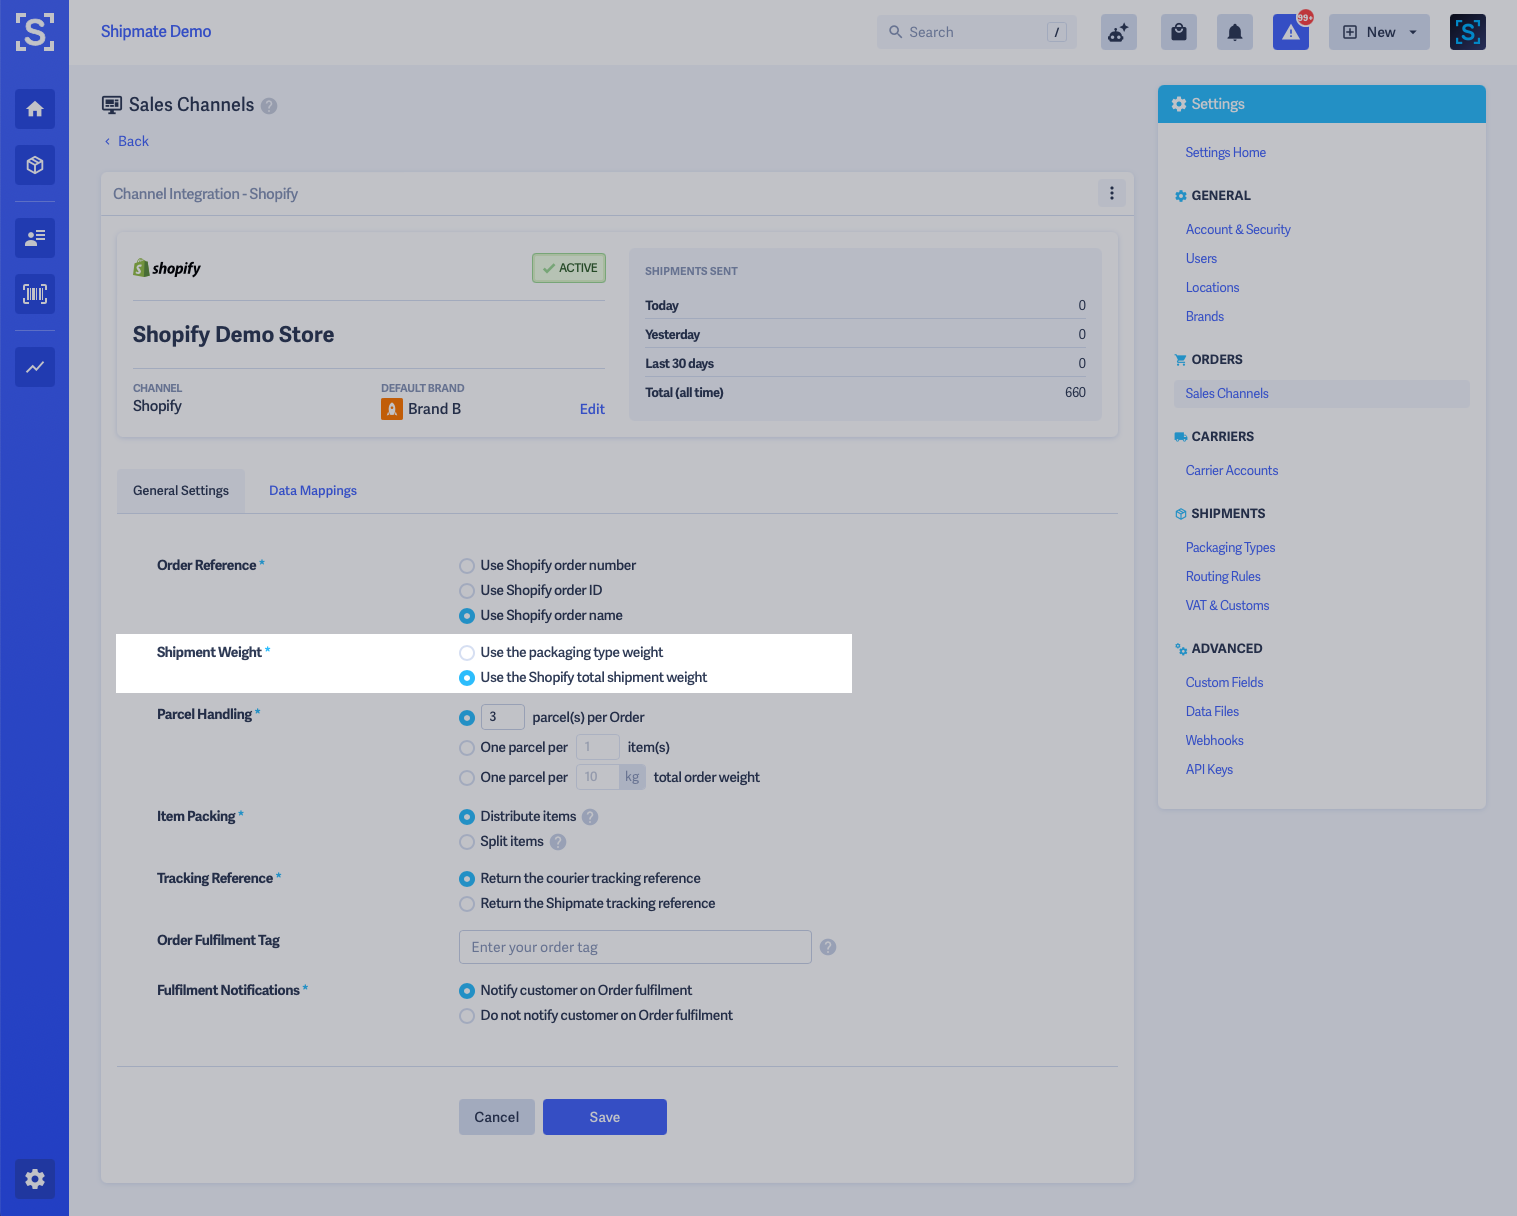
You can choose how the shipment weight is handled by choosing from the following options:
- Use Packaging Type Weight - this applies the default weight as set in your Packaging Types. Best suited when most orders are similar in weight, or fall within agreed maximums with your carrier(s).
- Use Shopify Total Weight - this applies the total weight of the products in the order. Best suited when orders vary in weight and you have accurate product weights configured on your store.
Select the option you wish to apply, then click ‘Save’. These settings will apply when you next process an order.

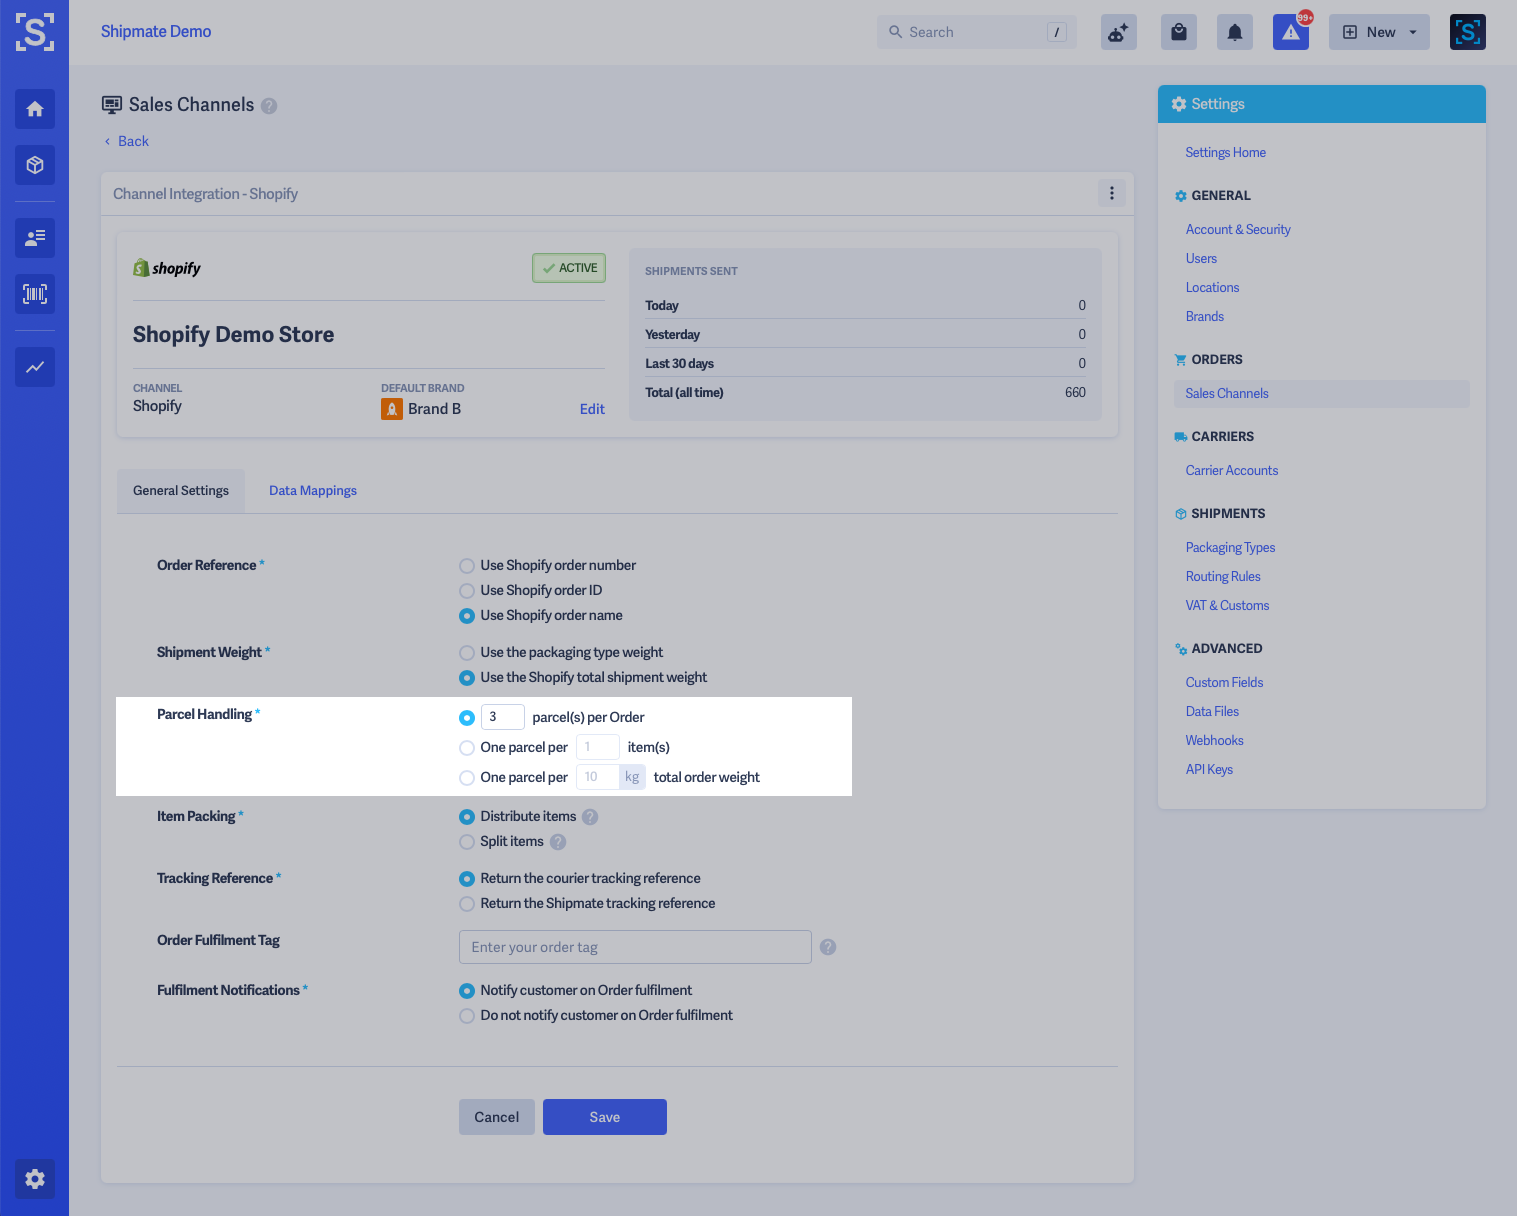
Parcel Handling
You can configure how many parcels are calculated when shipping each order, as your starting point. You can always change the number and size of parcels, but by choosing the Parcel Handling option that best suits the products you sell, you minimise the likelihood of having to change how many parcels you are sending for each order.
Simply choose the option that best suits your requirements, from the following options:
- X parcel(s) per order – ideal if you know most orders are sent in the same number of parcels
- One parcel per X item(s) – ideal if you know on average how many items fit in each parcel
- One parcel per X.X kg total order weight – ideal if you sell your product by weight
Select the option you wish to apply, then click ‘Save’. These settings will apply when you next process an order.

Item Packing
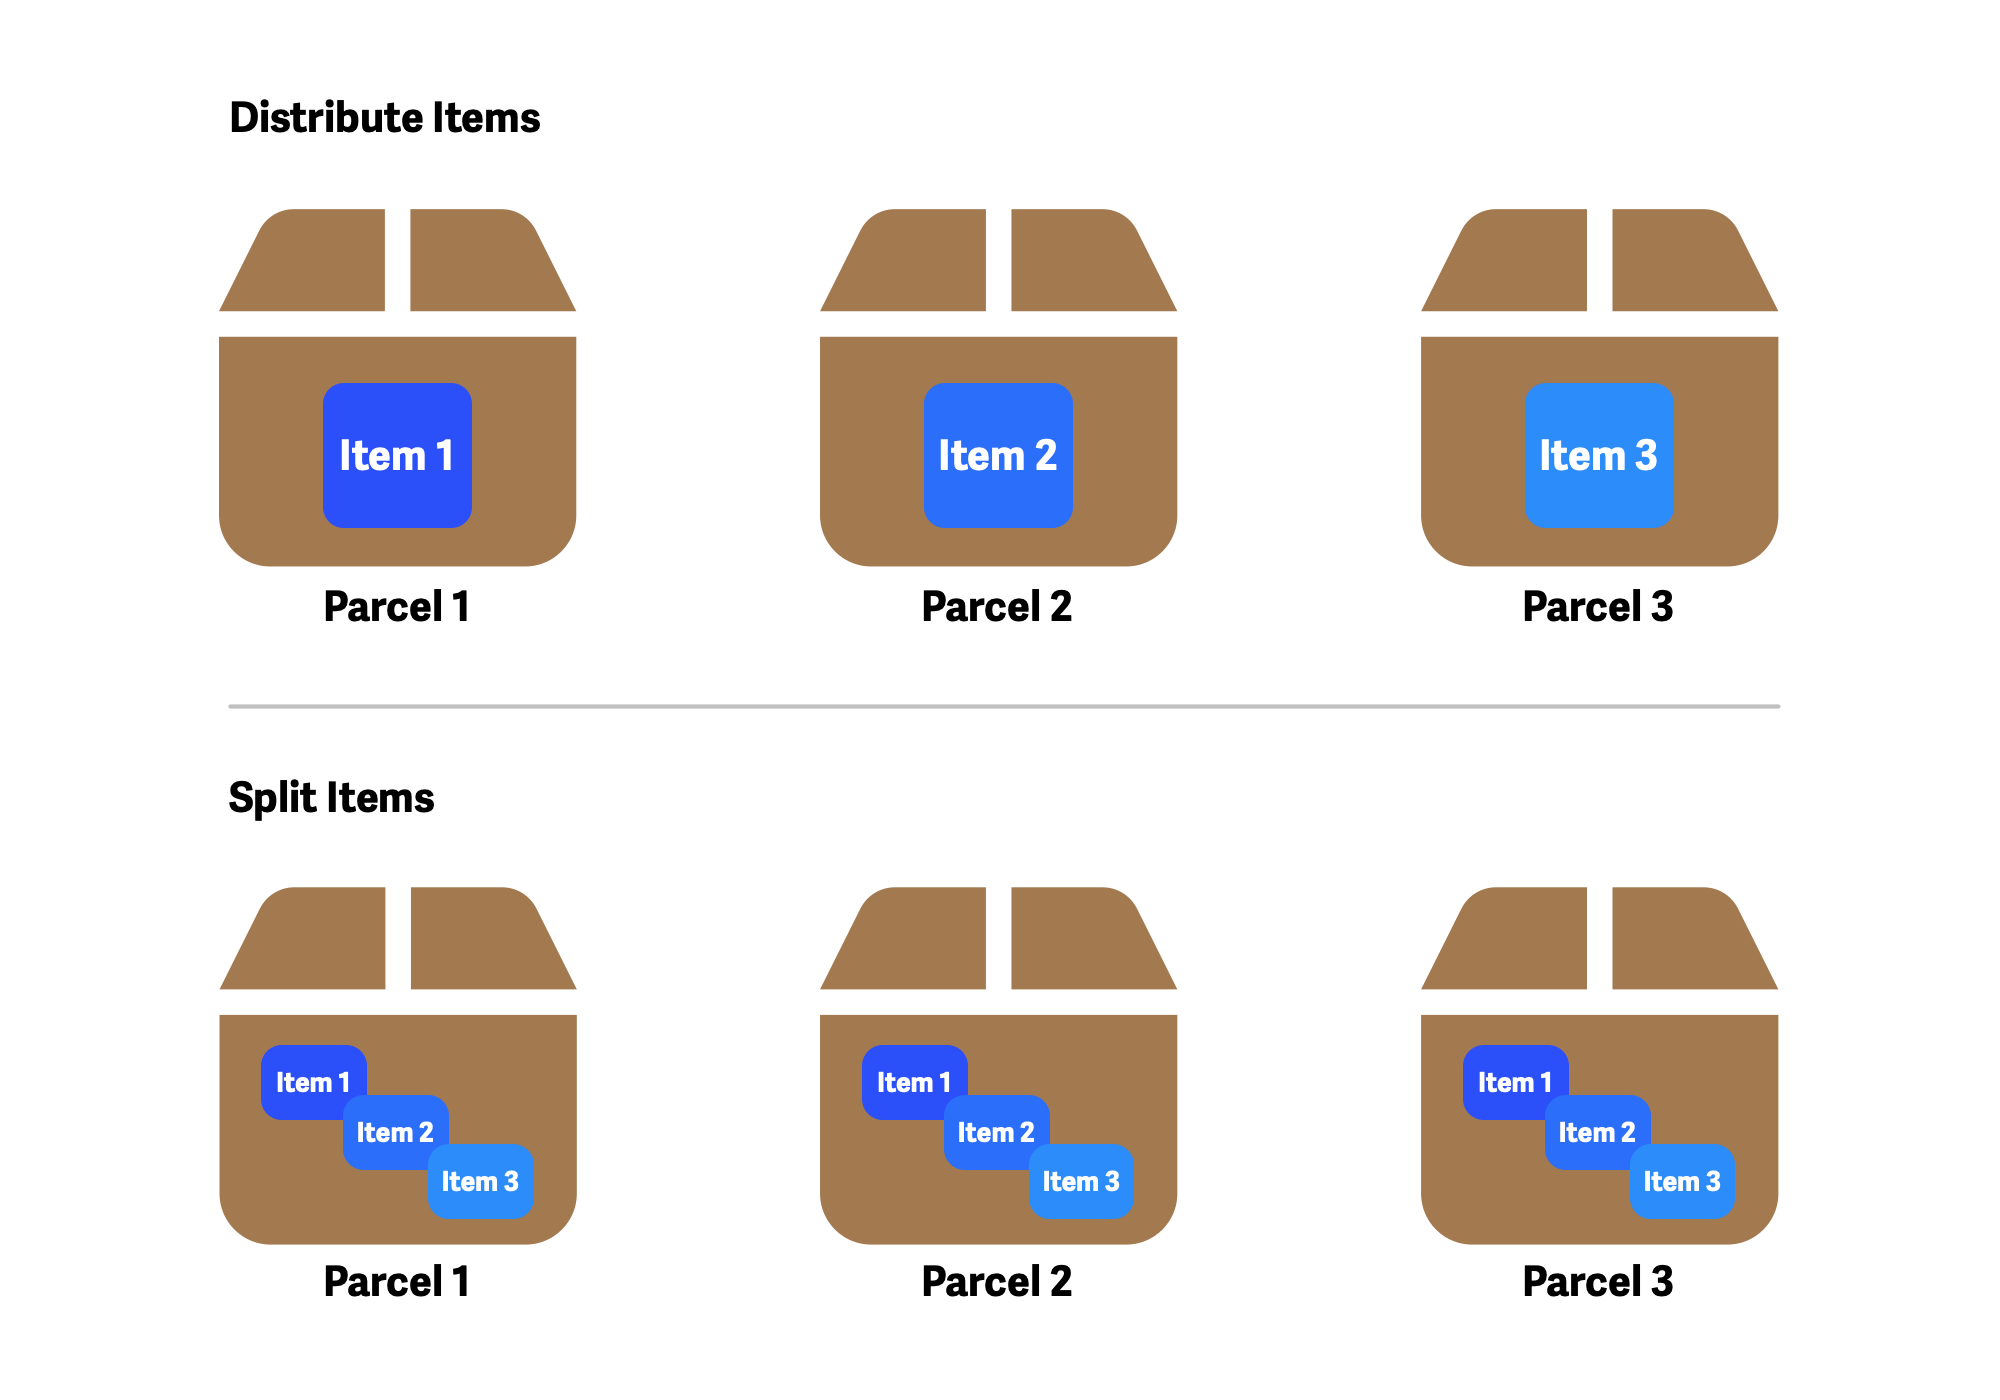
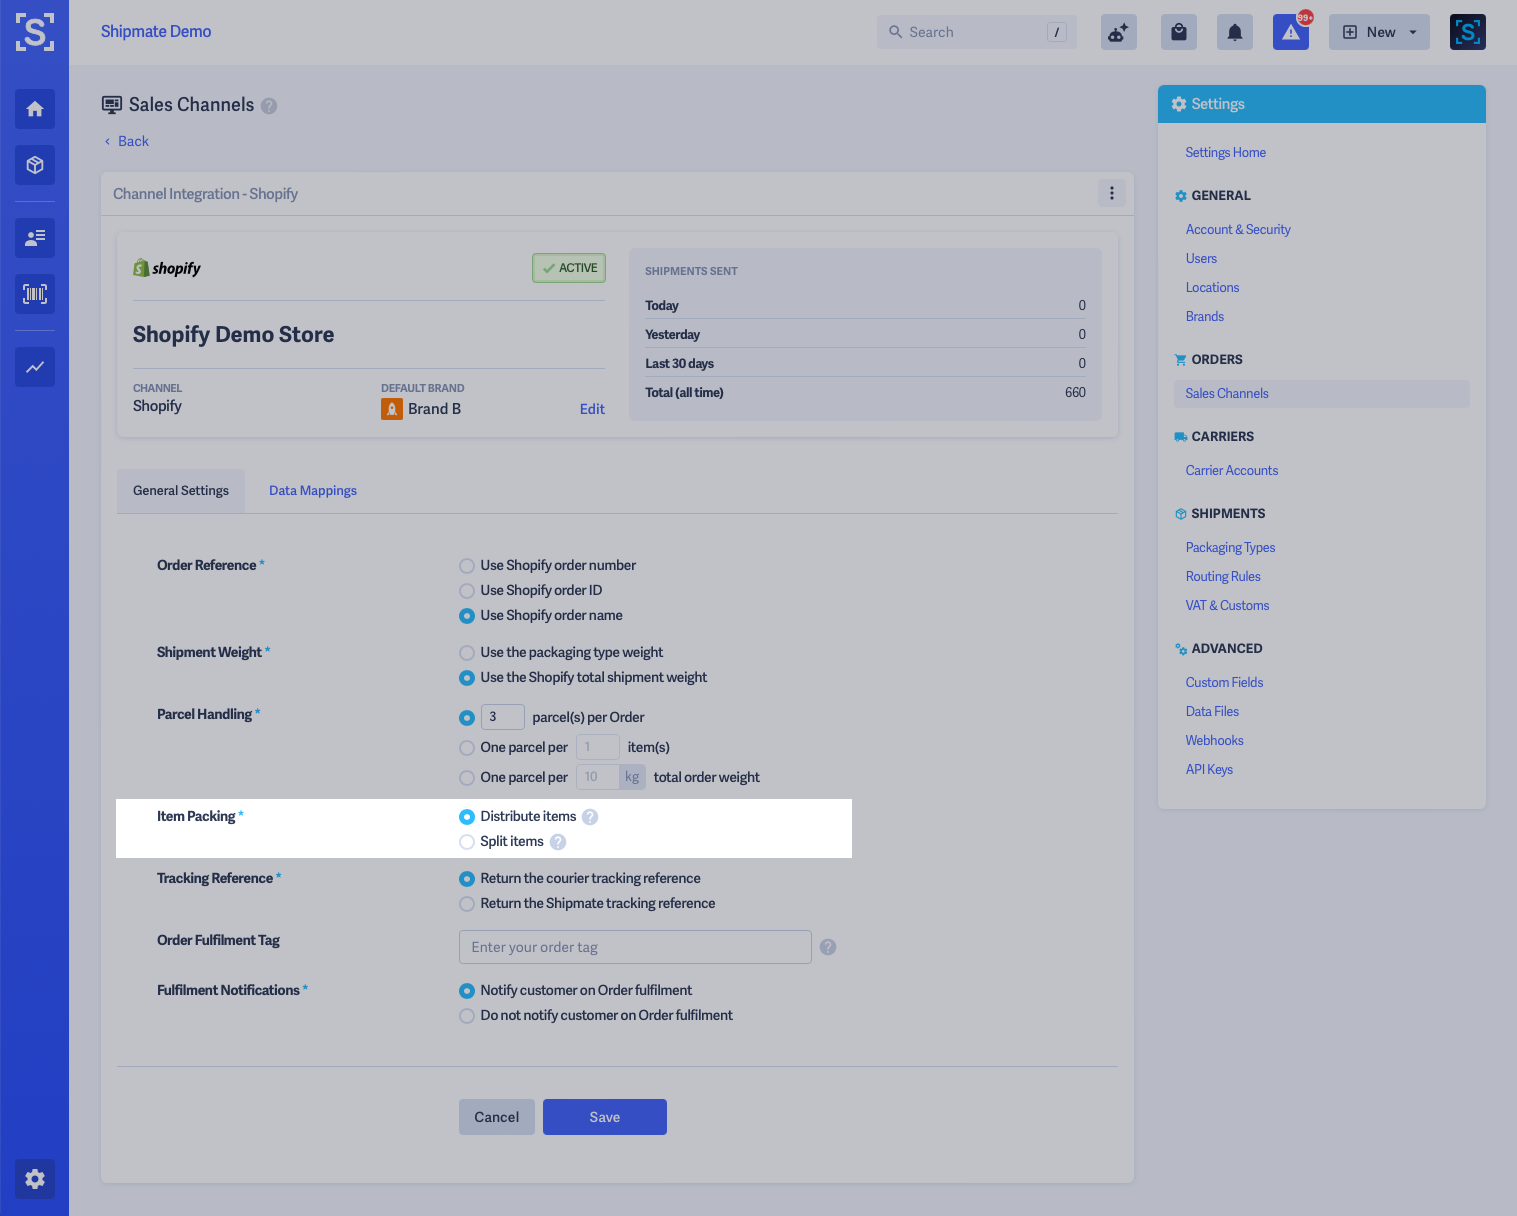
You can configure how the items in your order are packed into parcels automatically.
Simply choose the option that best suits your requirements, from the following options:
- Distribute items – this will place entire items into single parcels according to the selected Parcel Handling option. Ideal for most situations whereby products are shipped as a whole unit.
- Split items – this will place a copy of each item in the order in each parcel, with the value and weight divided by the total number of parcels. Ideal for loose product or when it isn't necessary to state exactly which item is in which parcel.
Select the option you wish to apply, then click ‘Save’. These settings will apply when you next process an order.

Tracking References
Shipmate is able to return either the carrier’s tracking reference, or the Shipmate Unified Tracking Reference, which you can use to notify your customers so they are able to track the progress of their orders.
If you opt for the Carrier’s tracking reference, customers will have the direct tracking reference for the carrier however if you subsequently make any changes to their delivery, they might not be informed automatically.
If you use the Shipmate Tracking Portal, it’s most likely that you should opt for the Shipmate Unified Tracking Reference, as this will provide you with the Unified Tracking Reference needed to link to the Tracking Portal.
To choose which tracking reference you’d like to use with Shopify, simply select the relevant option from the Tracking Reference section of the Channel Settings, then click ‘Save’.

Fufilment Tags
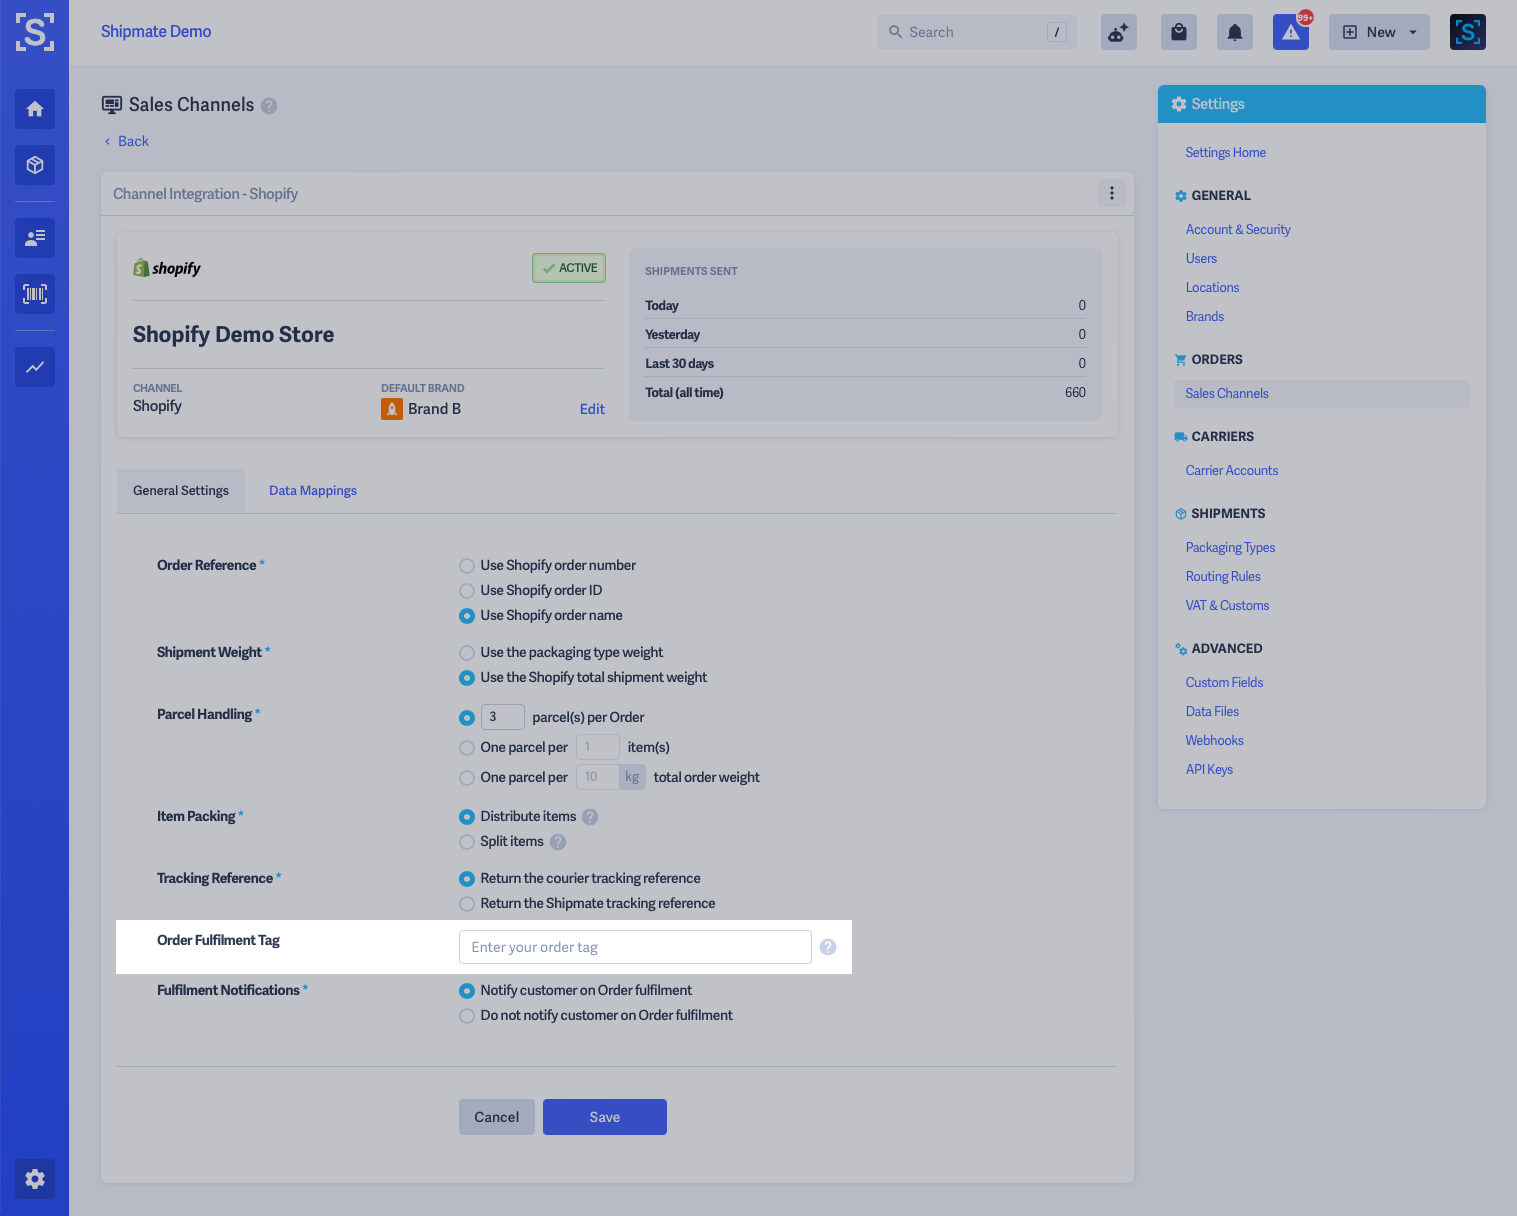
Shipmate can apply tags to Shopify orders when they are fulfilled. This makes filtering and reporting on orders easier within Shopify and can assist as part of your despatch workflow.
To use this feature, provide a text-based tag to be applied as the Order Fulfilment Tag.
Select the option you wish to apply, then click ‘Save’. These settings will apply when you next process an order.

Fufilment Notifications
You can choose whether Shopify will notify customers about their order fulfilment when you create labels in Shipmate, according to your operational requirements:
- Notify Customer – this will send the 'Your order is on the way' email as labels are generated. Ideal when you despatch your orders on-demand and the parcels are collected the same day you process them.
- Do Not Notify Customer – this does not notify customers, instead allows you to return to Shopify at a later time to mark the orders as despatched and notify your customers. Ideal when you batch-process orders in advance.
In both cases tracking numbers and links are sent over to Shopify automatically upon label creation, so you do not need to add these in manually later.
Select the option you wish to apply, then click ‘Save’. These settings will apply when you next process an order.

Data Mappings
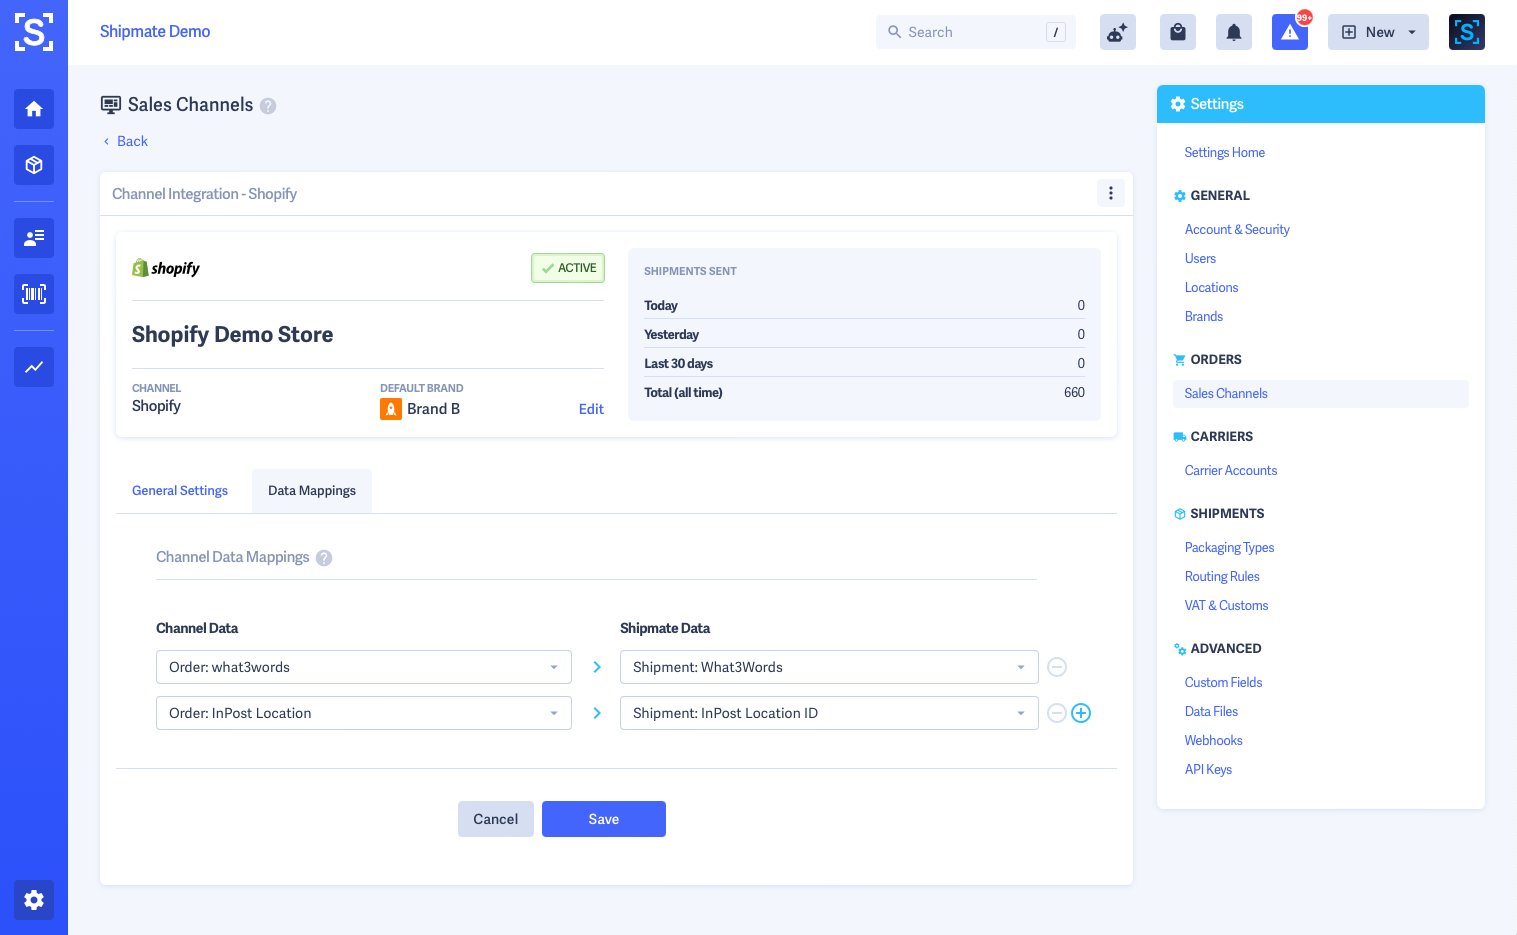
As standard, Shipmate will map most data required to ship a simple order from Shopify, however you may have further requirements to bring data captured on your store over to Shipmate for use with Routing Rules, or Carrier Data Mappings. This can be achieved using the Data Mappings facility.
Examples of data you might wish to map over from Shopify could include:
- Parcel Shop / Locker Locations – if selected as part of your checkout flow and stored as a custom field or particular address line
- Specified Service – if your customer has selected a particular delivery service they wish to use, or time slot
- ///what.3.words – if your customer has provided a what3words location and you want to pass this to the carrier
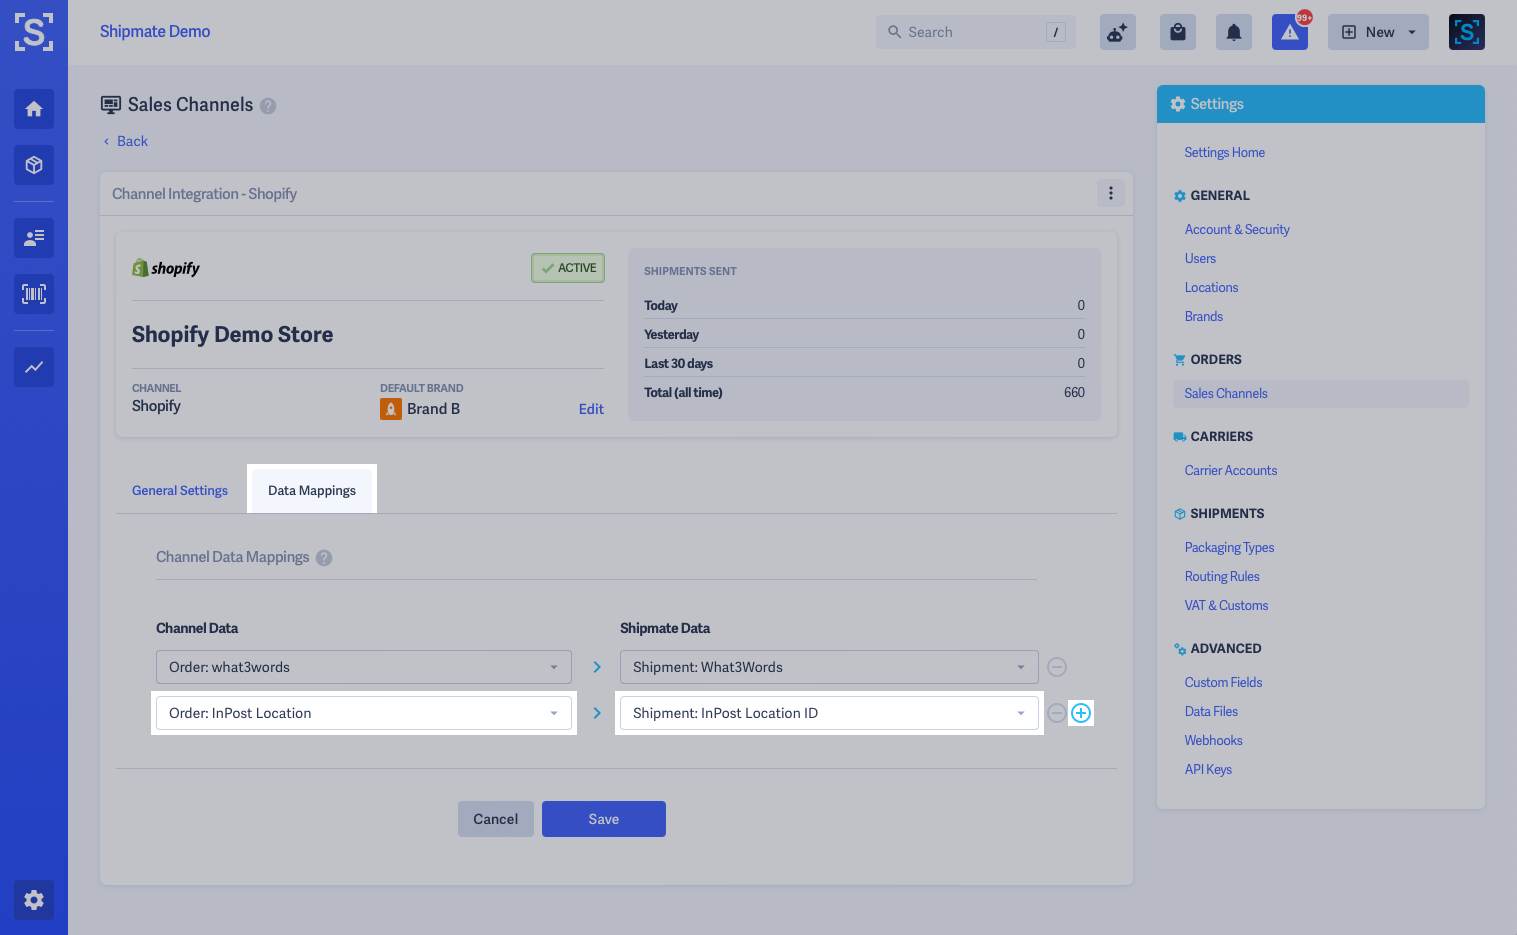
To configure Data Mappings, within the Shopify Channel Settings screen, select the Data Mappings tab.
You can then add multiple mappings by first selecting from the Channel Data menu and mapping that by selecting an option from the Shipmate Data menu. Click the + button to add more mappings. You may need to set up Custom Fields on your Shipmate account first if you need to store additional data Shipmate does not support as standard.
Once you have finished configuring your Data Mappings, click ‘Save’. These settings will apply when you next process an order.
Shipmate will then apply values from Shopify to the corresponding location on Shipmate you have selected, whenever that data is present on an order.
Shipmate Desktop App
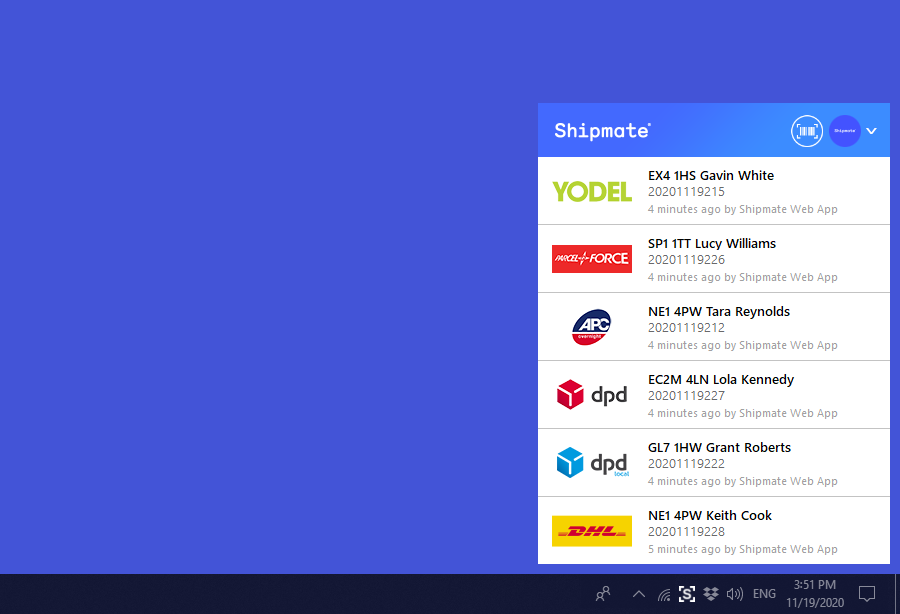
In order to print shipping labels directly using Shipmate with Shopify, you must download the Shipmate Desktop App and configure the app to use your label printer.
You can find out more about installing and configuring the Shipmate Desktop App for Windows or macOS in these user guides.
Removing Shopify
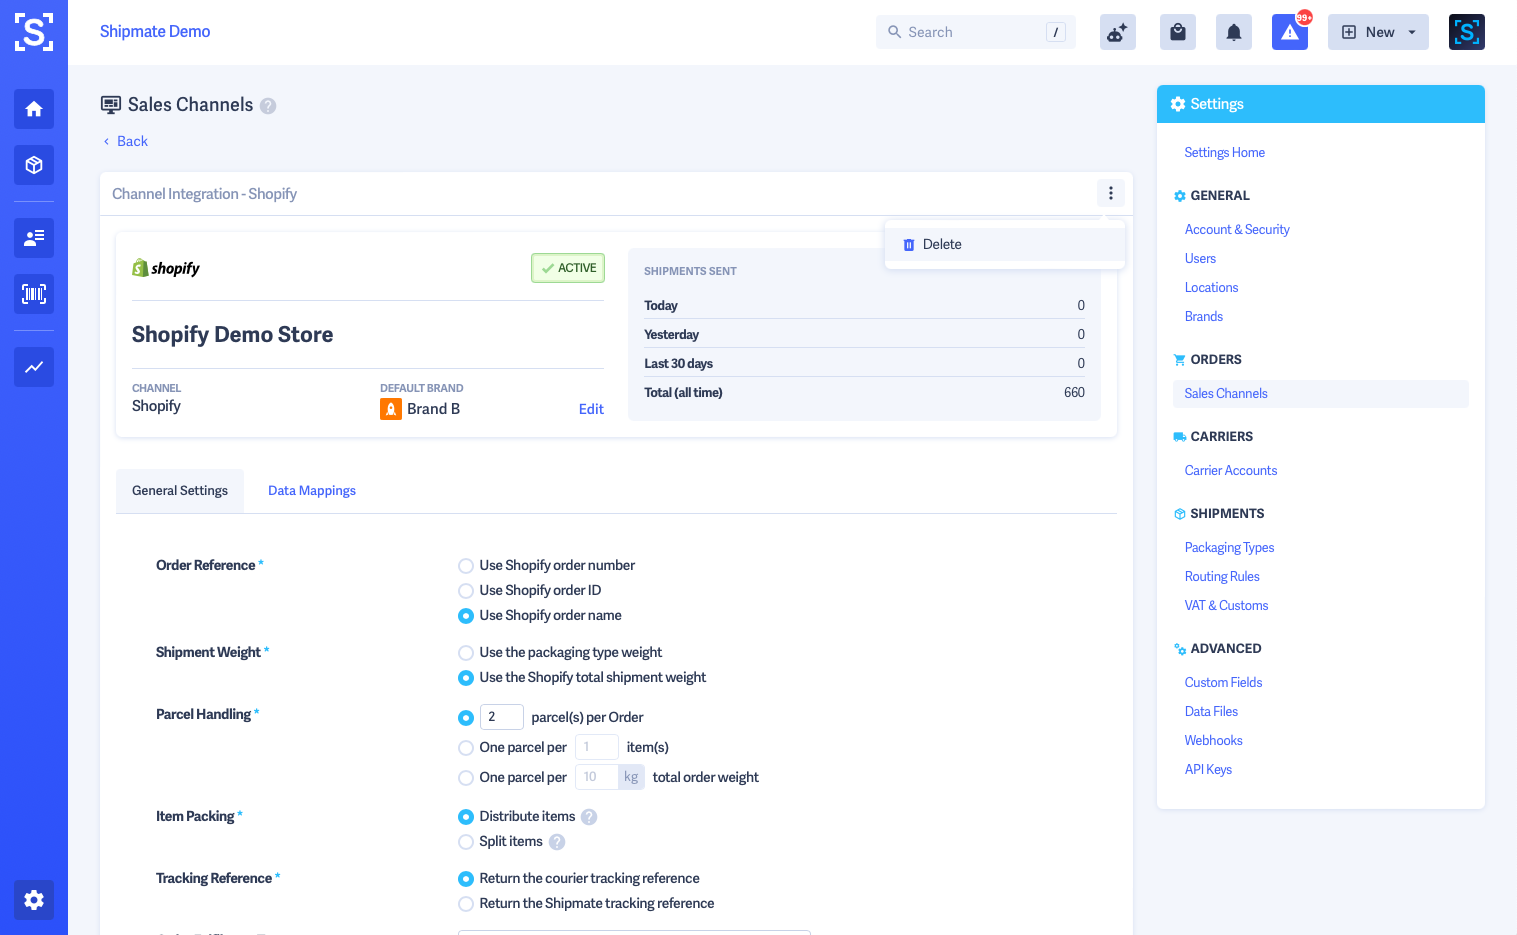
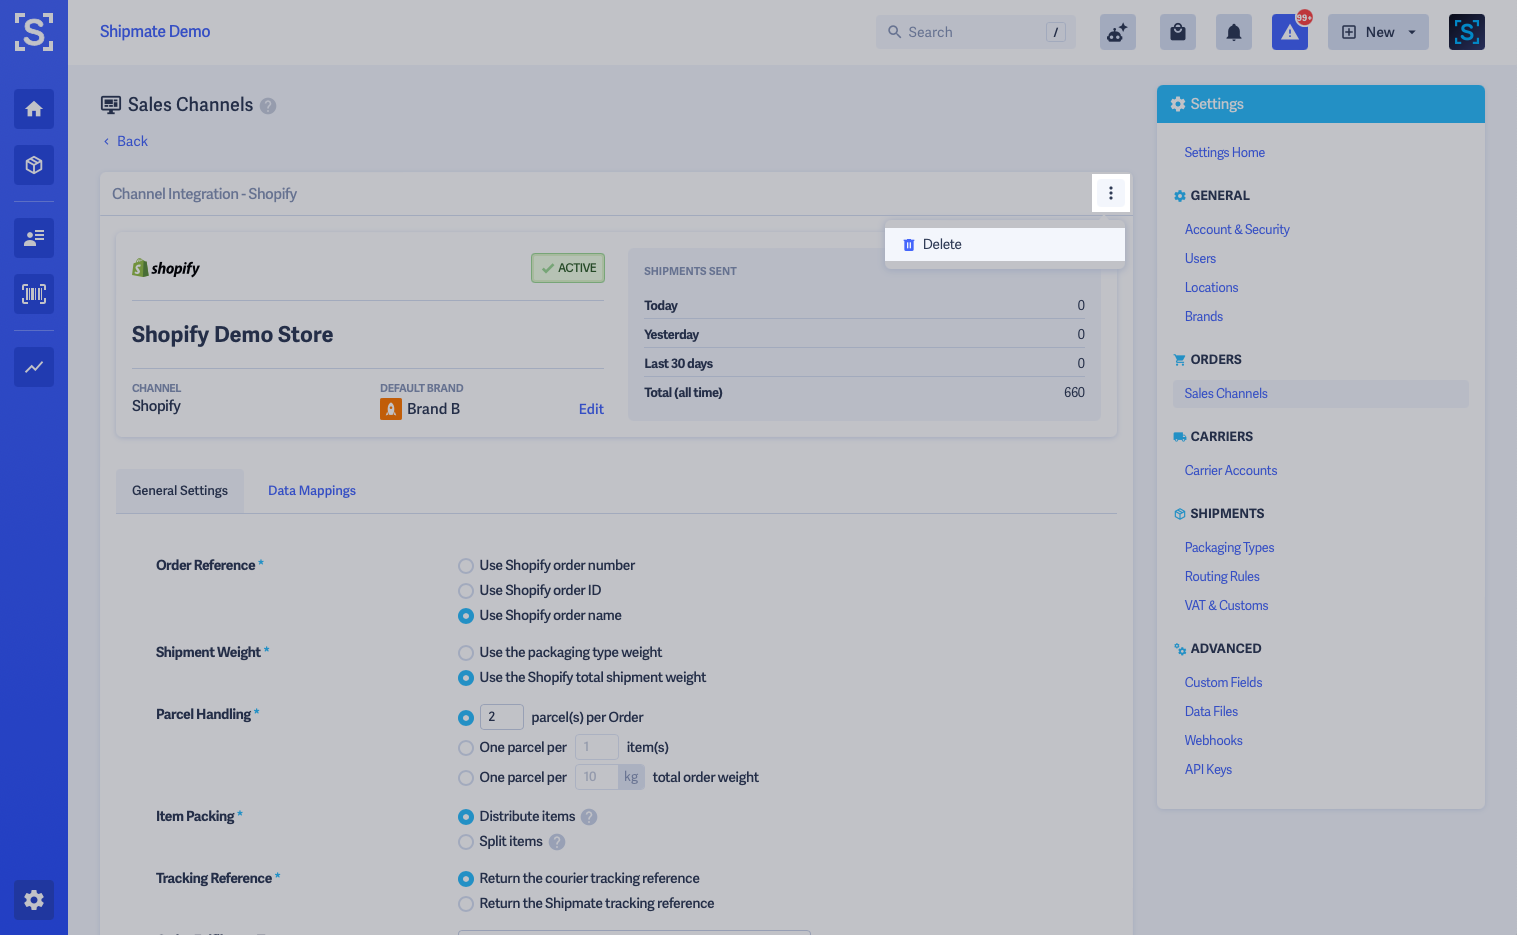
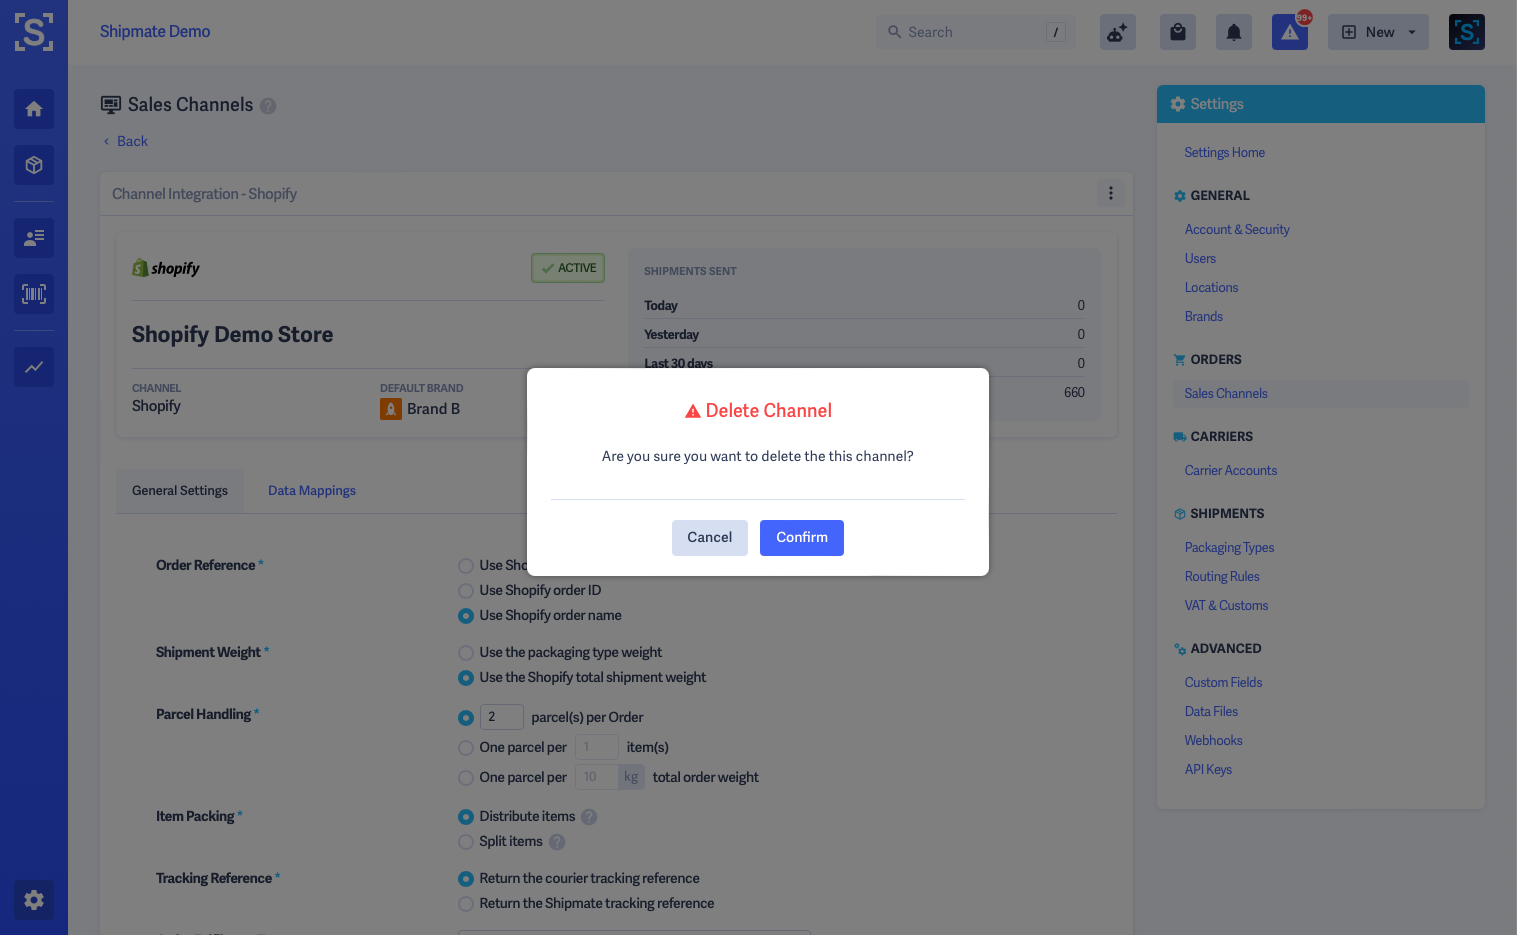
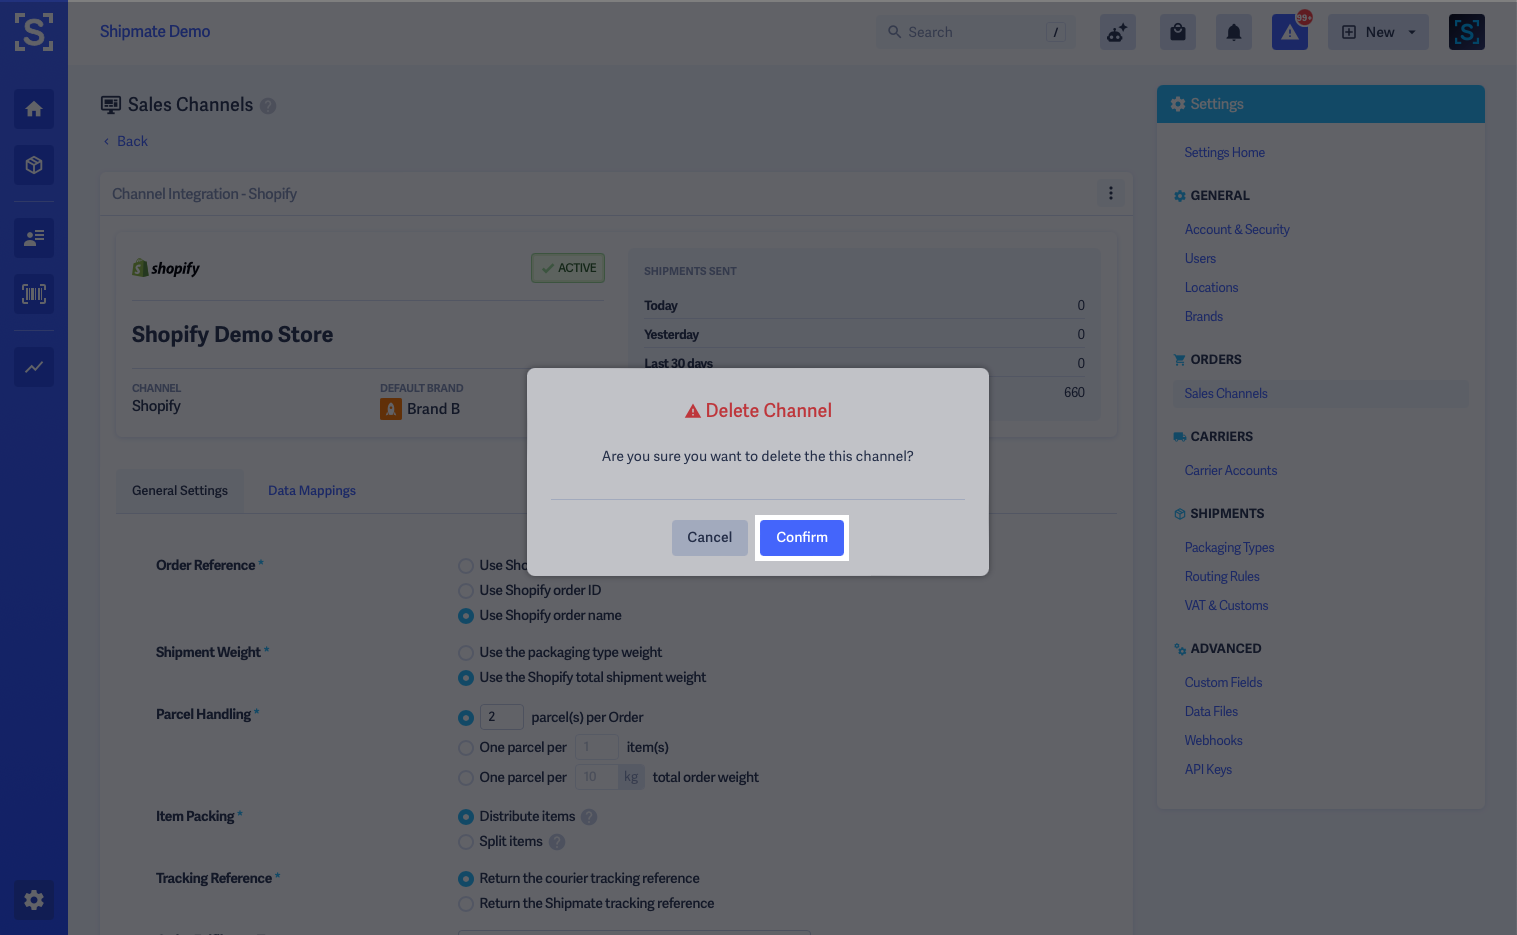
If you no longer require Shopify on your Shipmate account, you can delete the channel by clicking the vertical ellipsis ⋮ more options button from the Shopify Channel settings page and selecting Delete. A pop-up dialogue box will ask you to confirm whether you wish to delete the channel.
Confirm you wish to remove the channel and it will be disconnected from your Shipmate account. You will then be returned to the Channels page, where you can view, enable or re-enable other Channels.
In Use
Introduction
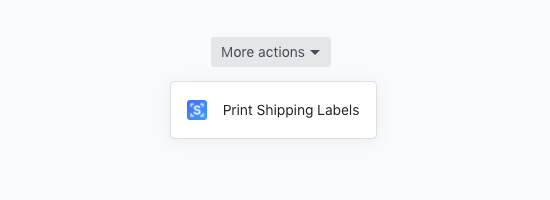
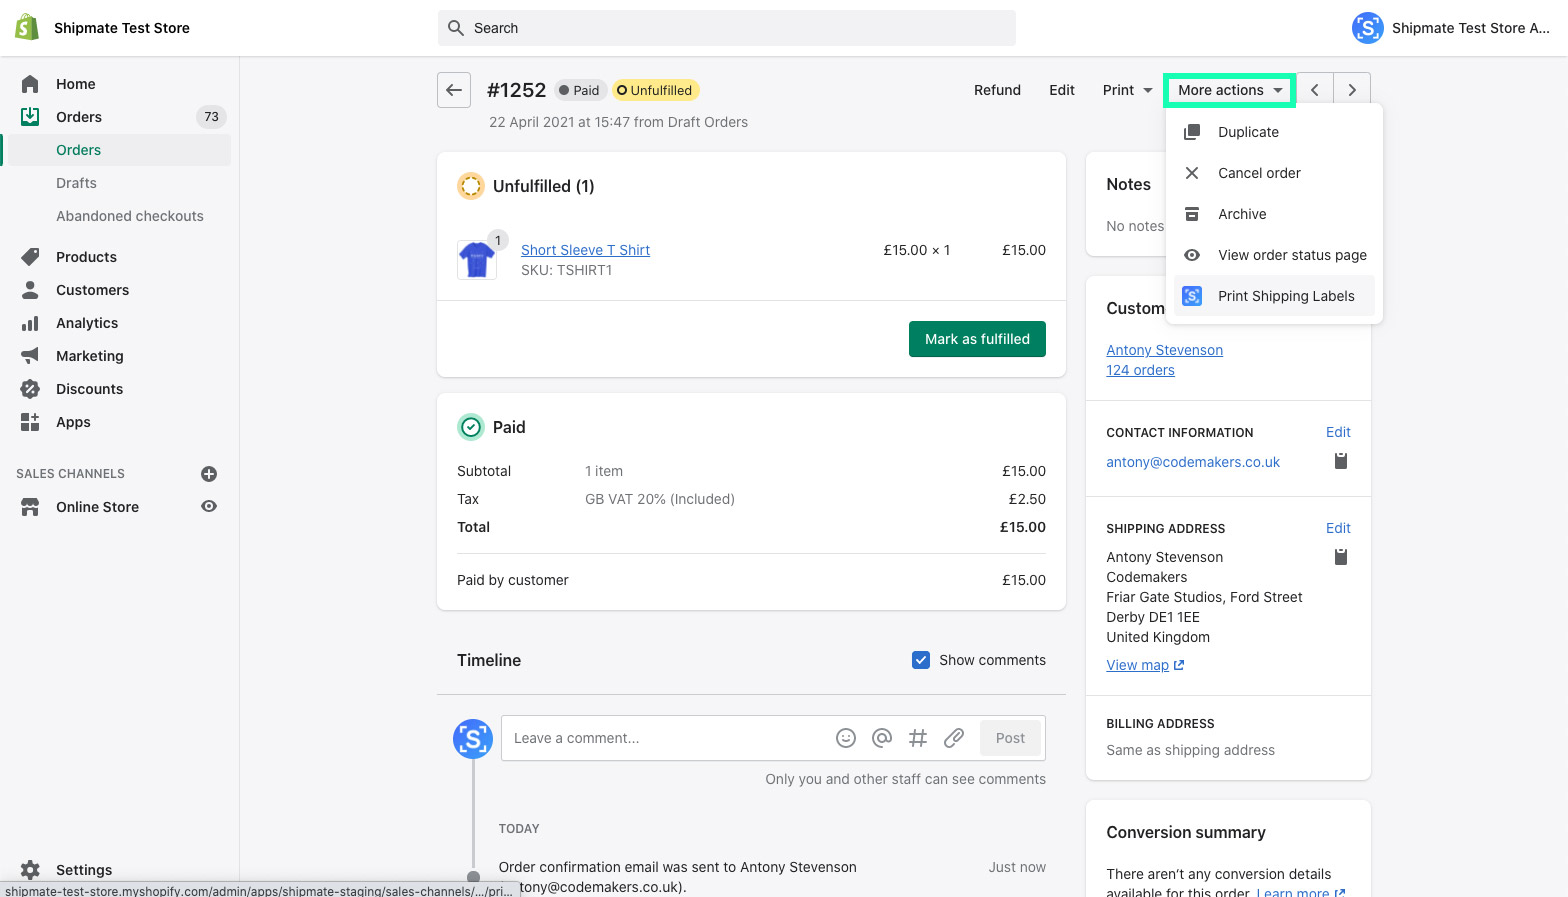
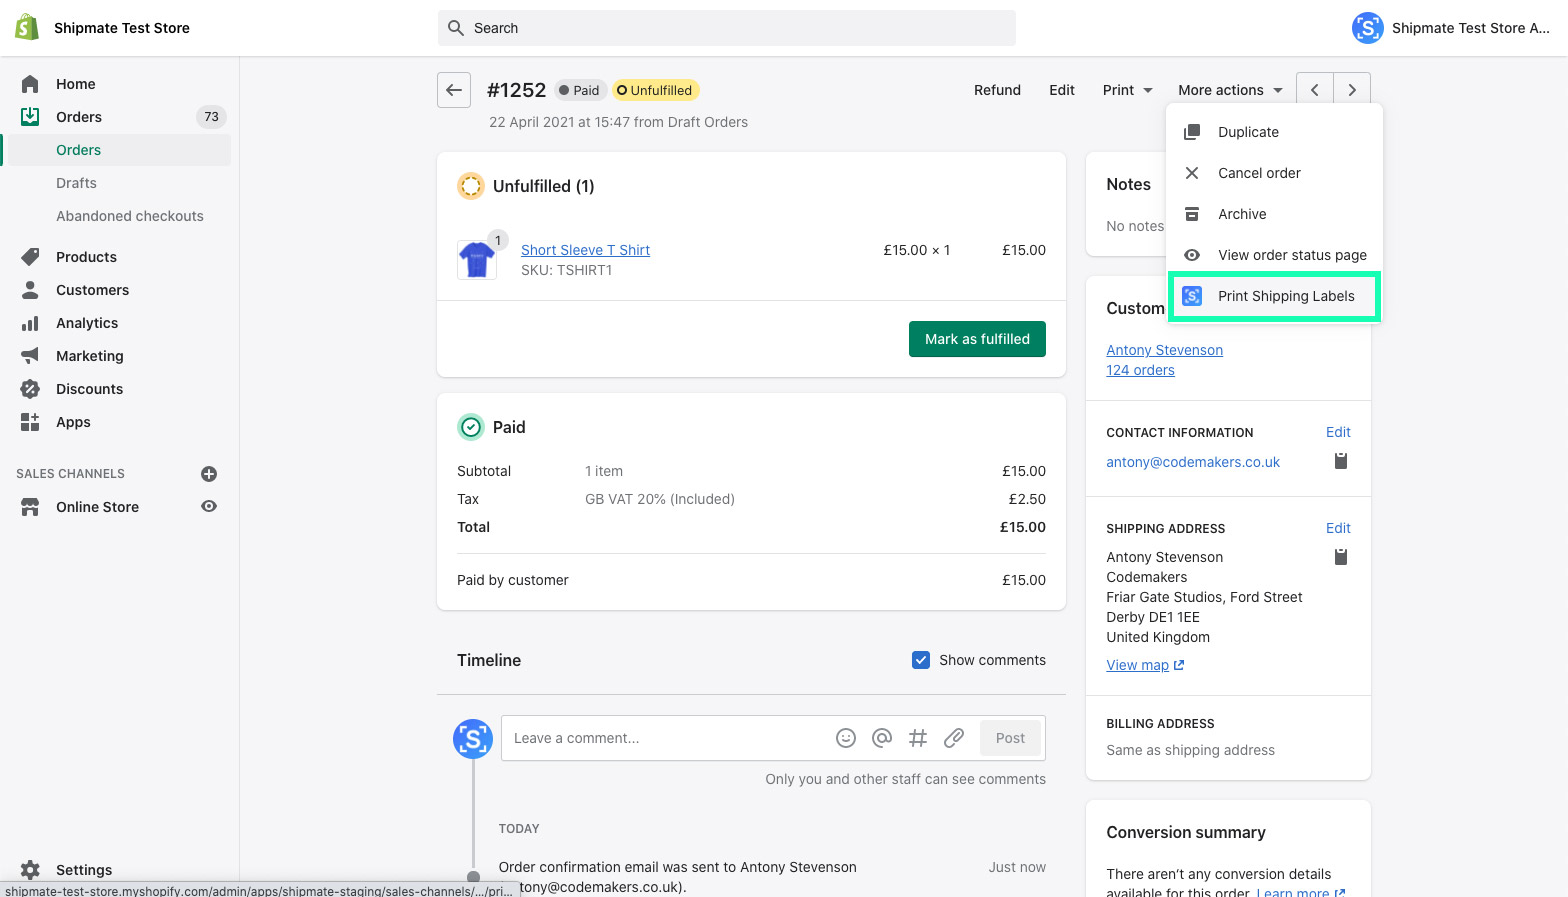
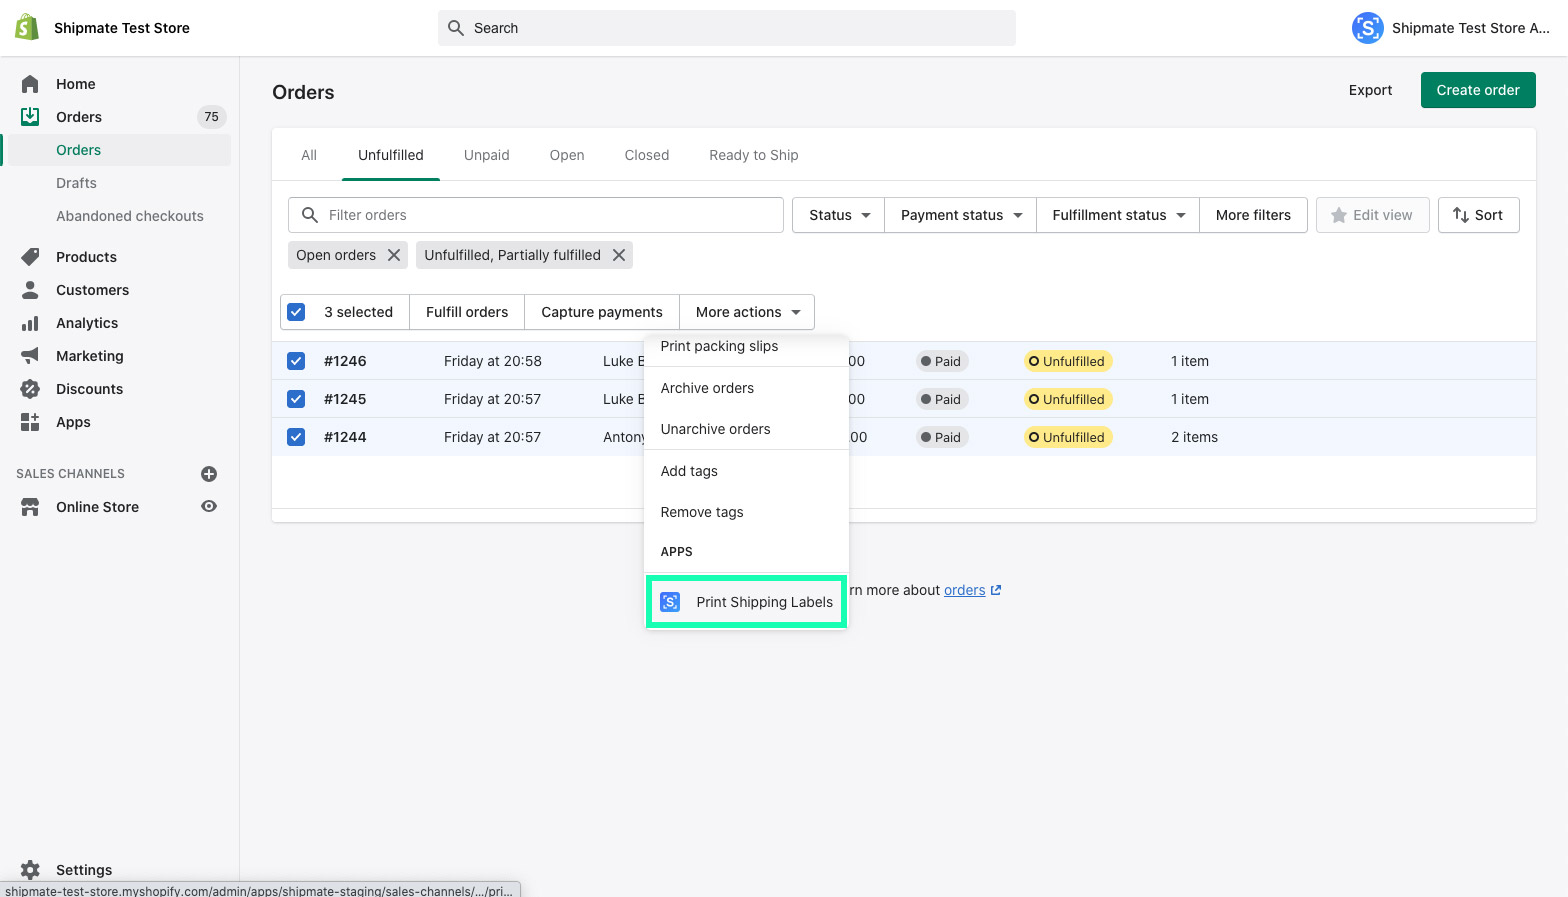
The Shipmate Shopify plugin works by adding a 'Print Shipping Labels' option inside the 'More actions' drop-down menu inside Shopify.
Wherever you see the More actions menu, you can print shipping labels through Shipmate. The selected order(s) will be sent over to Shipmate securely for onward processing in a window within the Shopify admin area.
Shipping a Single Order
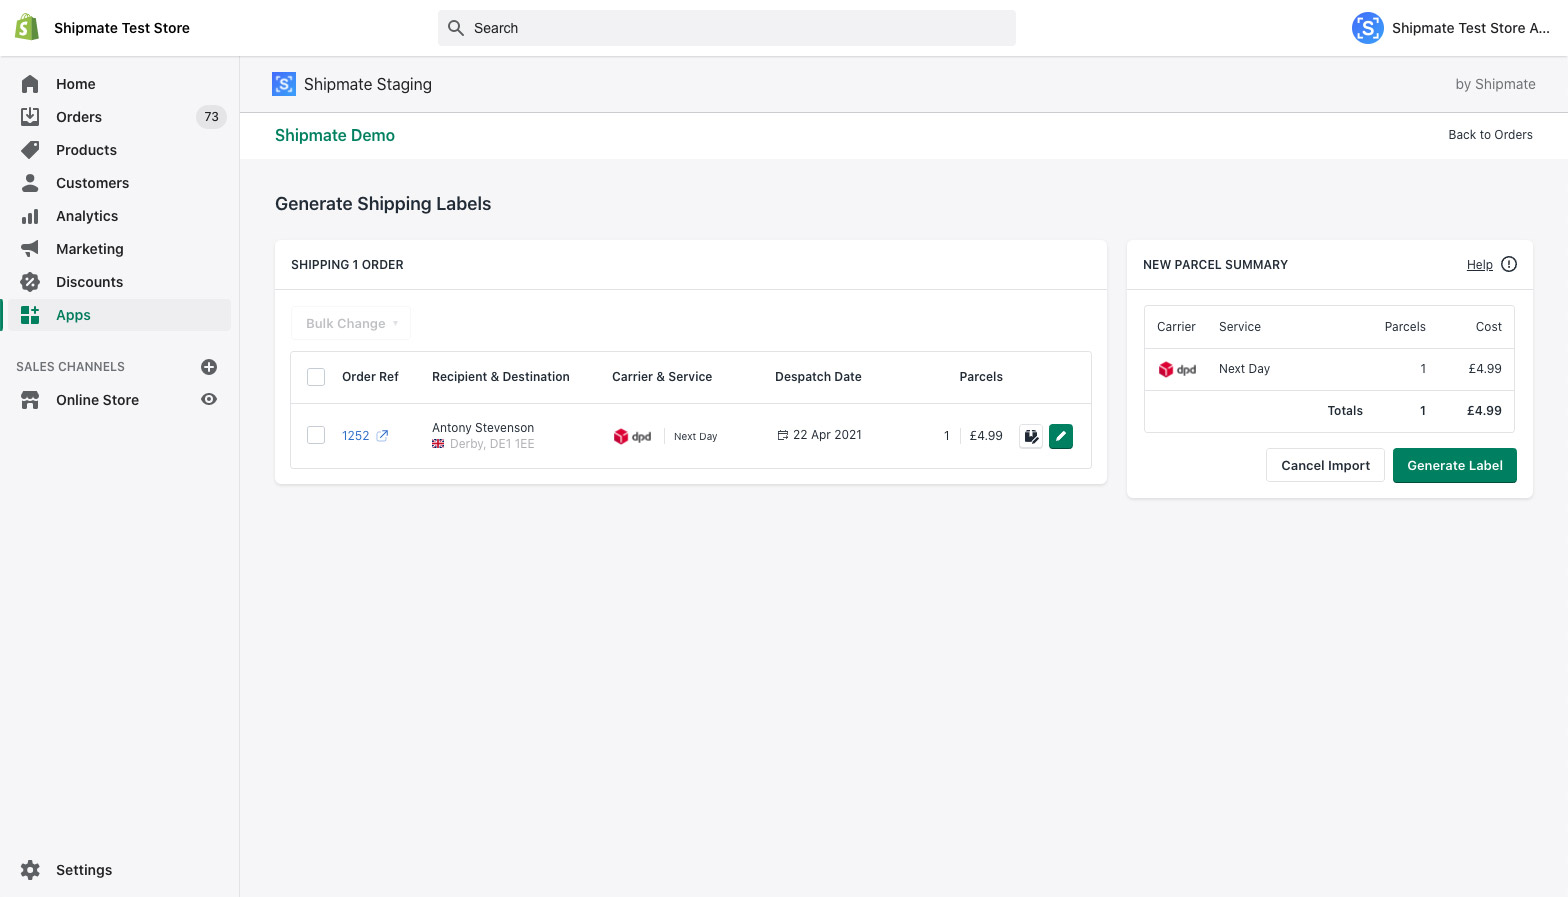
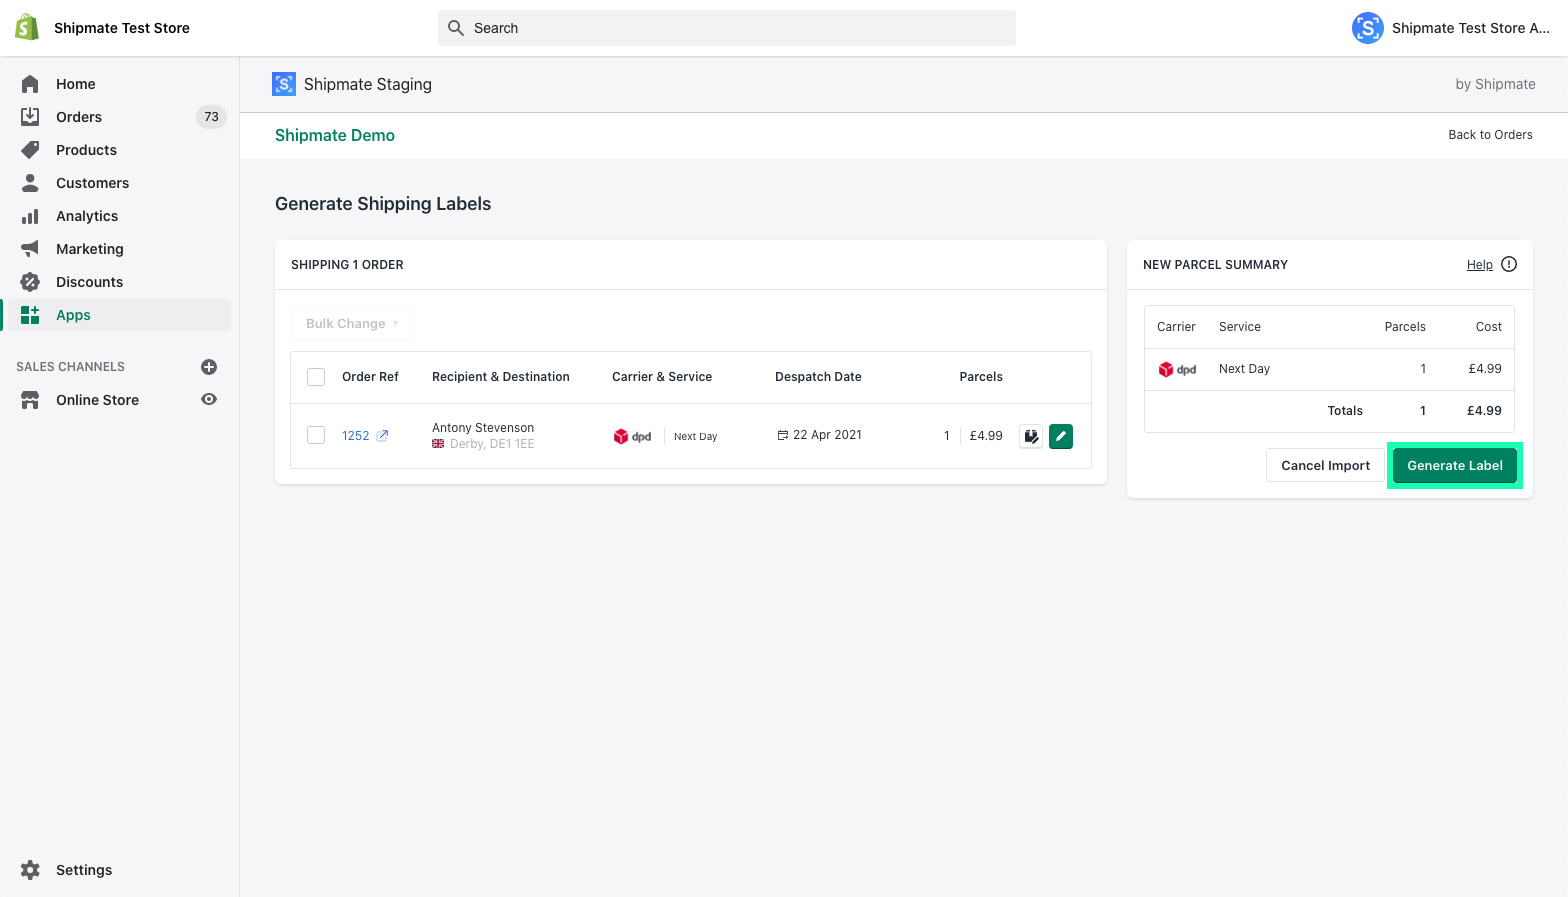
From the Order screen inside Shopify admin, simply click the 'More actions' button then click 'Print Shipping Labels'. A new screen will load showing the Shipmate interface within Shopify, complete with your imported order ready for processing.
Simply confirm the parcels and metrics, carrier and delivery service along with any further consignment details then select ‘Generate Labels’.
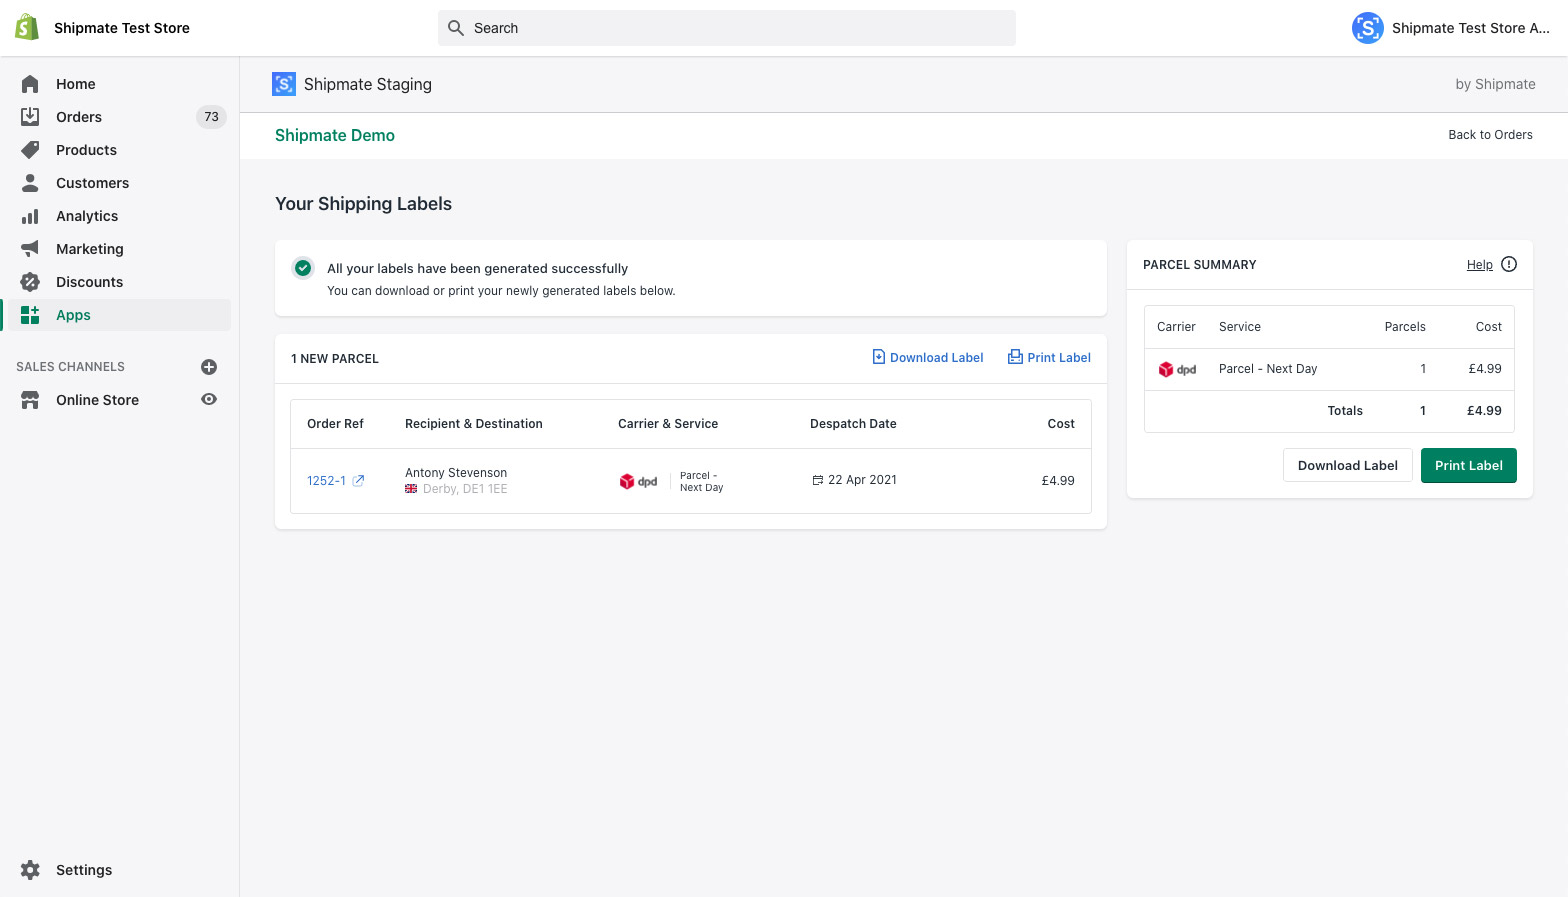
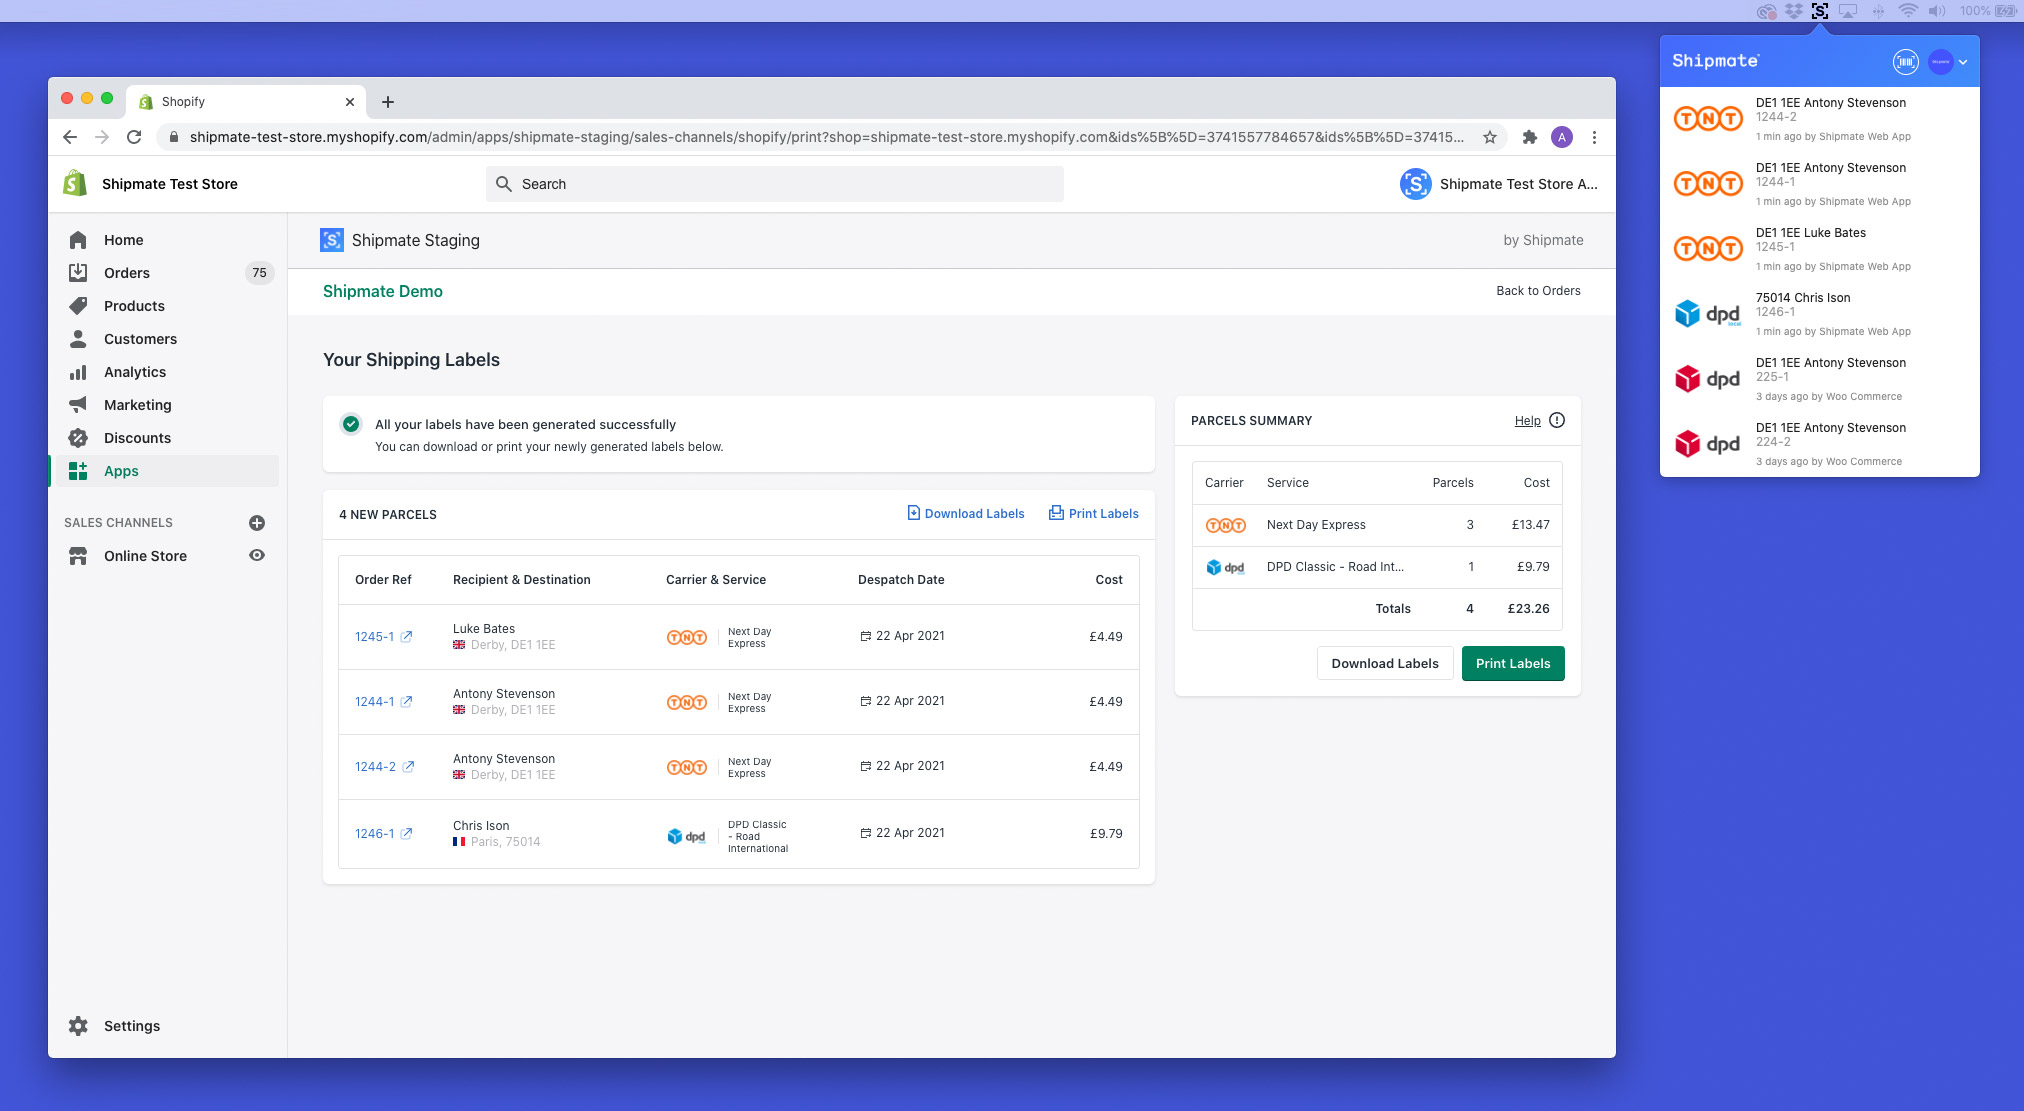
The labels will then be generated and be available for downloading or printing, and the tracking number(s) and tracking URL(s) will have been added to the order in Shopify automatically.
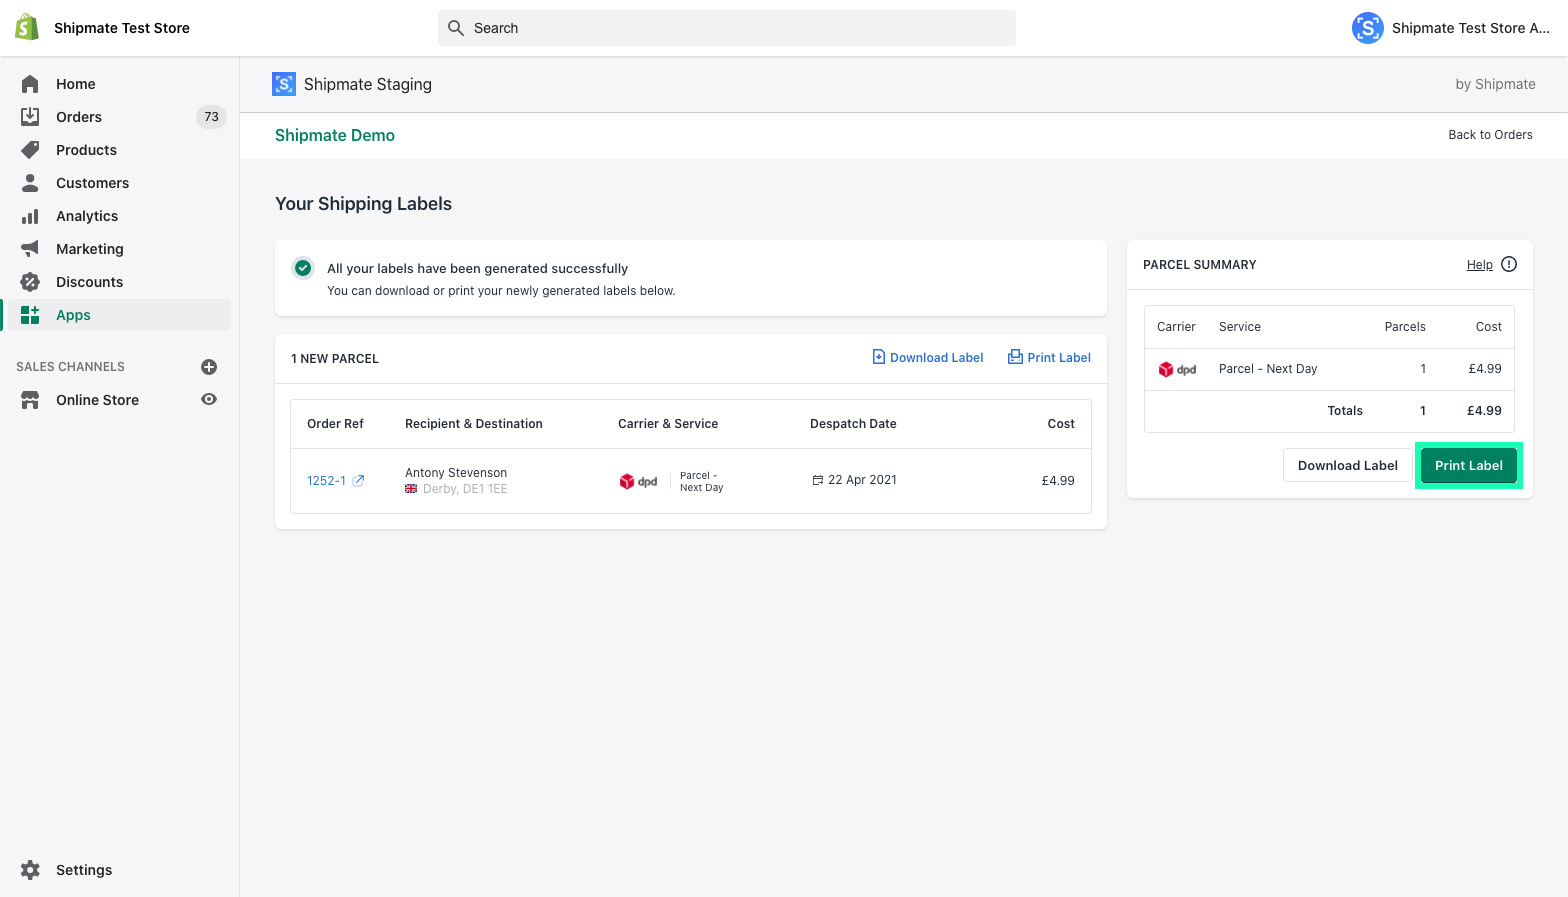
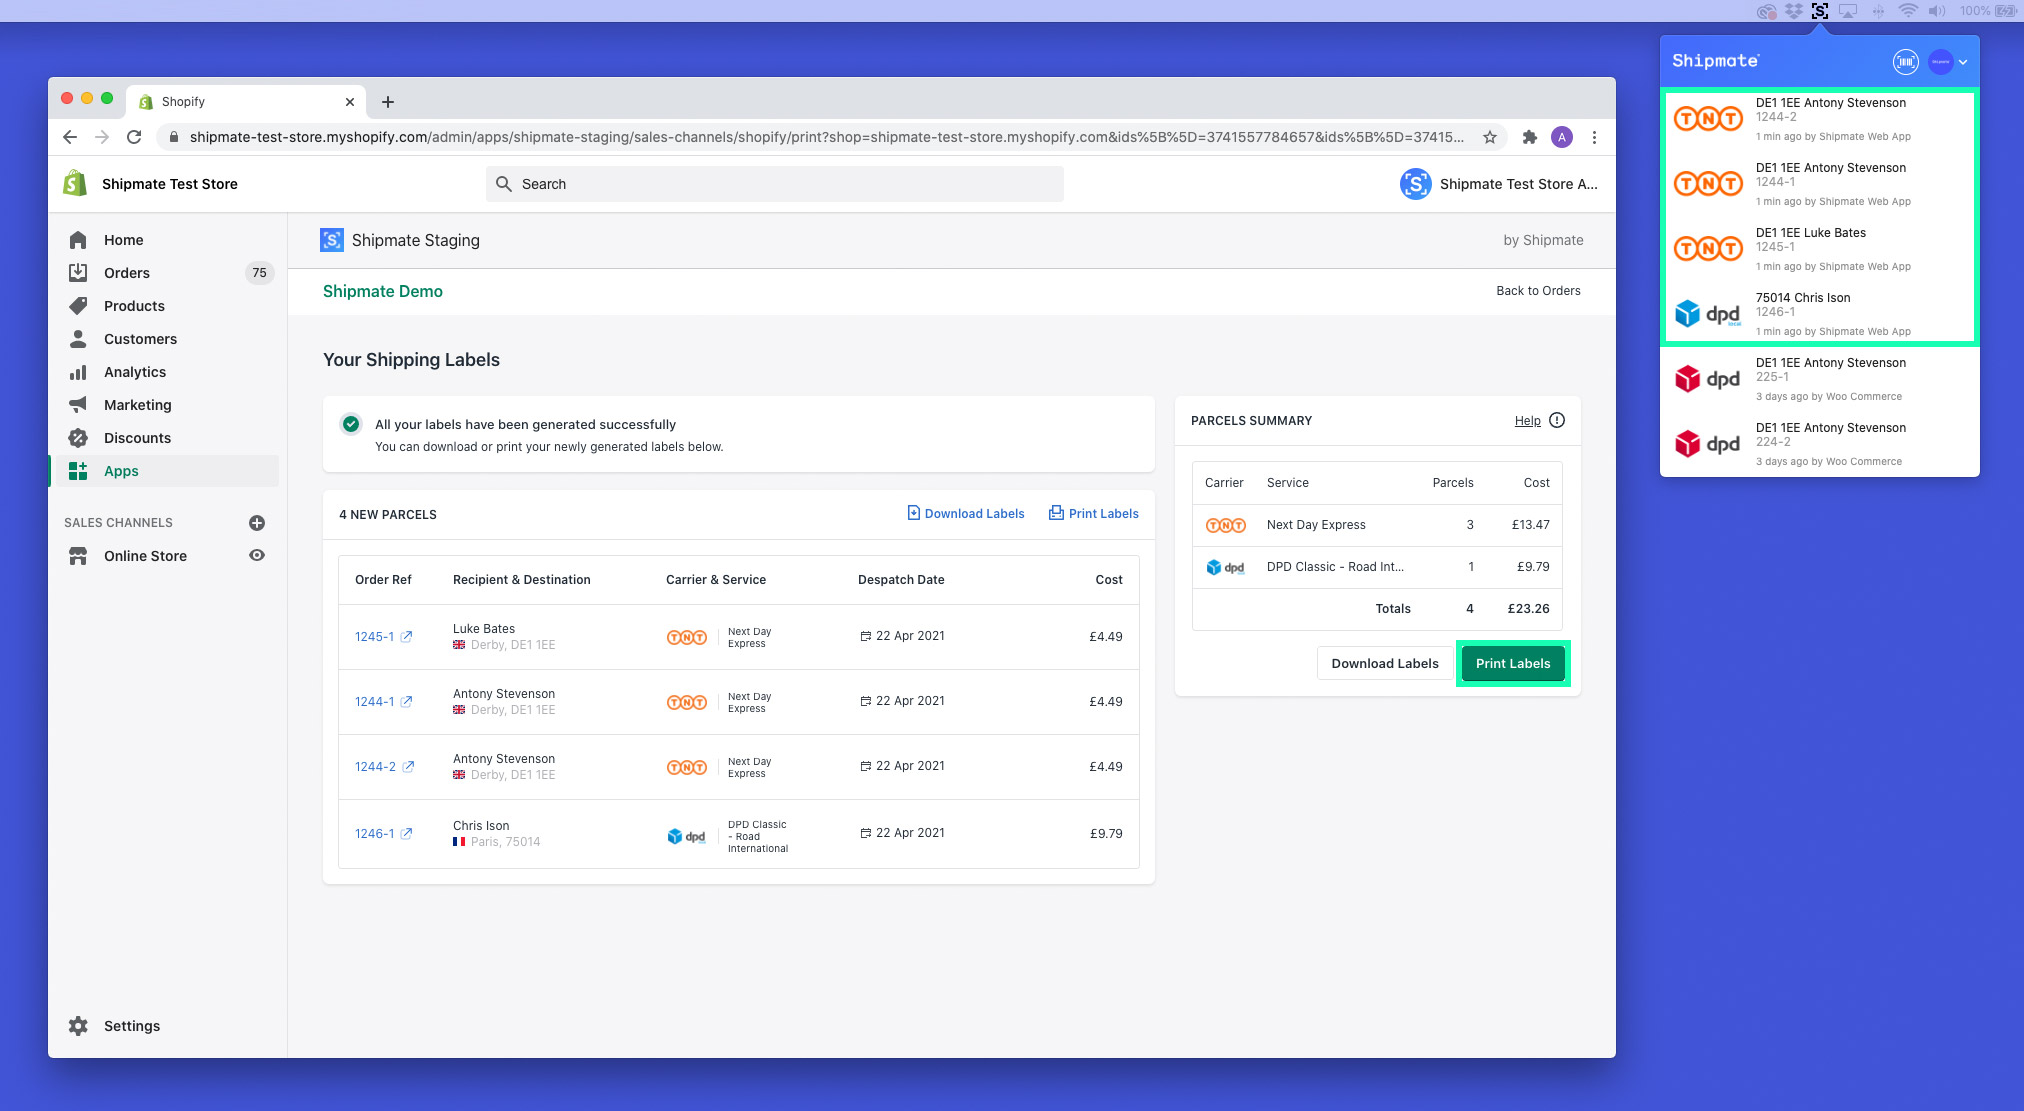
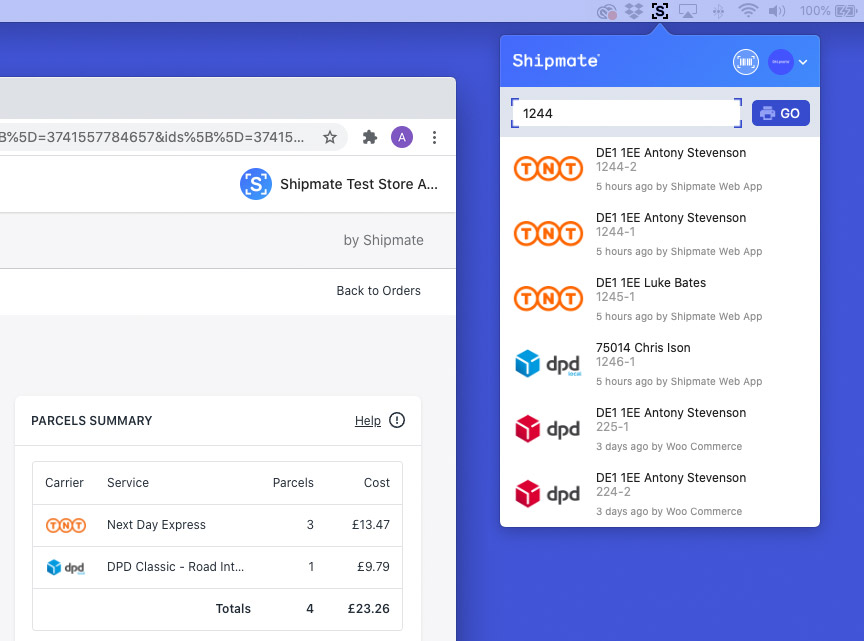
If you are using the Shipmate Desktop App, the 'Print Labels' button will be available and you can click this to send the label(s) straight to your configured printer. Alternatively, you may leave the process at this stage then print the label(s) when you need them by keying or scanning in the order number in the Scan & Print feature on the Shipmate Desktop App.
Shipping Multiple Orders
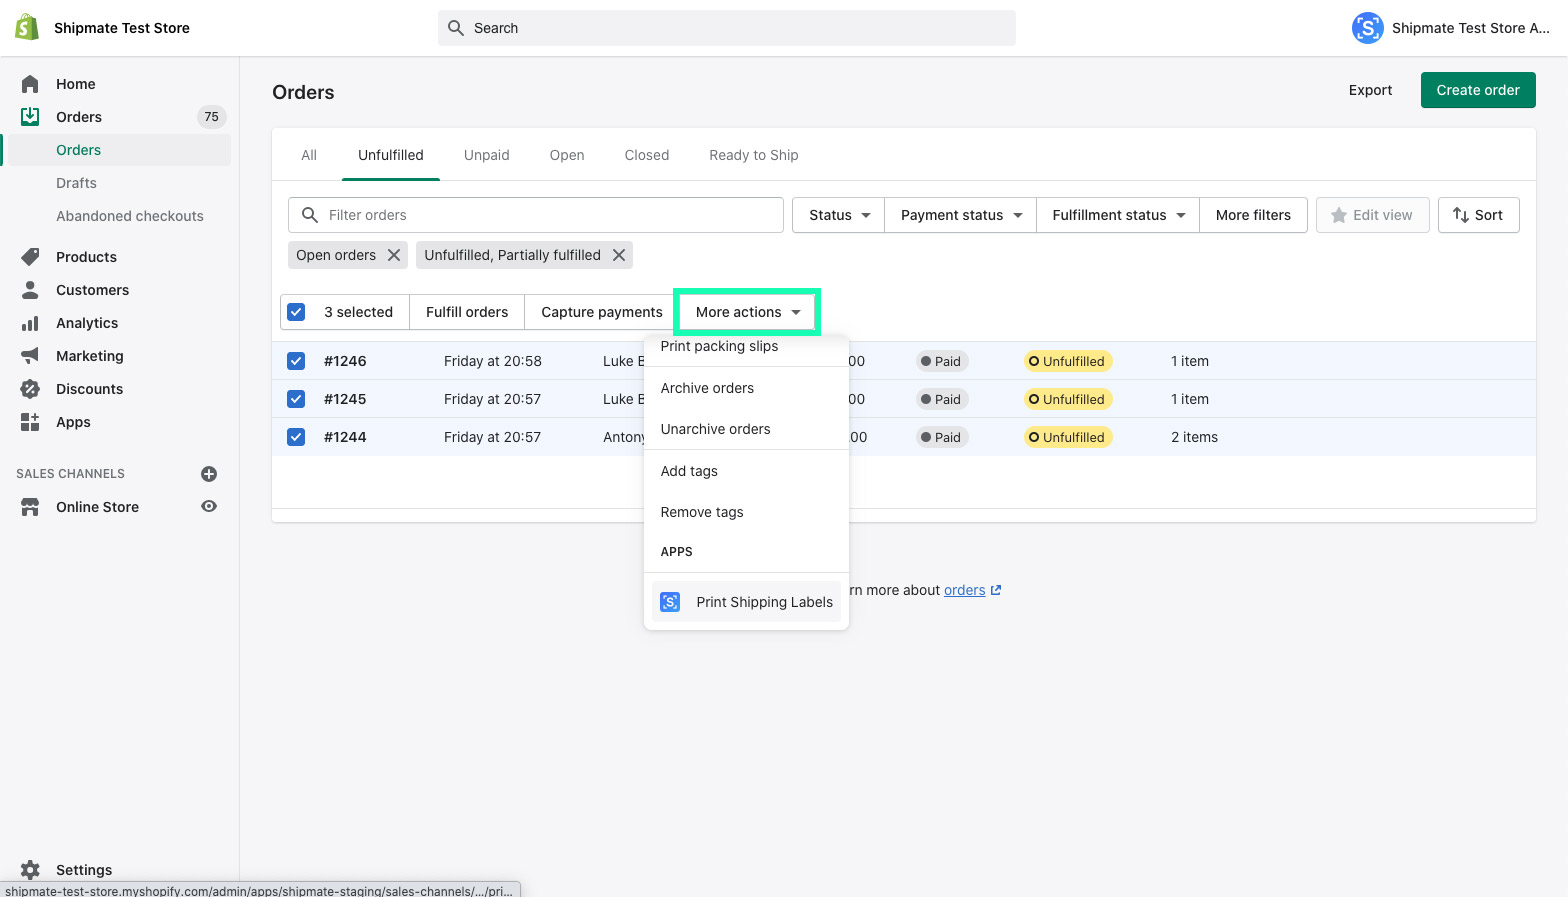
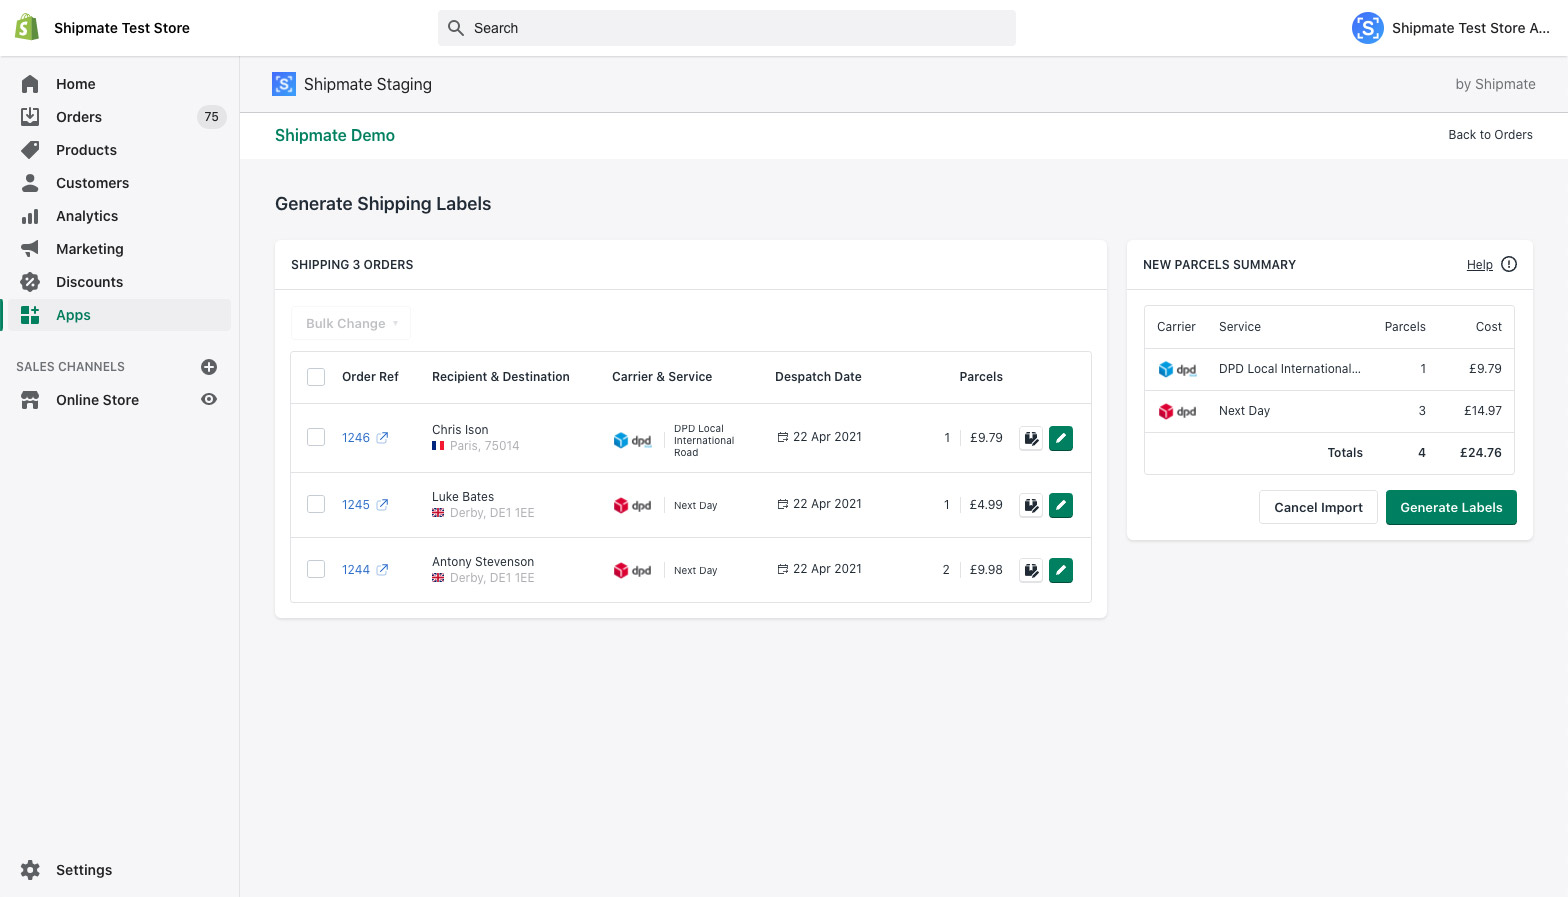
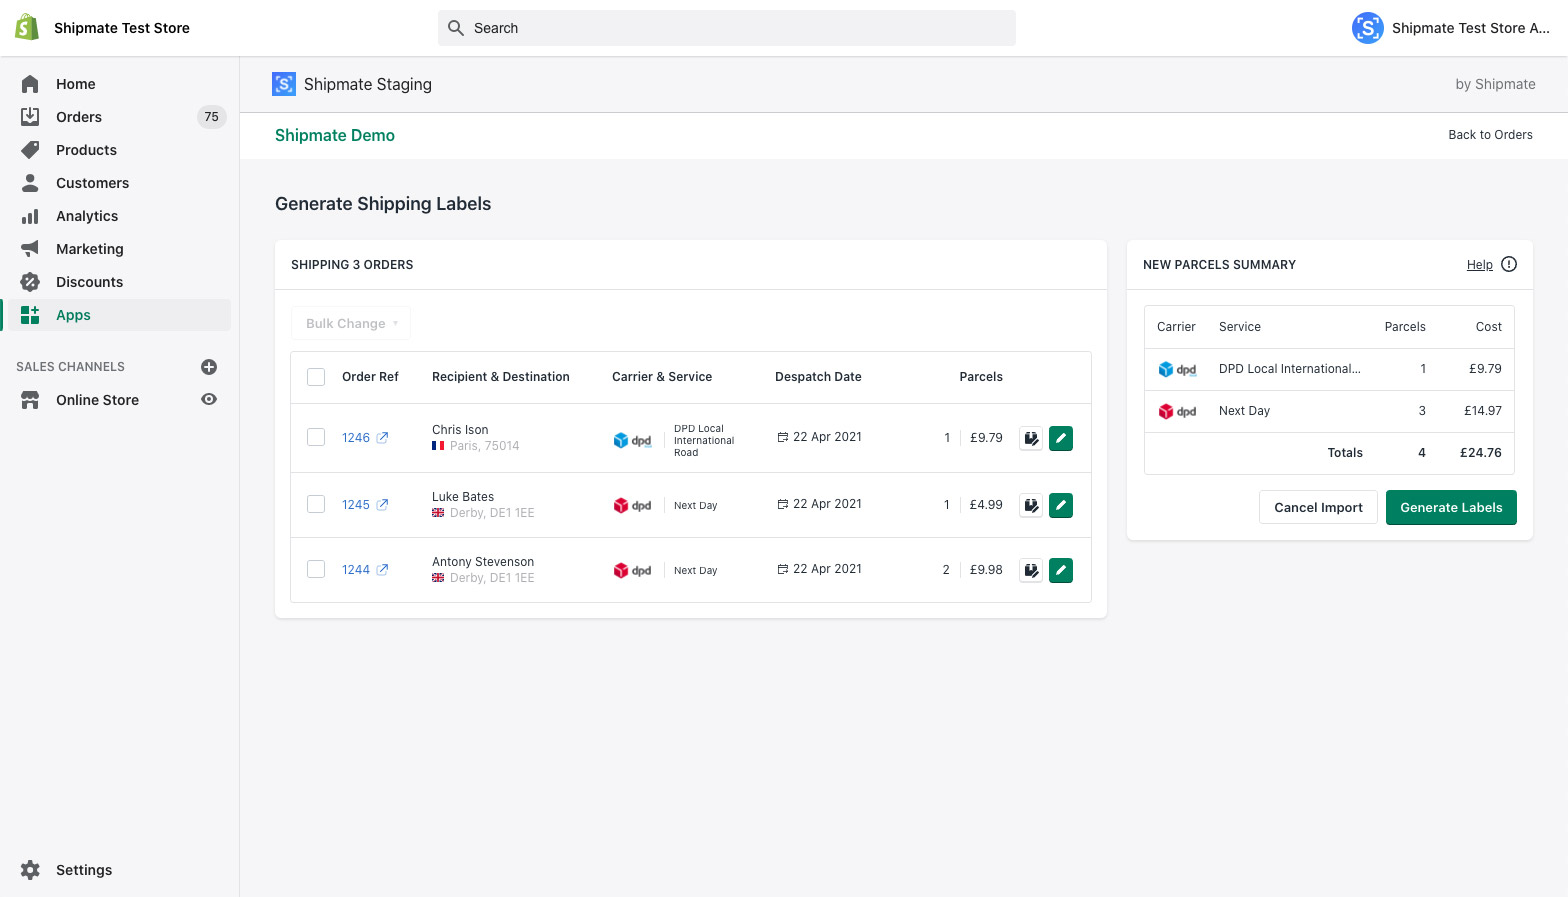
From the Orders screen inside Shopify admin, simply select the orders you wish to fulfil, click the 'More actions' button then click 'Print Shipping Labels'. A new screen will load showing the Shipmate interface within Shopify, complete with your imported orders ready for processing, in the same way as processing a single order.
Bulk Change Operations
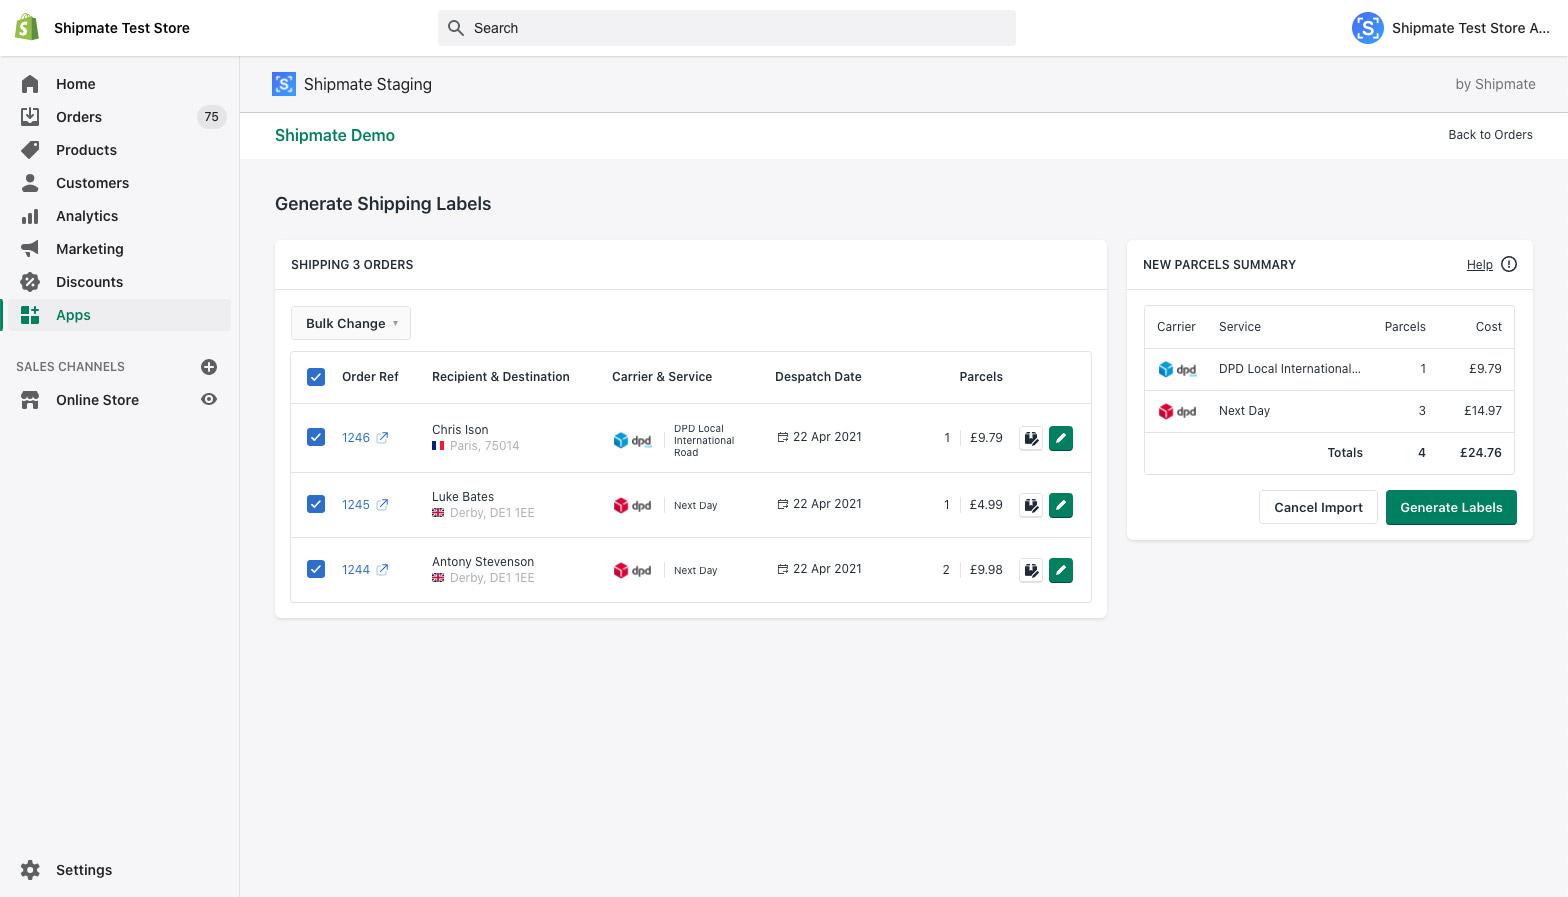
You can easily perform the same operation for multiple orders using the Bulk Change feature.
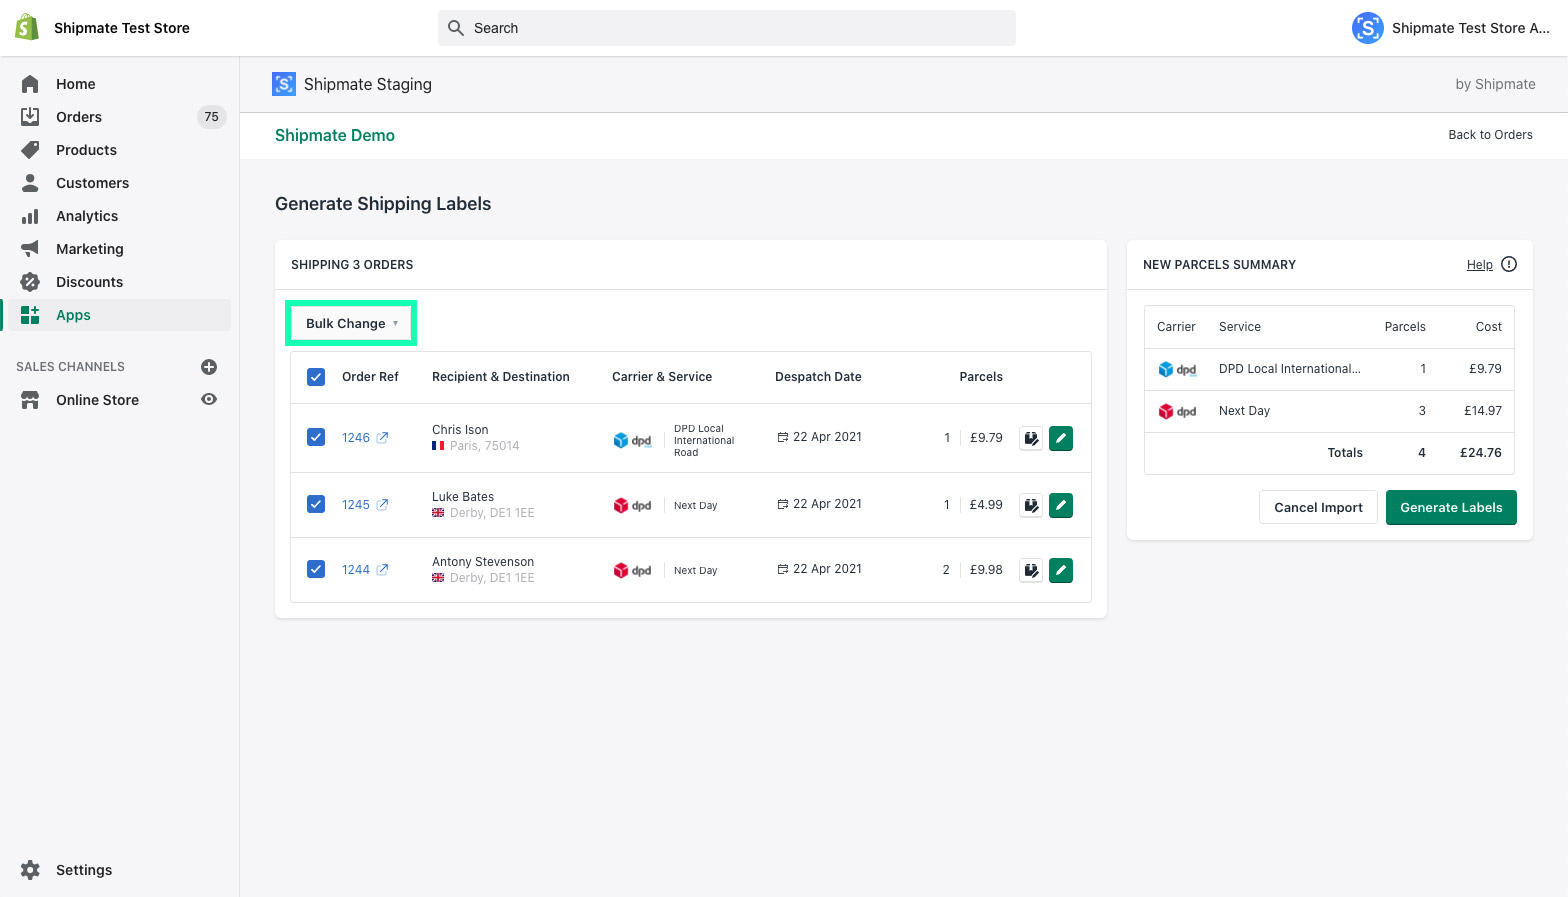
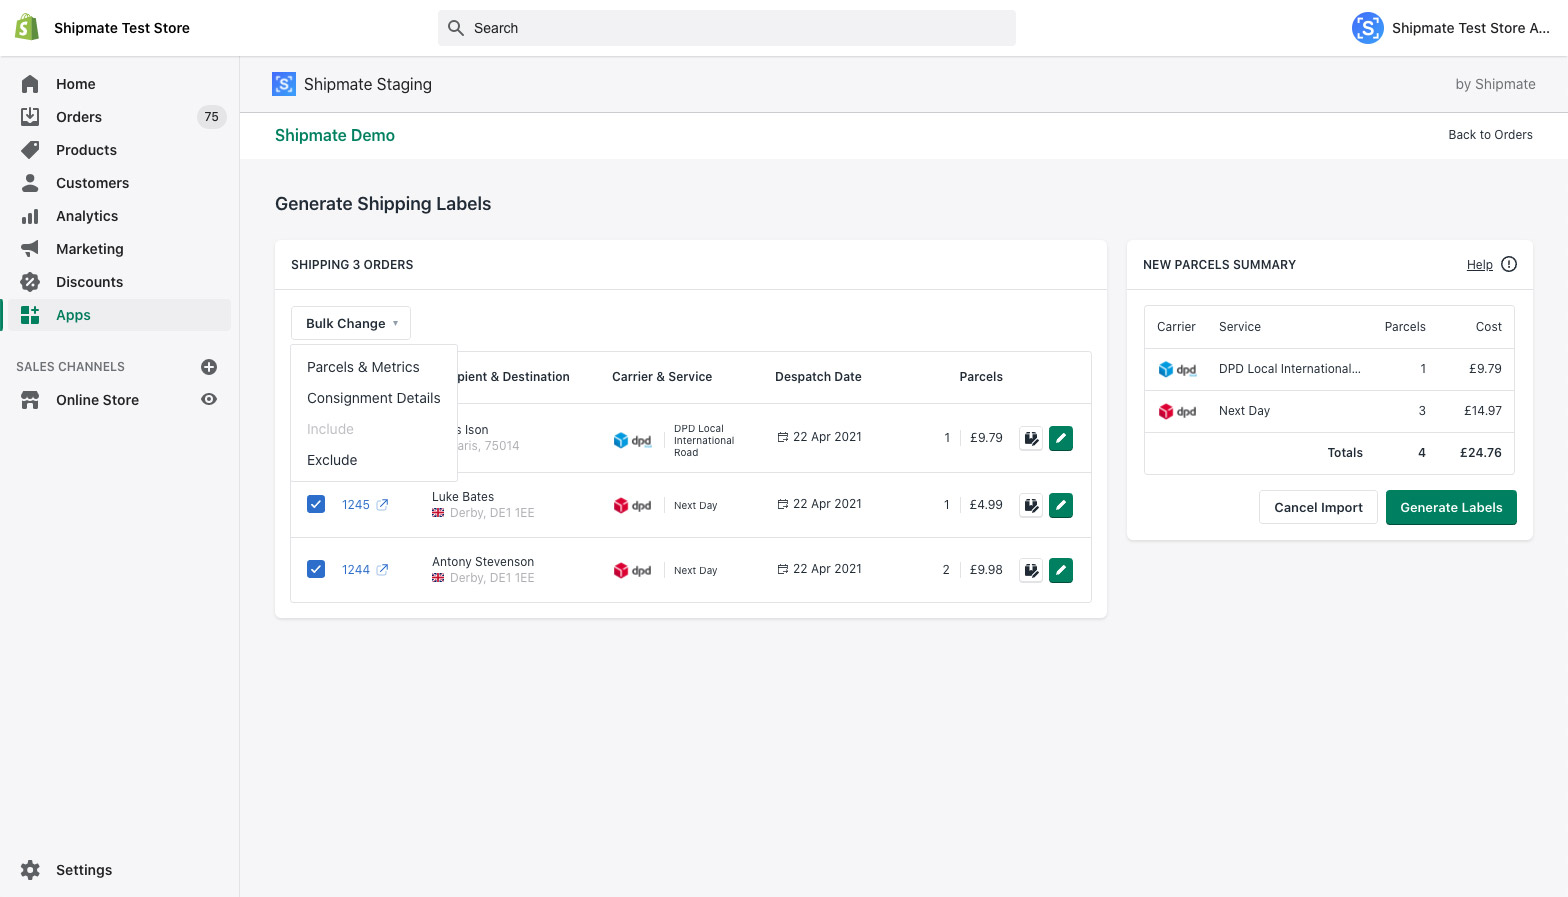
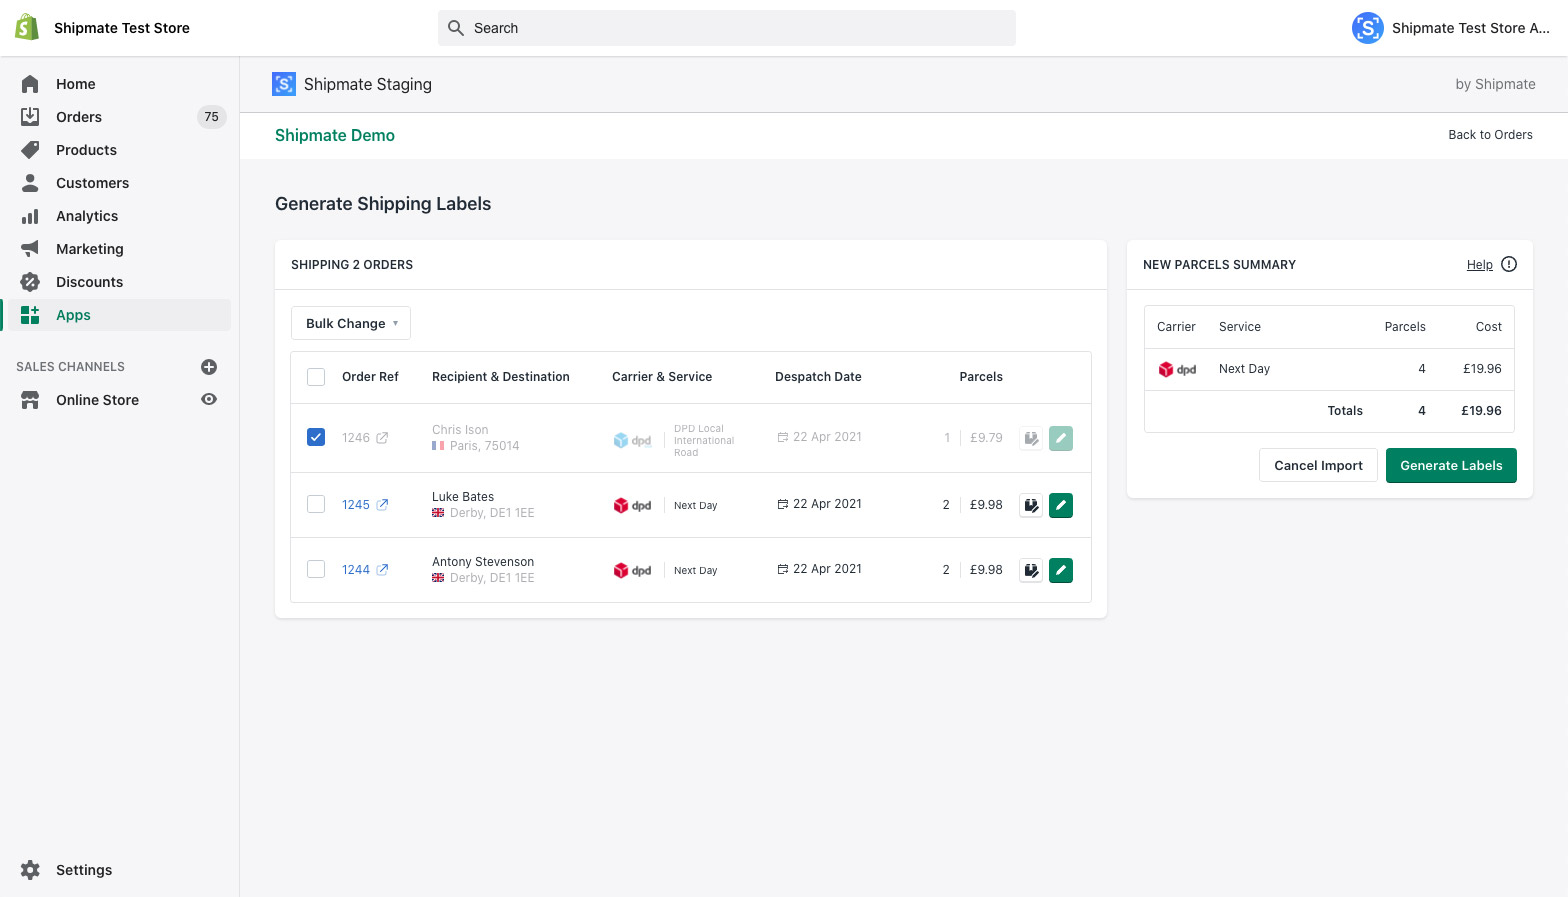
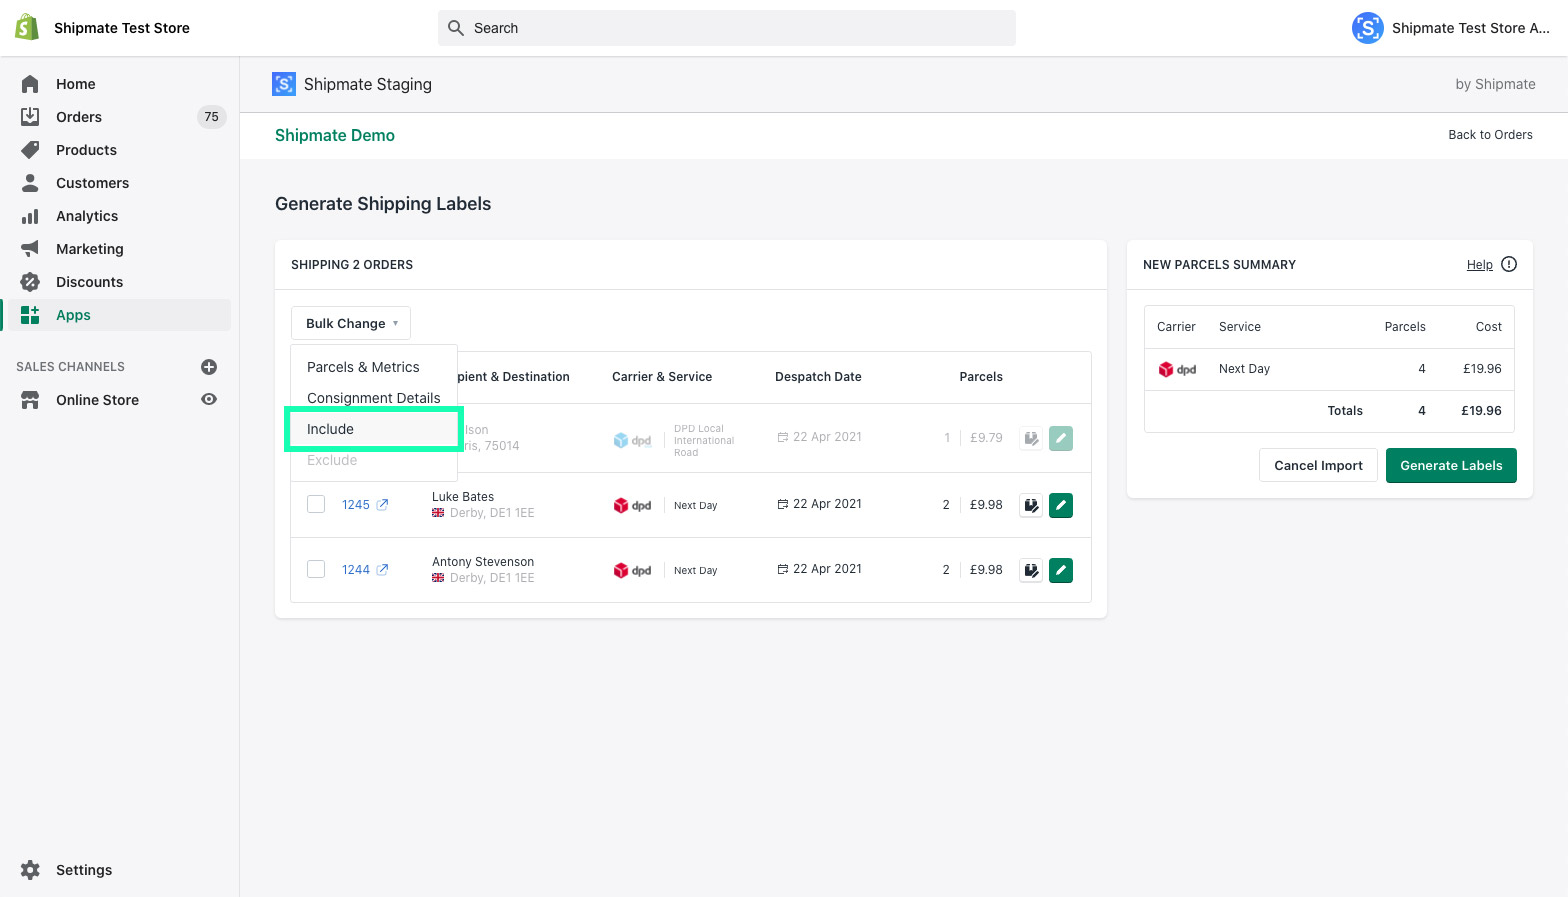
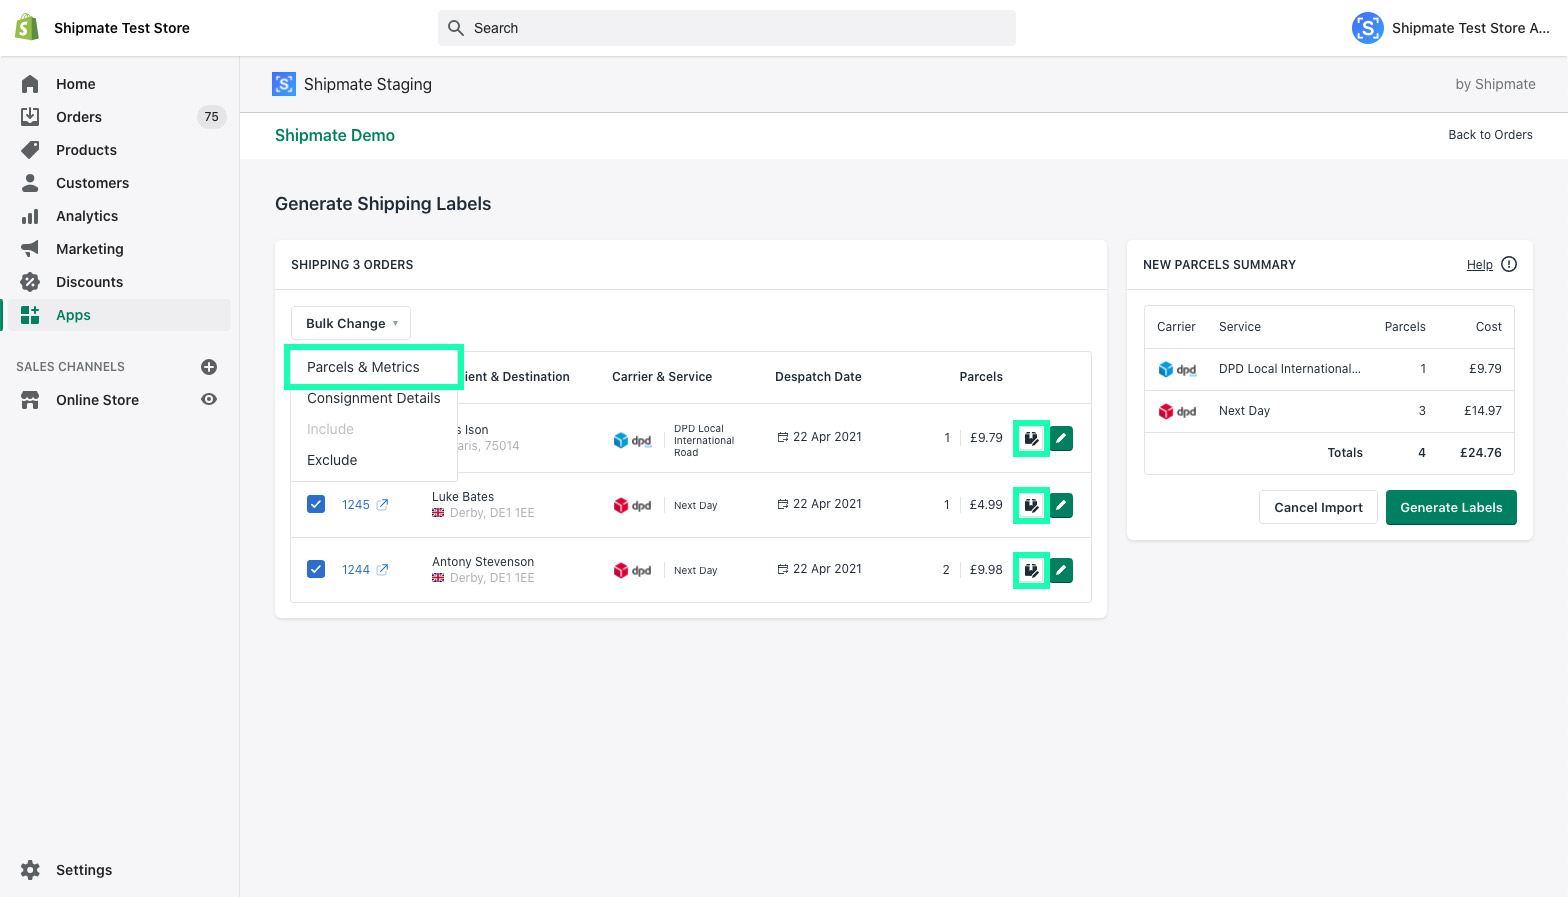
Simply select the orders you wish to apply a change to by clicking the tick-boxes at the beginning of each order row, or use the tick-box in the table heading to select all orders, then click the Bulk Change menu button and select the operation you wish to perform from the drop-down menu.
You can perform each of the following operations in bulk:
- Parcels & Metrics - Updates Number of Parcels and Size & Weight Metrics
- Consignment Details Updates details such as Despatch Date and Delivery Service
- Include Includes selected Orders in Import
- Exclude Excludes selected Orders from Import
Selecting the desired option will perform the operation in bulk for all of your selected orders. Each of the individual operations are described in detail separately in this guide.
Some aspects of features are disabled when performing a bulk action - for instance, it isn't possible to update delivery addresses for multiple orders, as this would likely lead to error. There are also some other preventative measures in place to help avoid making mistakes when applying operations over multiple orders.
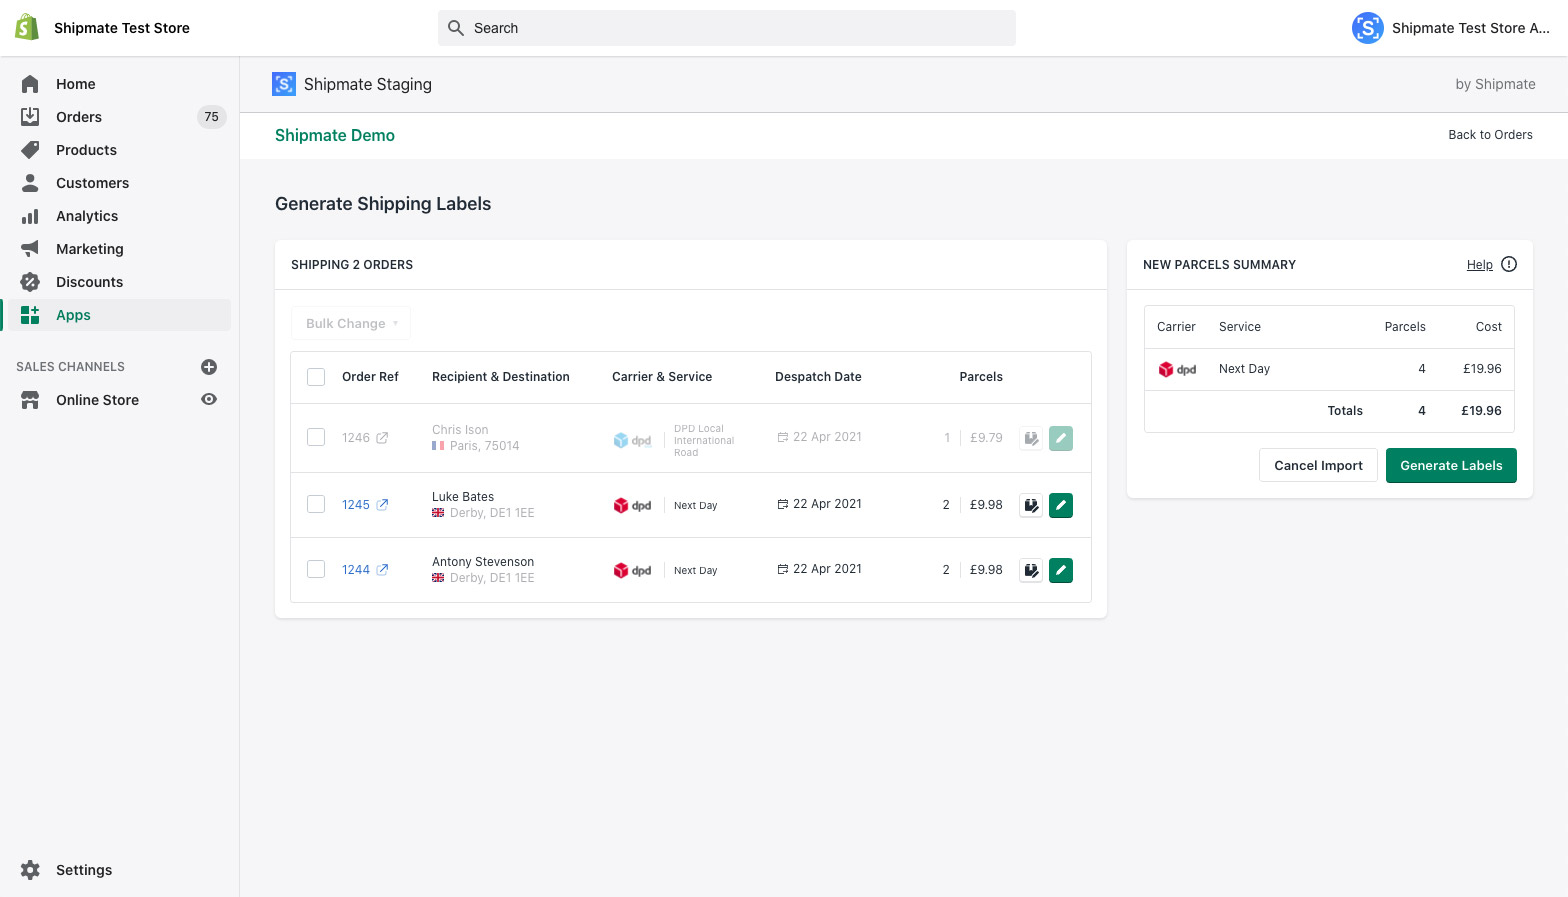
Excluding Orders from Import
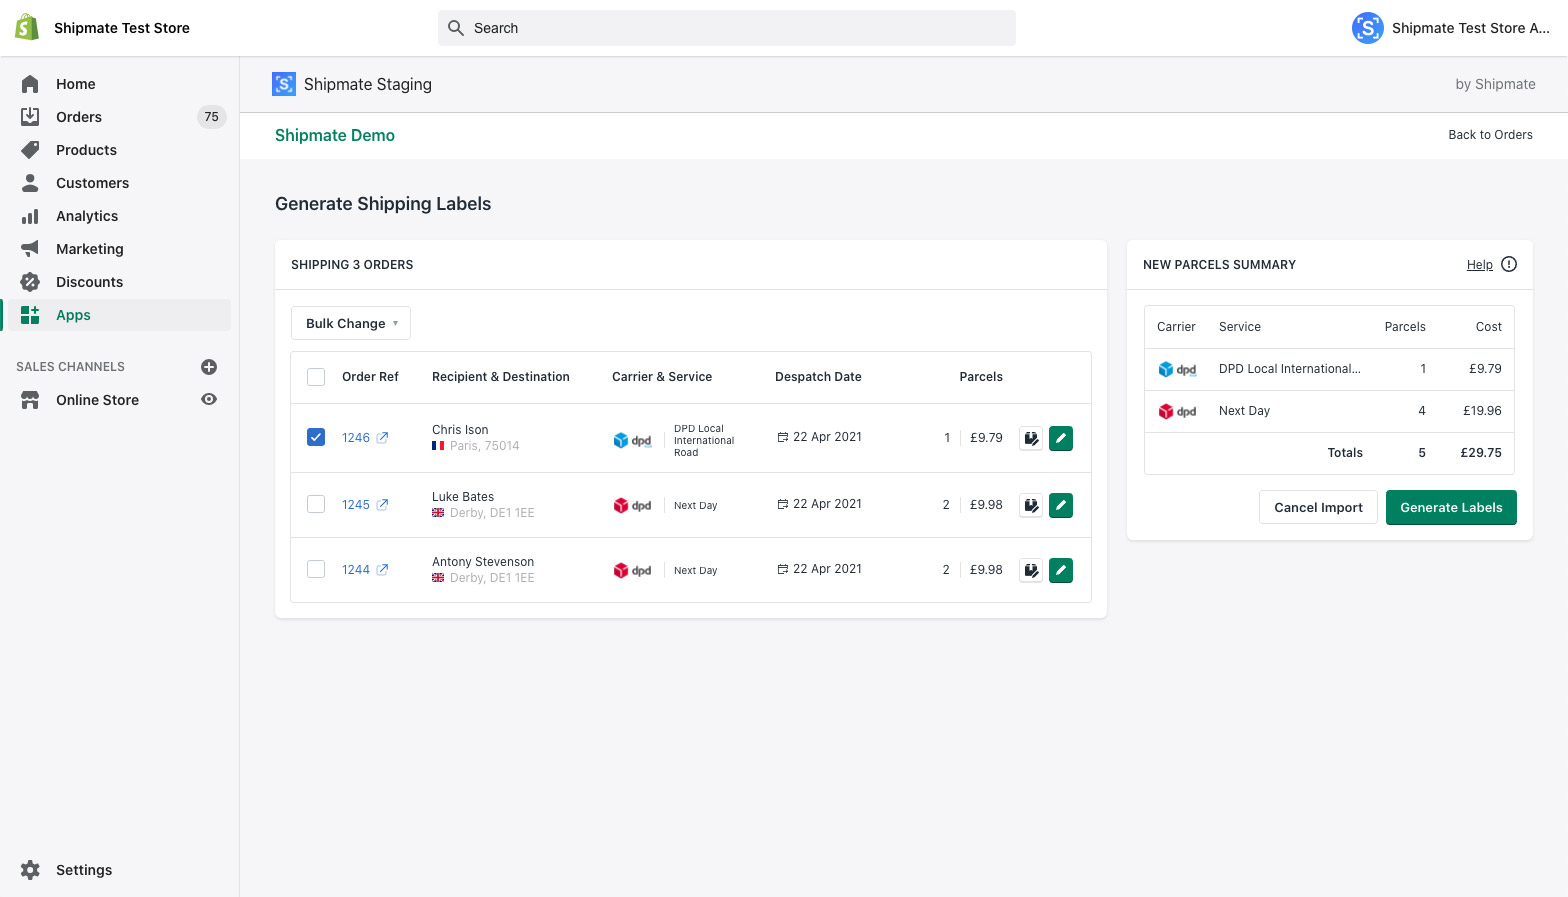
If you wish to exclude orders from your import, simply select the tick-box for each unwanted order, then click the Bulk Change menu and select the Exclude option.
Shipmate will then ignore the selected order(s) when you generate your labels.
Including Orders in Import
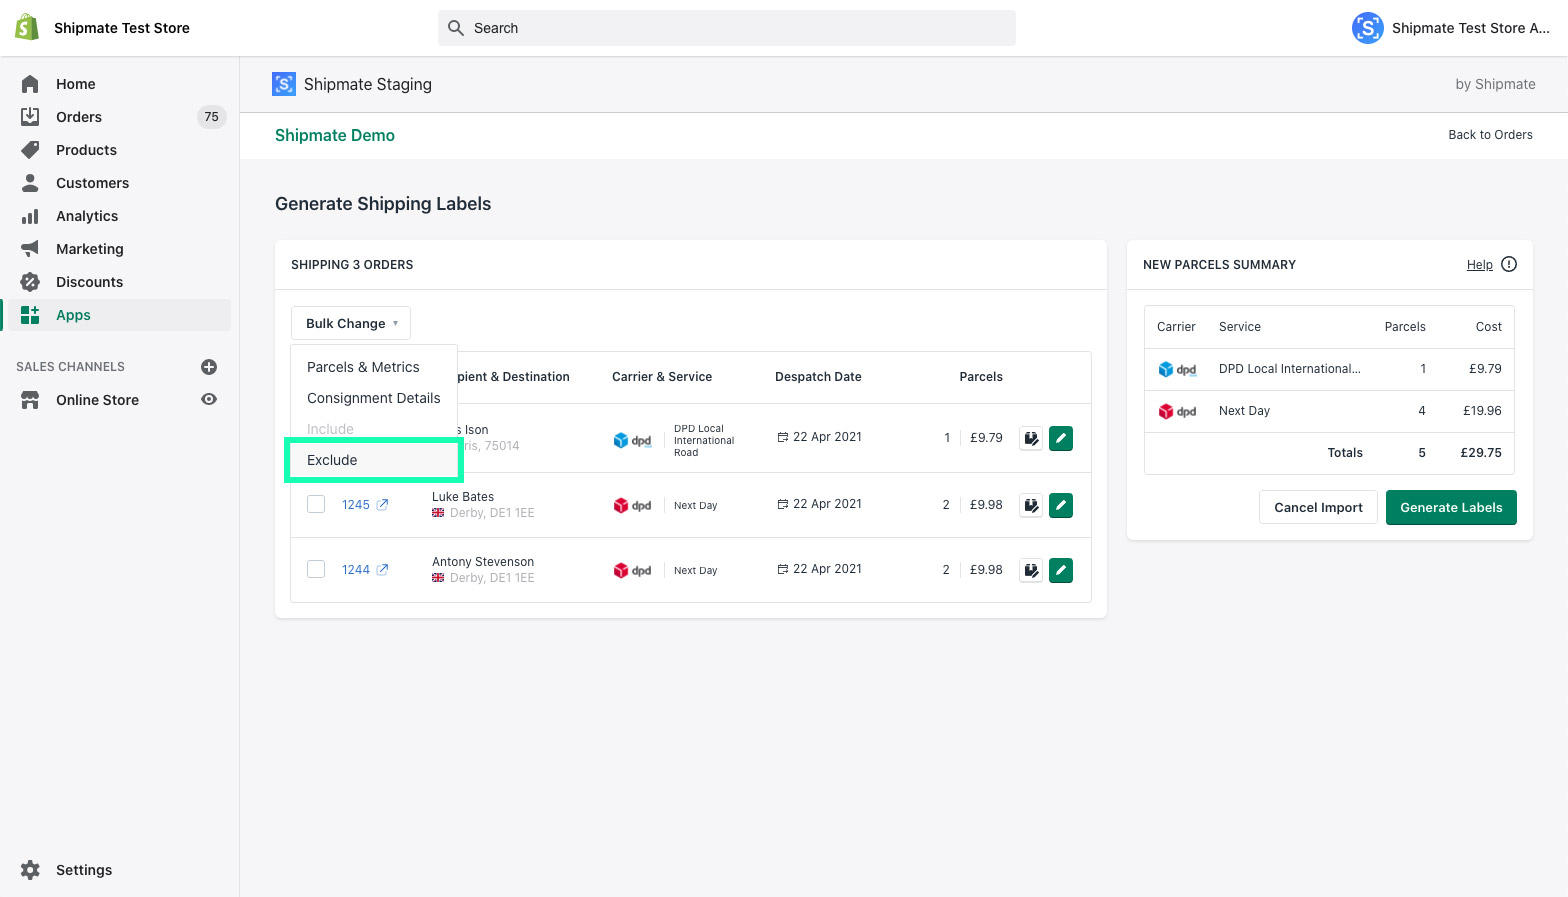
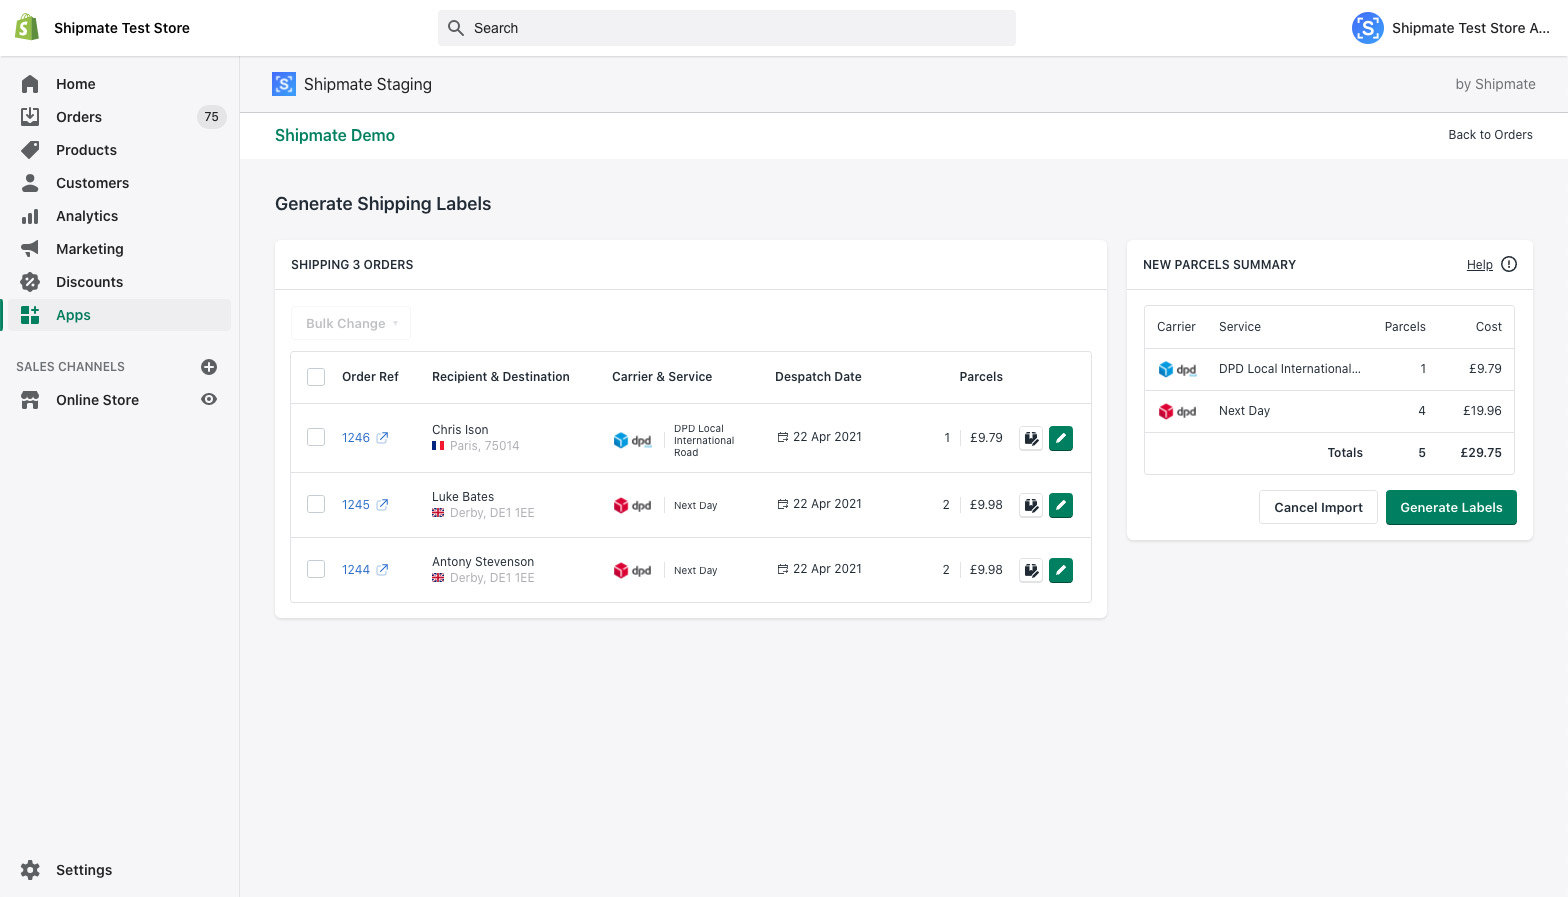
If you have previously excluded orders from your import that you wish to reinstate, simply select the tick-box for each excluded order, then click the Bulk Change menu and select the Include option.
Shipmate will then reinstate the selected order(s) for further processing and generating labels.
Choosing Number of Parcels
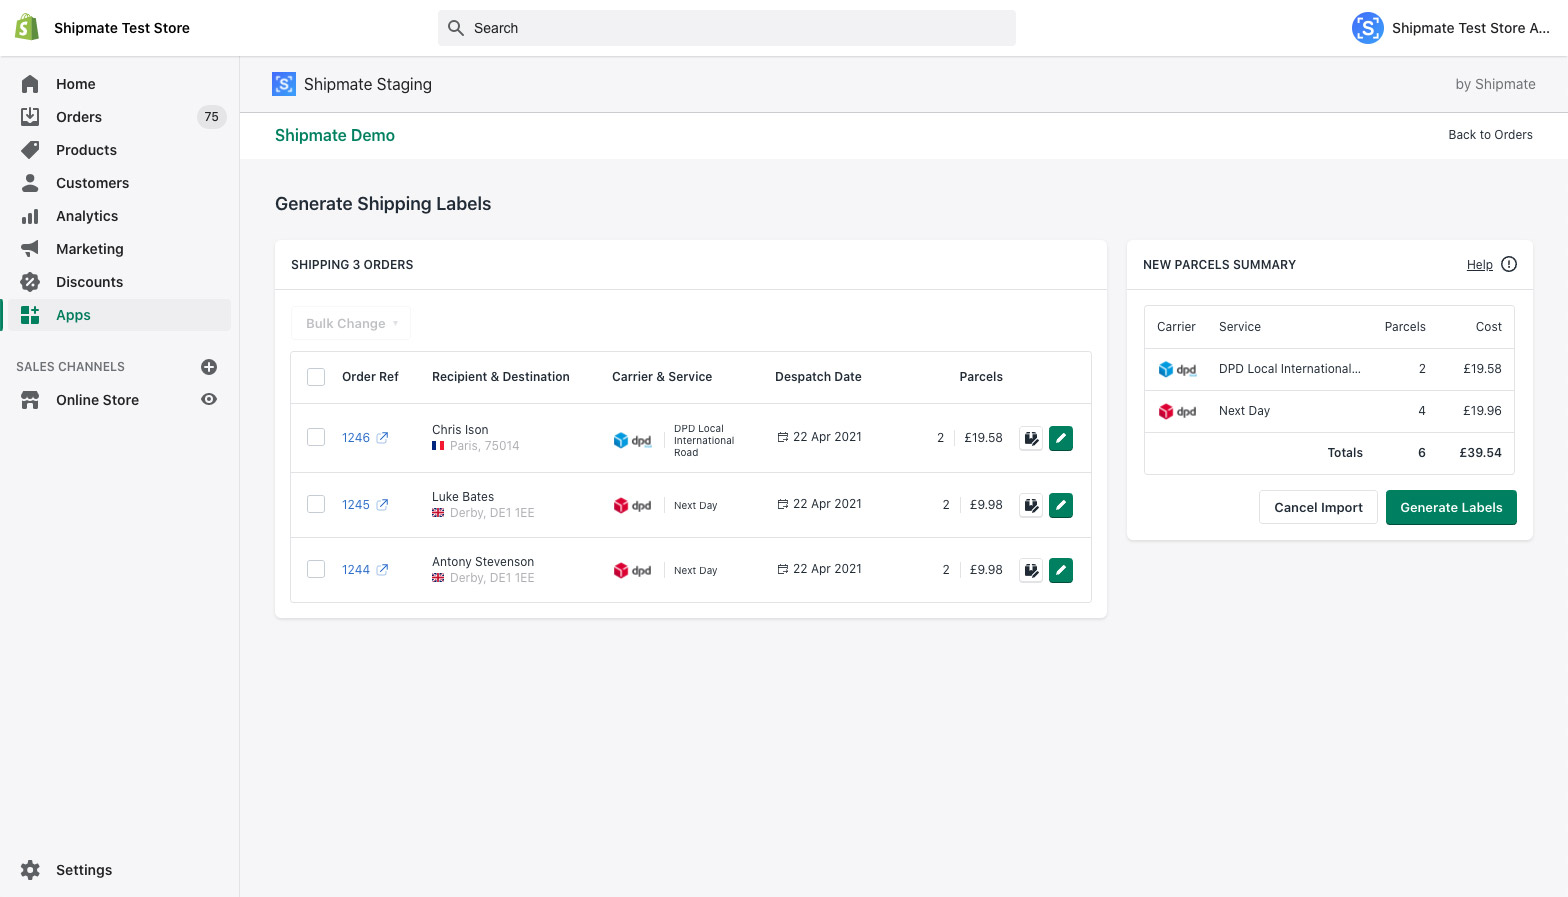
Shipmate will automatically start your order with the number of parcels configured in the Parcel Mapping Channel Setting - one per item or one per order.
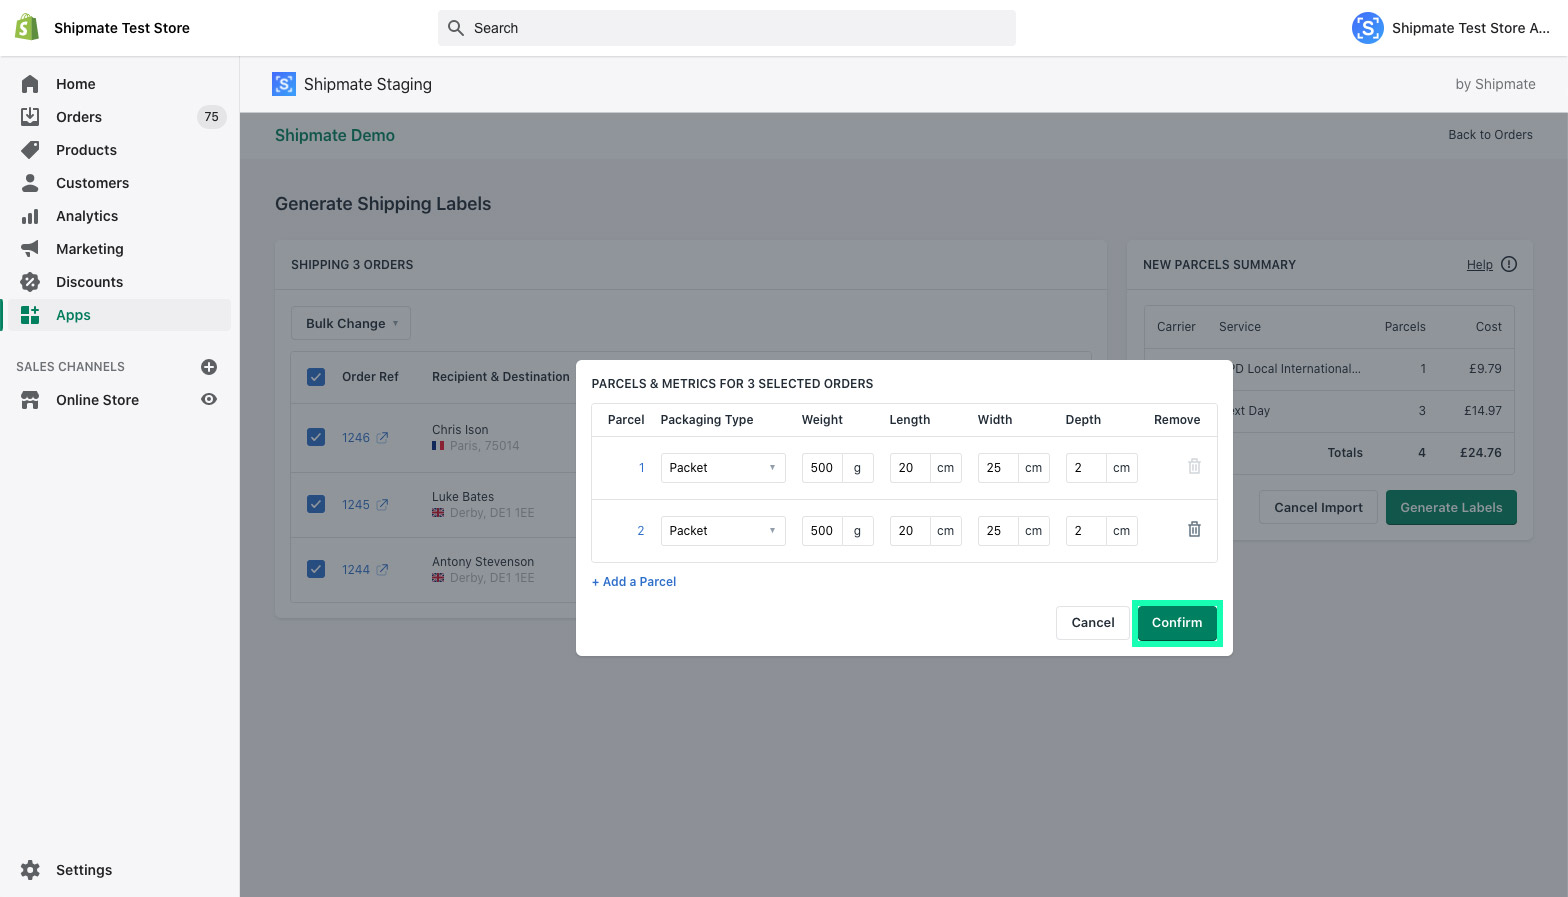
You can edit the number of parcels for an individual order by clicking the Parcels & Metrics icon on the order row, or perform this as a bulk change by selecting the orders you wish to update, clicking the Bulk Change menu and selecting the Parcels & Metrics option.
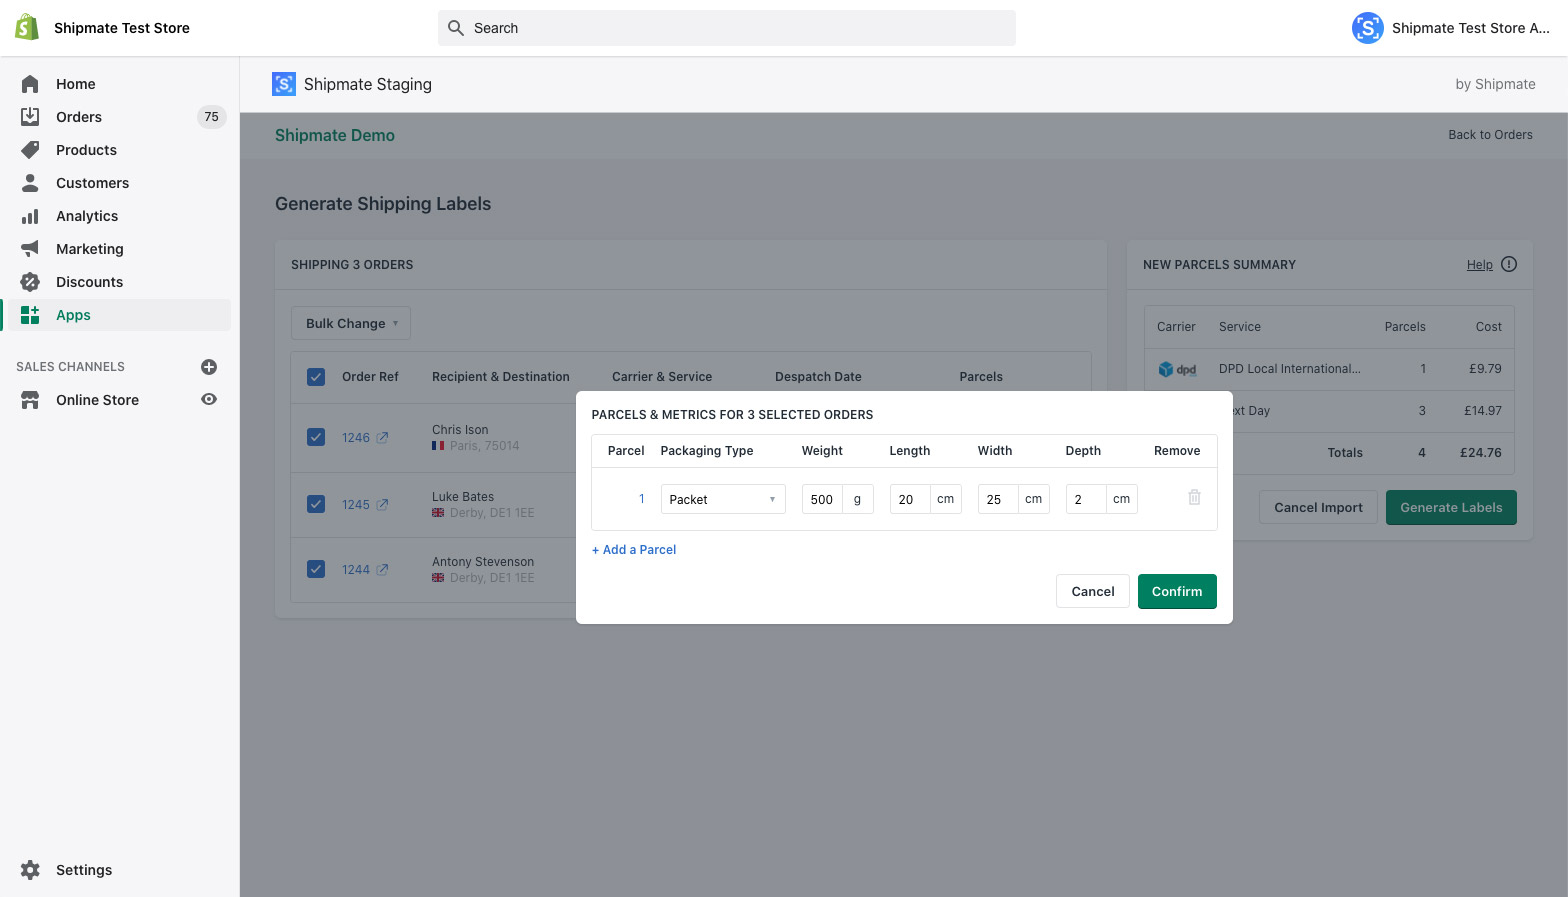
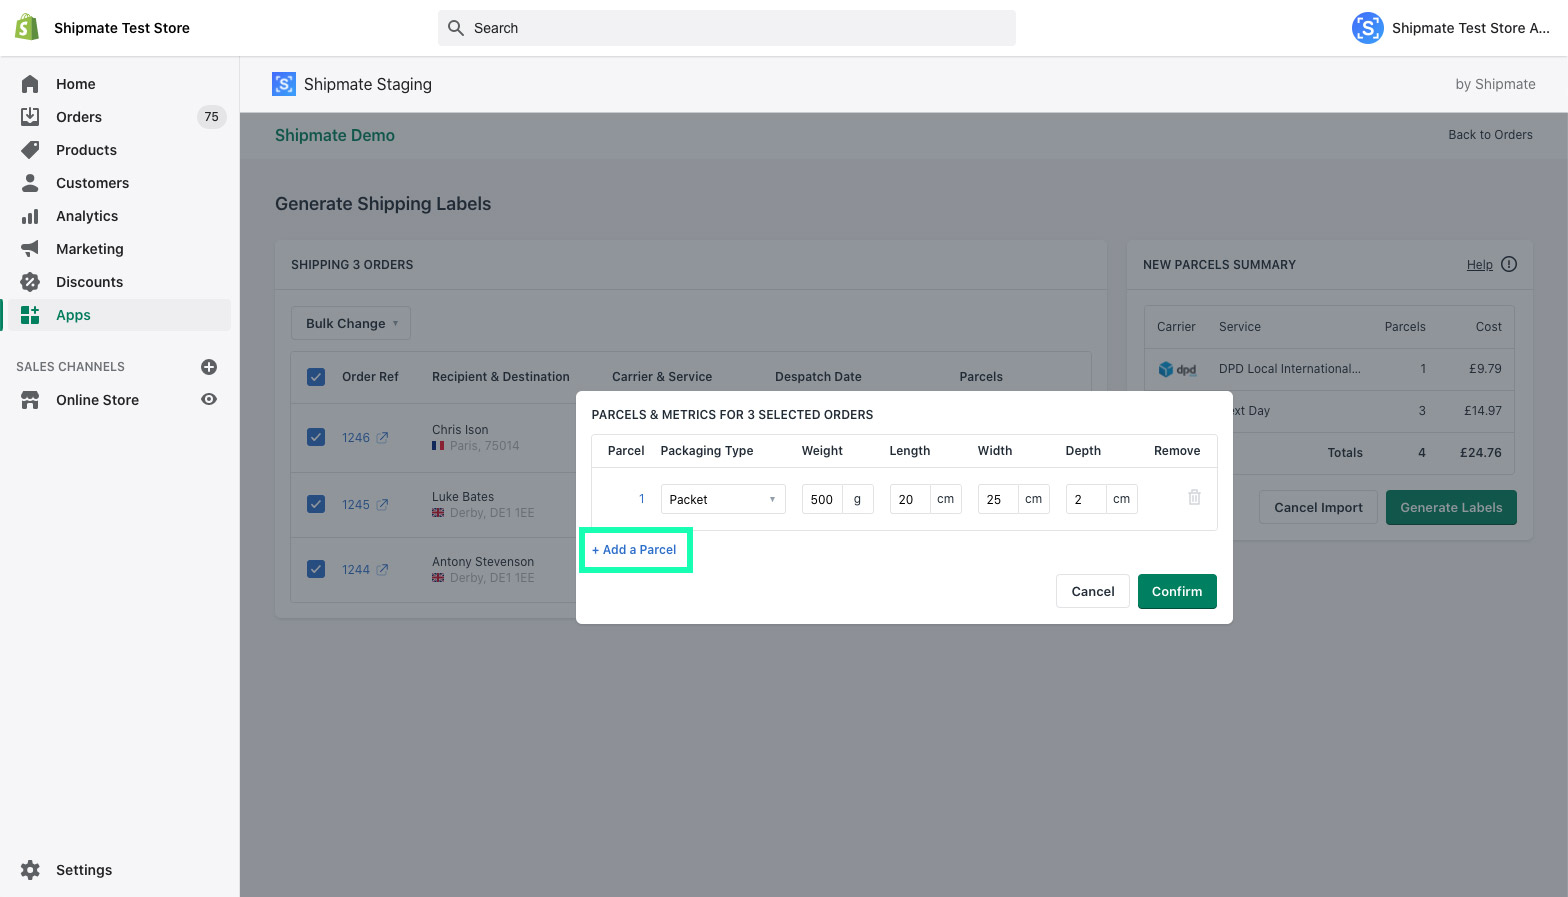
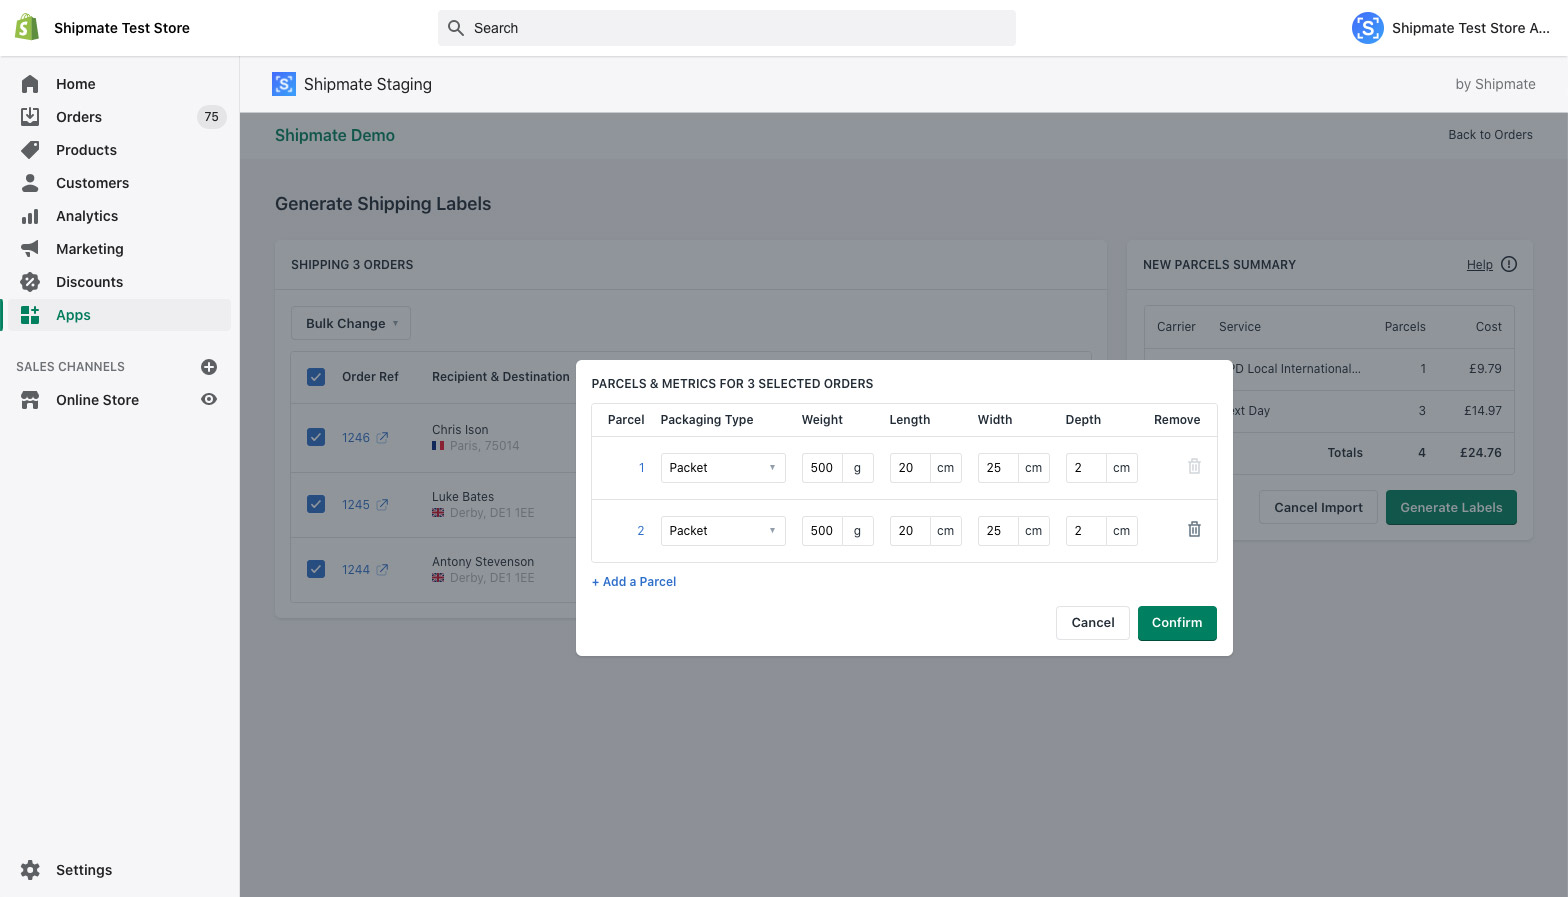
This opens a pop-up window where you can provide the details of each of the parcels required for your order. Use the 'Add Parcel' button on the left-hand side of the pop-up to add more parcels, or the trash bin icon on the row of each parcel you wish to discard.
You may either choose a Packaging Type from the list you may have configured on your Shipmate account, or enter the metrics directly.
Once you are happy with the number of parcels you want to generate and their individual metrics, click the Confirm button.
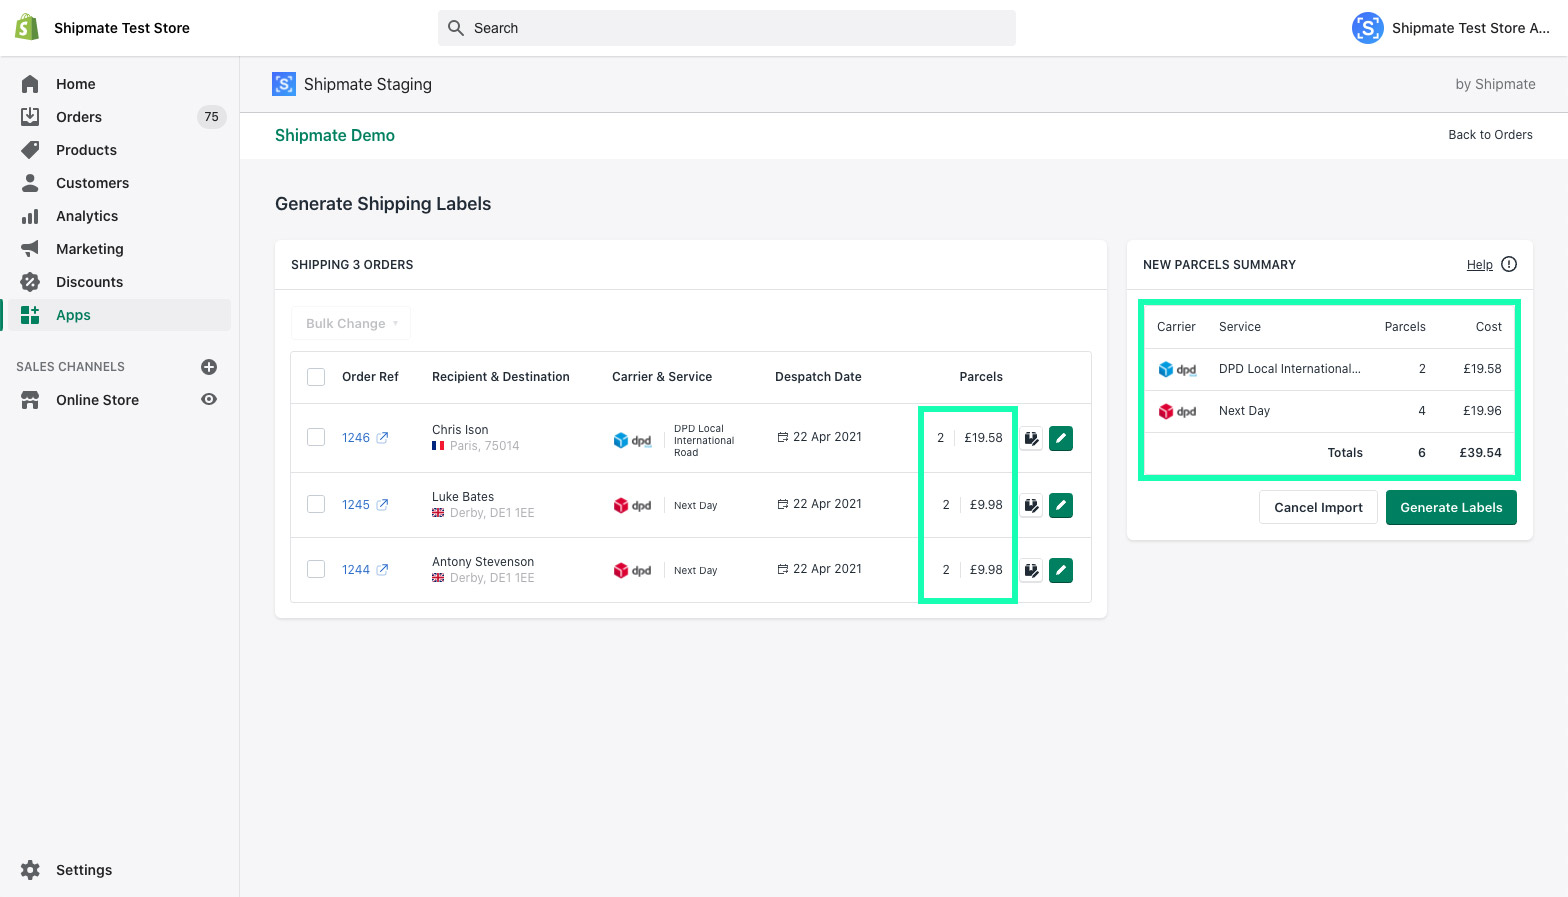
You will then be returned to the Generate Shipping Labels screen where you can review the updated number of parcels, with each row being updated with the new number of parcels and cost, together with the New Parcels Summary reflecting the total number of parcels you are going to be generating.
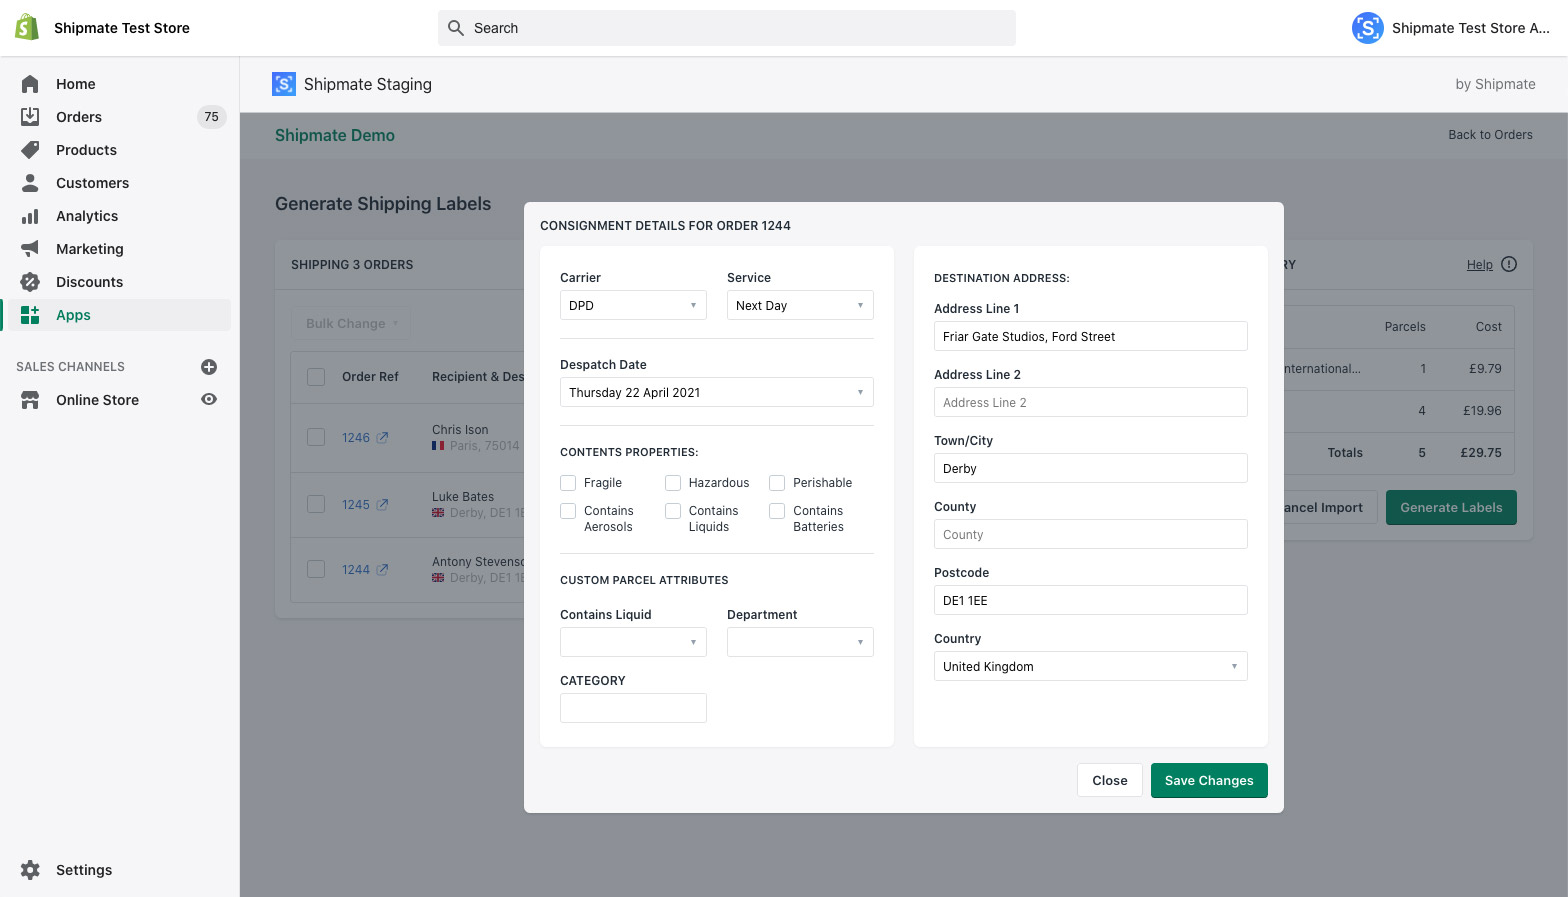
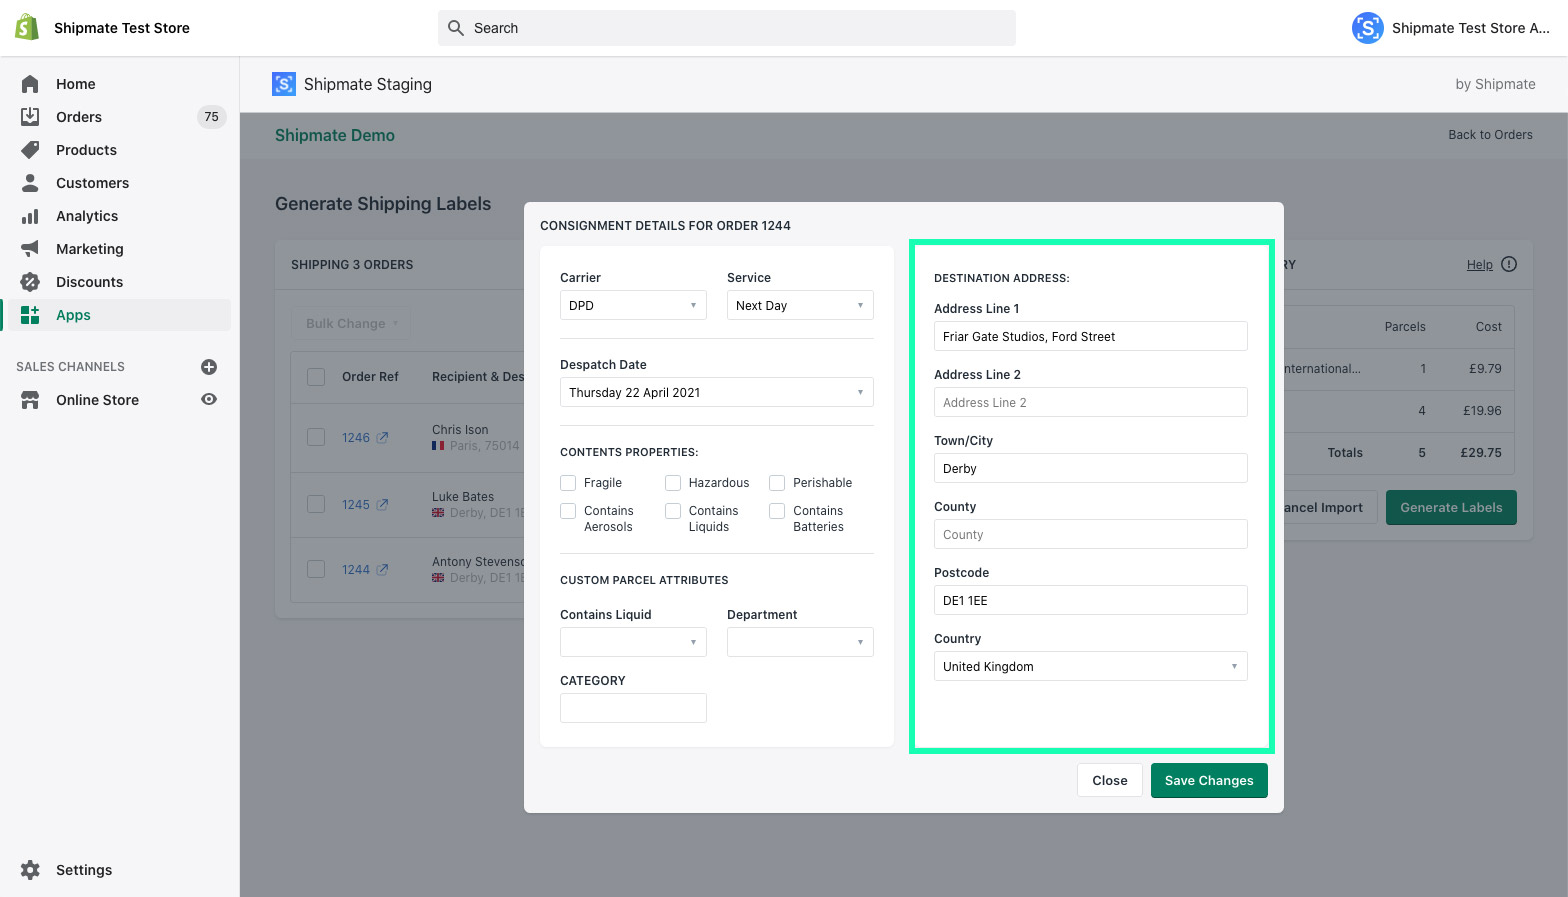
Updating Delivery Address
Sometimes Shopify formats addresses in ways that carriers cannot process, or perhaps you have noticed a mistake in the delivery address.
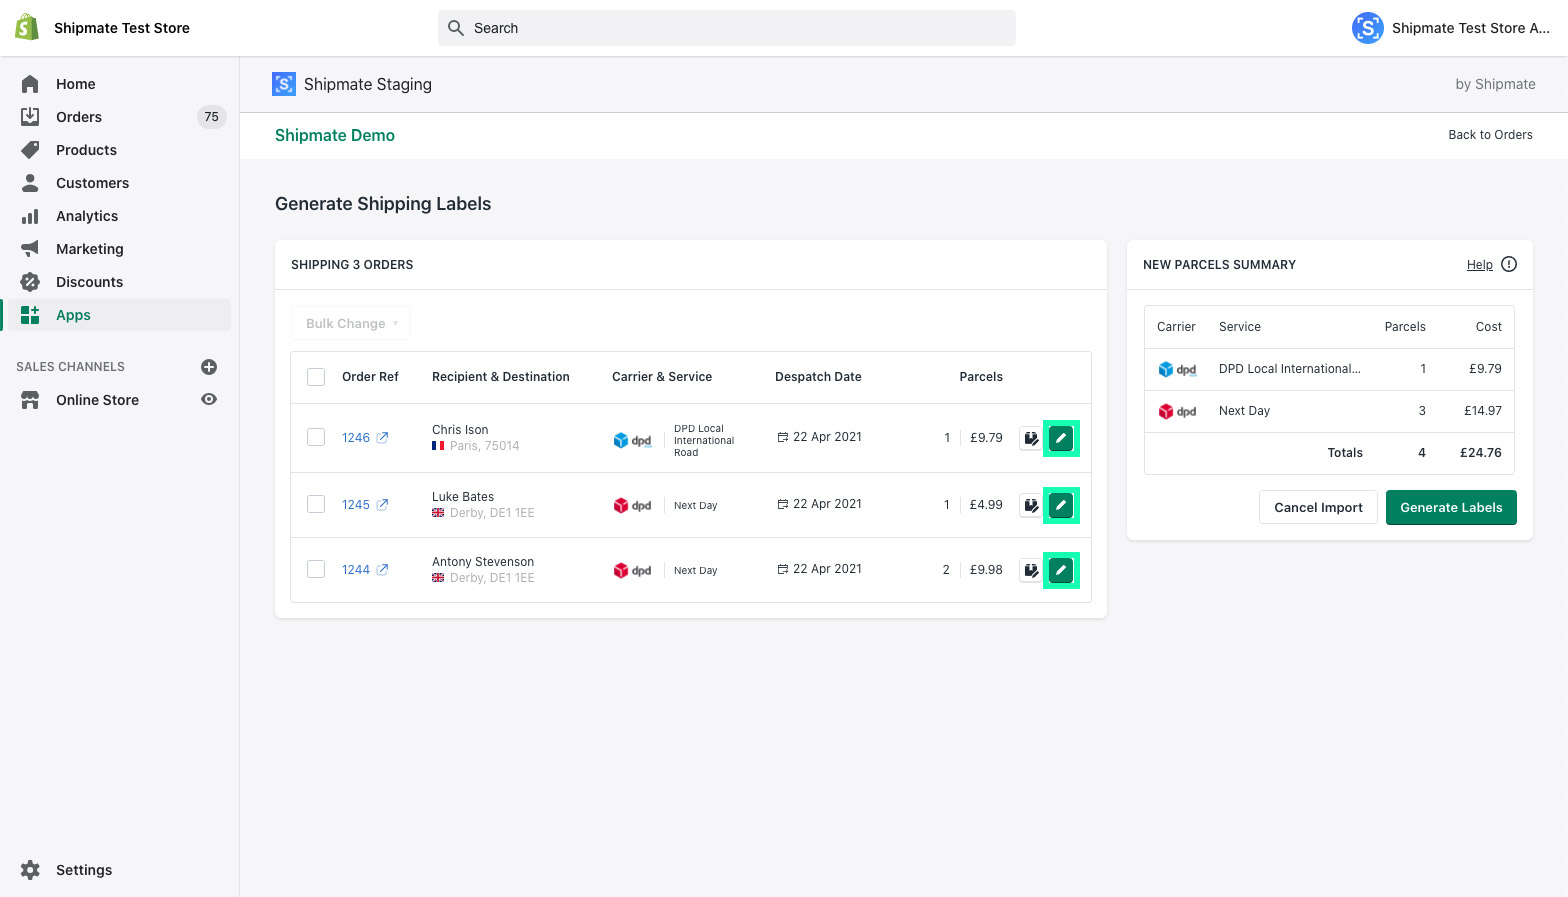
To update the delivery address for an individual order, click the Consignment Details icon on the row of the order you wish to change. The Consignment Details pop-up box will allow you to edit the address.
Once you are happy with the new address, click the Save Changes button.
Changing Delivery Service
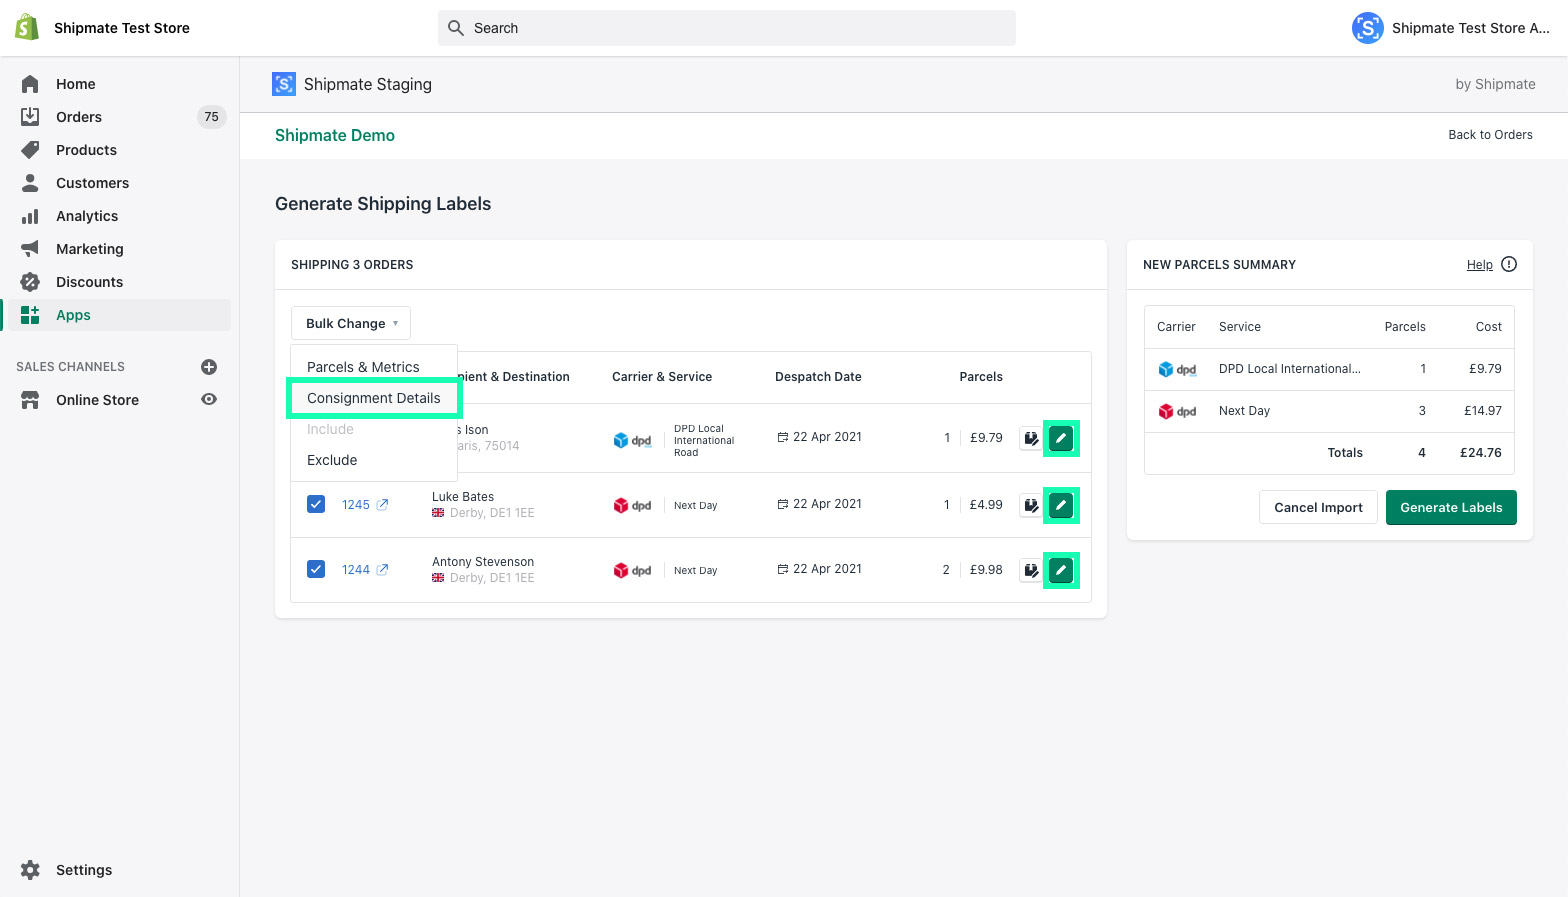
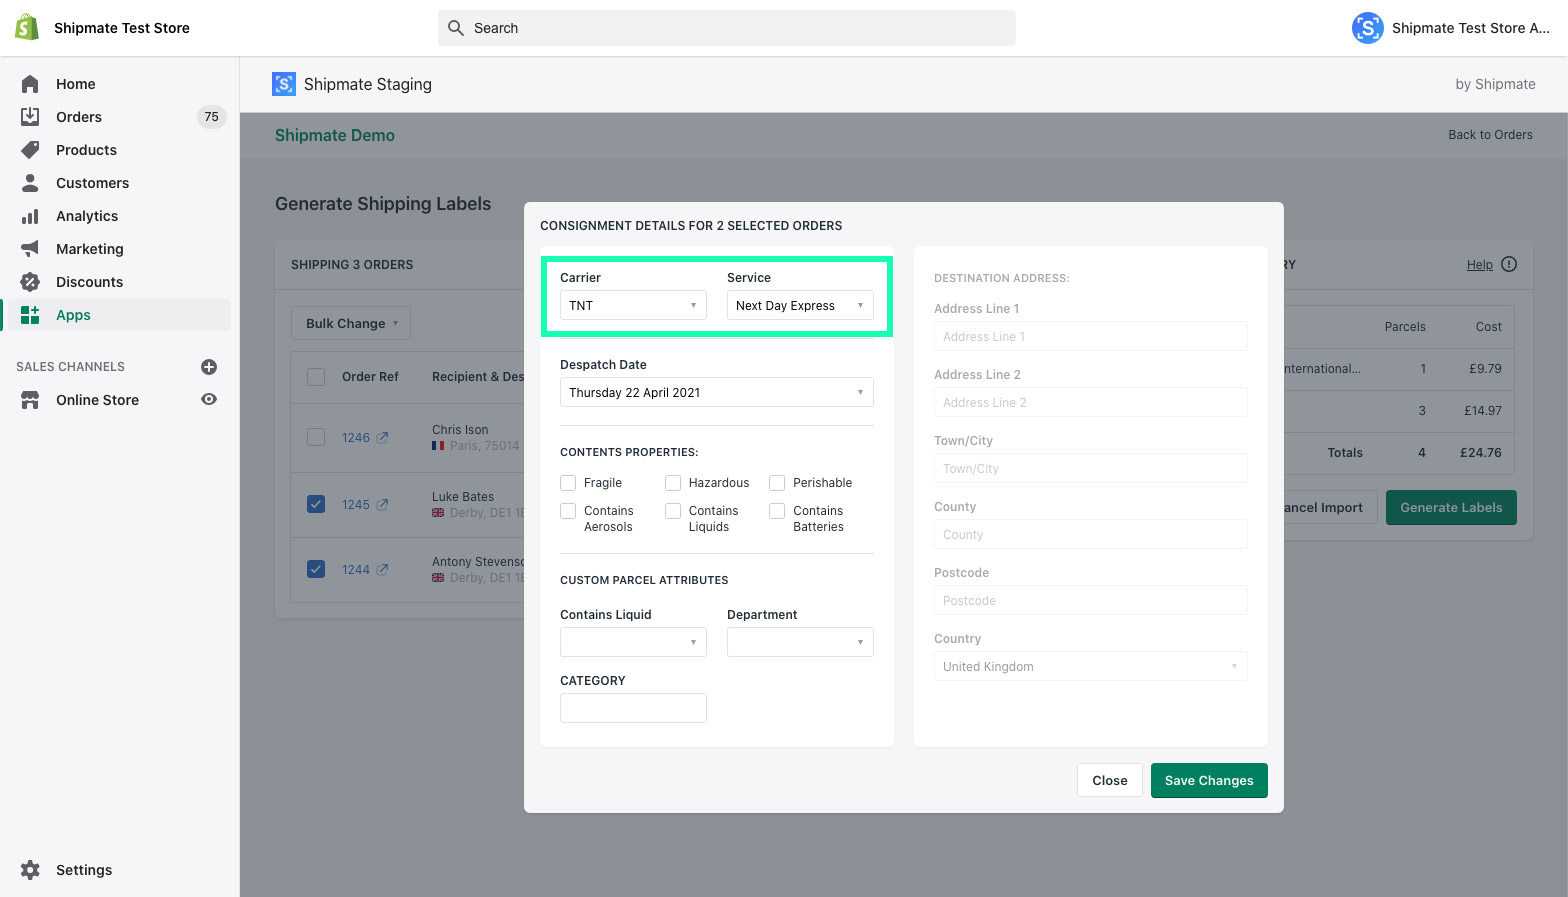
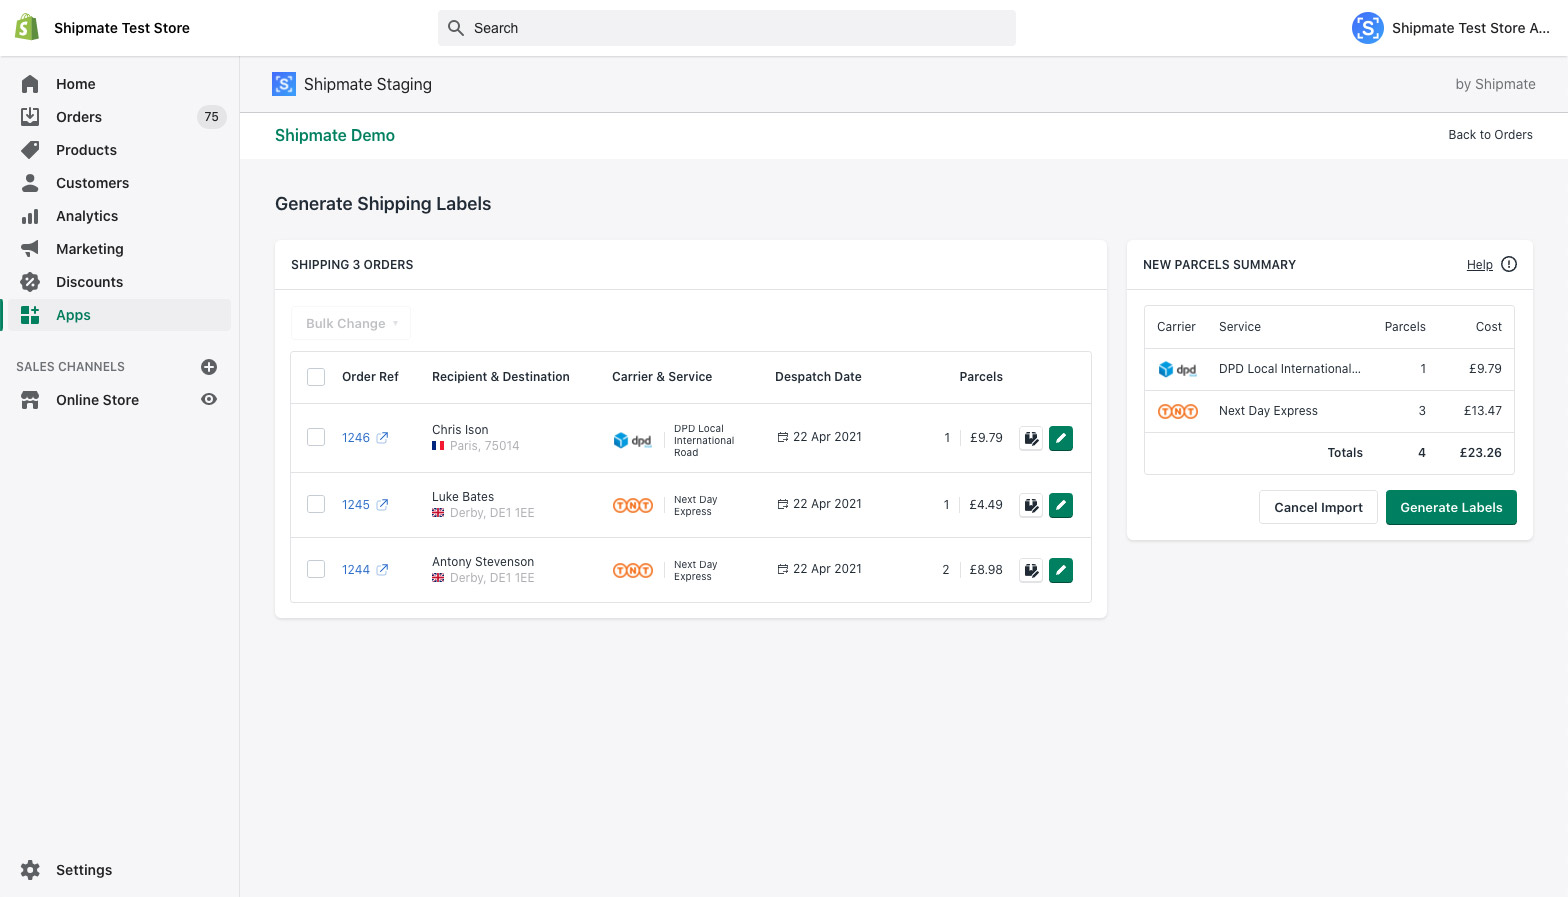
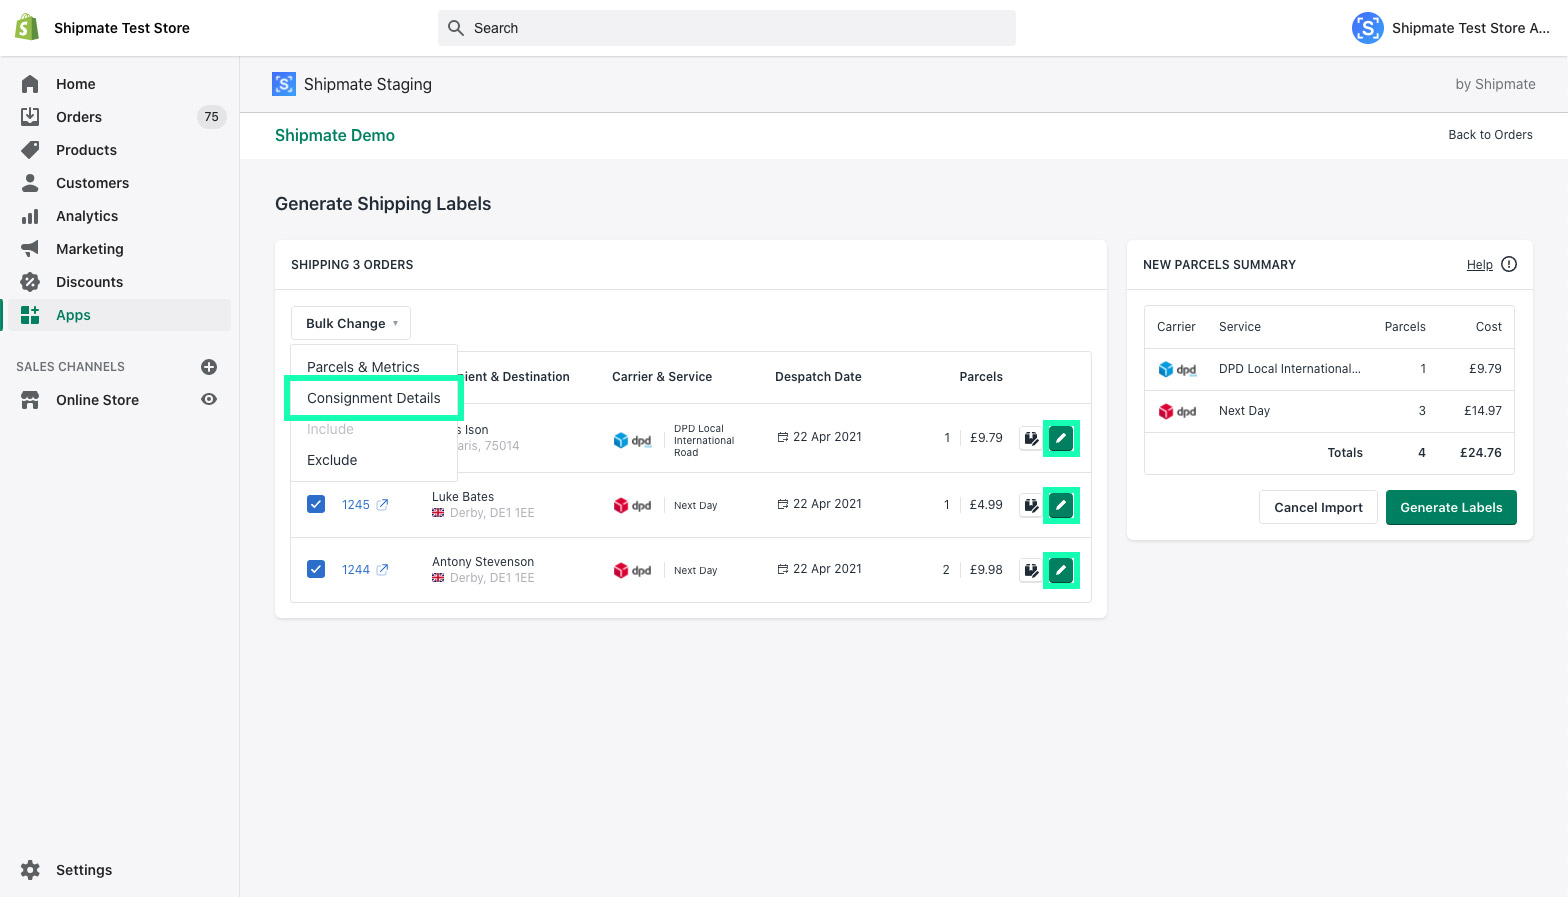
You can amend the Delivery Service for an individual order by clicking the Consignment Details icon on the order row, or perform this as a bulk change by selecting the orders you wish to update, clicking the Bulk Change menu and selecting the Consignment Details option.
Choose the carrier and delivery service from the two drop-down menus at the top of the Consignment Details pop-up box.
Once you are happy with your new selection, click the Save Changes button.
Any changes to the delivery cost will be updated and the newly selected carrier and delivery service will now be shown next to the order(s) you have changed, ready for generating labels.
Changing Despatch Date
It is easy to generate your shipping labels in advance of despatch using the Shipmate Shopify plugin.
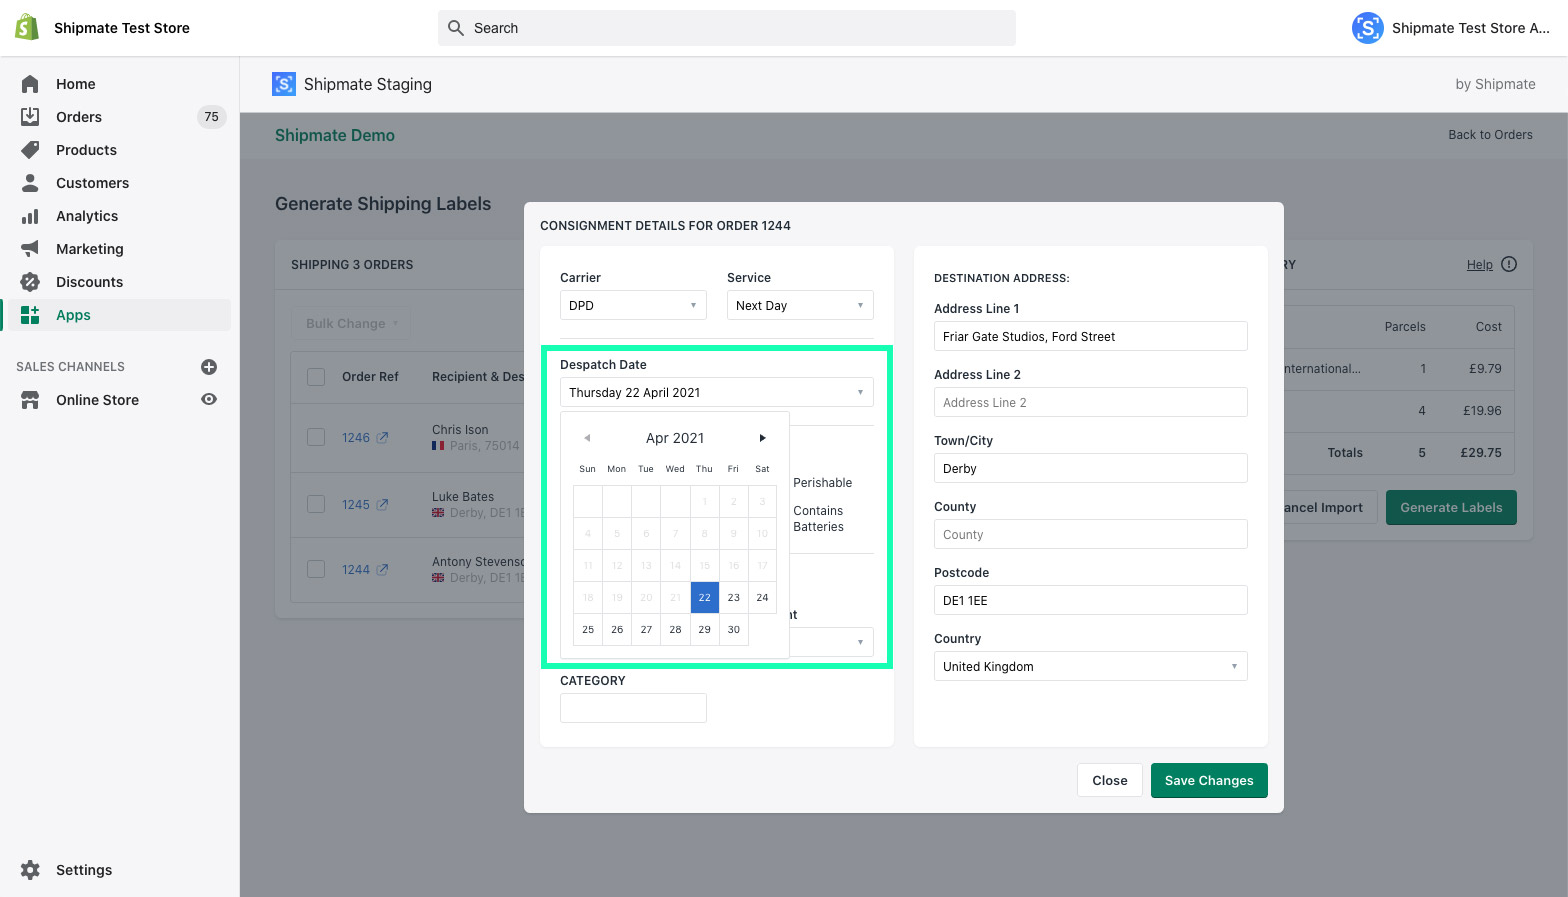
You can amend the Despatch Date for an individual order by clicking the Consignment Details icon on the order row, or perform this as a bulk change by selecting the orders you wish to update, clicking the Bulk Change menu and selecting the Consignment Details option.
The Shipmate Shopify plugin always opens with today's date as the Despatch Date. To change this, simply click on the date from the Despatch Date area of the Consignment Details pop-up box and choose a date in the future.
Once you are happy with your new selection, click the Save Changes button.
Setting Parcel Attributes
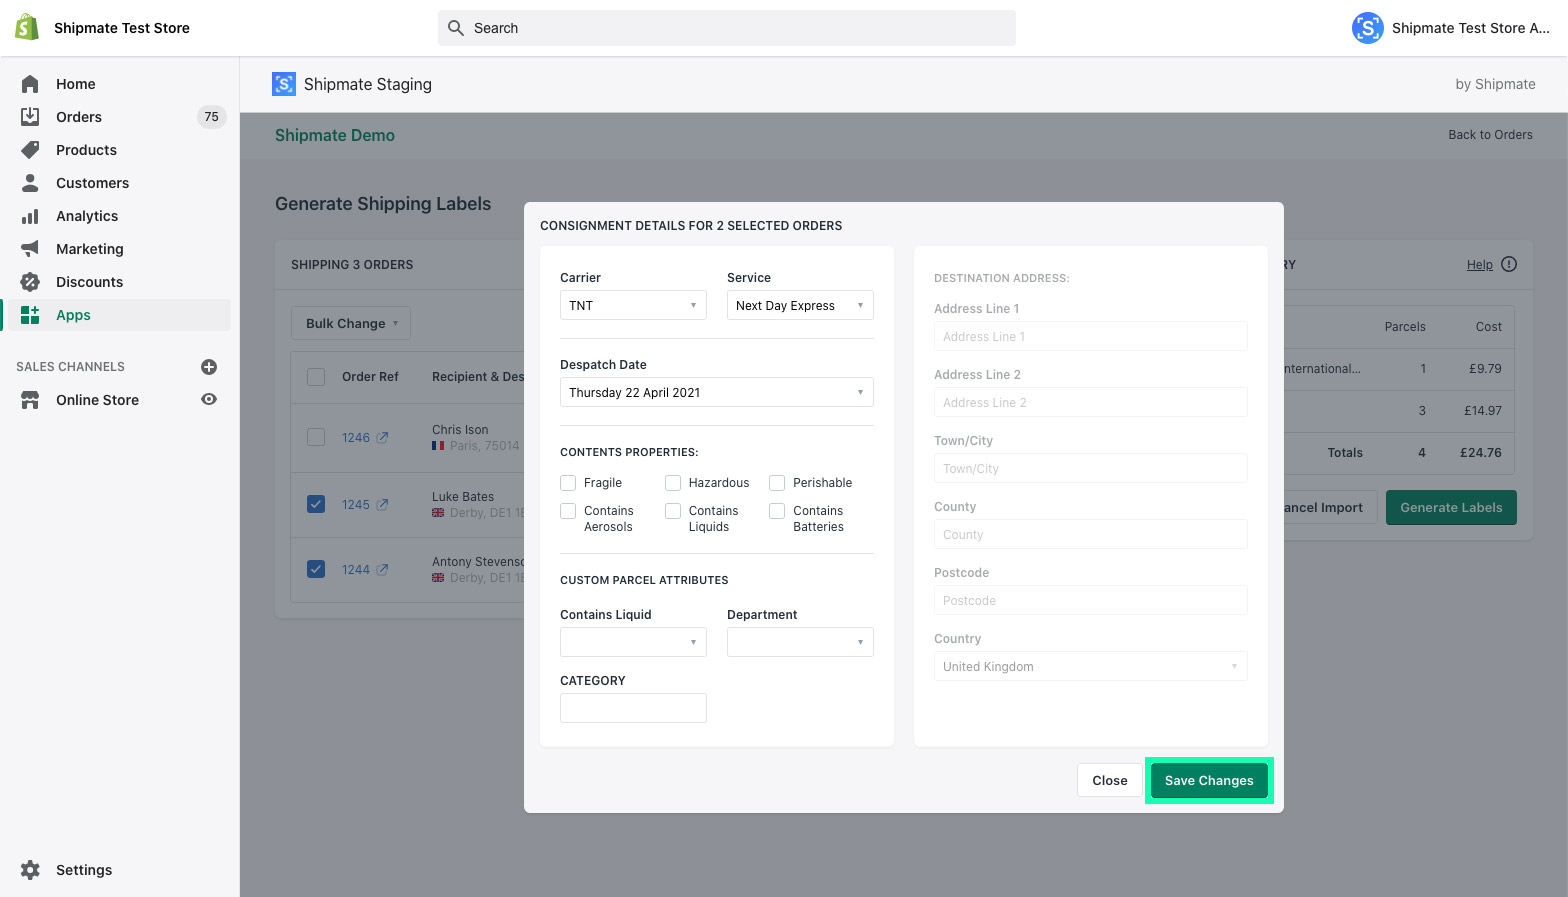
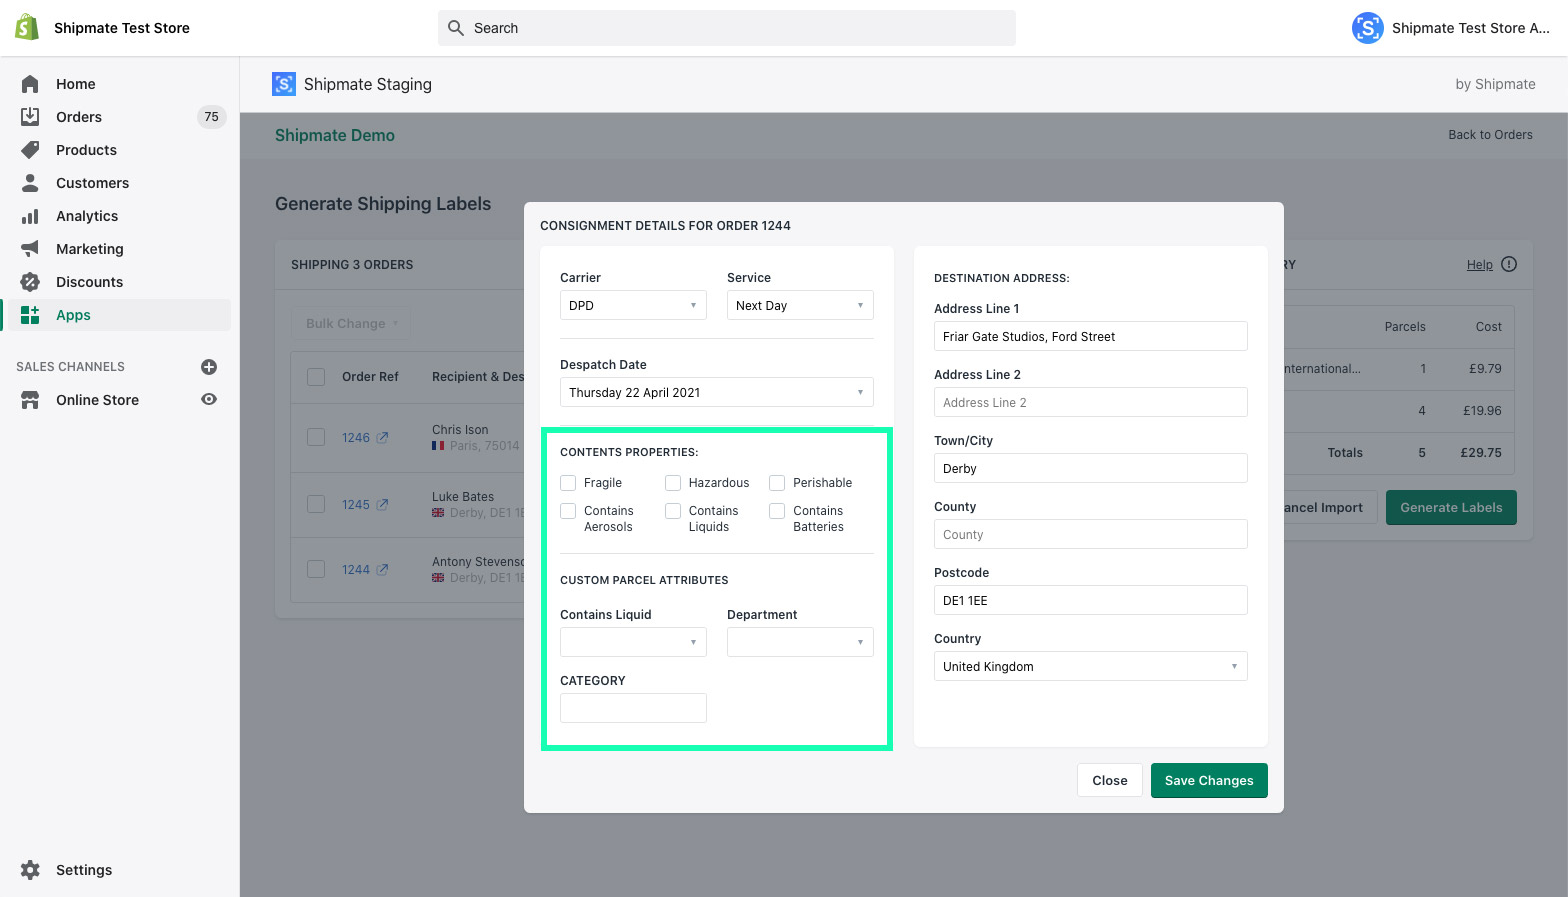
You can add further details about your consignment, such as statutory properties or any Custom Parcel Attributes you may have configured. You can do this for an individual order by clicking the Consignment Details icon on the order row, or perform this as a bulk change by selecting the orders you wish to update, clicking the Bulk Change menu and selecting the Consignment Details option.
To add these details, simply make your selections from the Contents Properties and Custom Parcel Attributes areas of the Consignment Details pop-up box.
Once you are happy with your new selection, click the Save Changes button.

Label Printing
There are two methods of printing labels with Shopify using the Shipmate Desktop App.
If you are ready to print your labels straight away, simply click the Print Labels button once you have generated your labels. This will send the labels directly to the Shipmate Desktop App and to your printer.
If you wish to print your labels later, you can enter the Shopify order number in the Scan & Print area of the Shipmate Desktop App and all the labels you originally created for that order will be printed.
Further Information
Version History
Version 2.5.0 - September 2025
Following customer feedback we have added further automation options to the Shopify channel and allow you to view the items you are shipping.
Updates include:
- Improved user interface with item-level details and visual parcel management
- More parcel handling options including X parcels per order, One parcel per X items and One parcel per X.X kg of order weight
- Ability to choose whether items are packed distributed across parcels or split across all parcels
- Ability to add a bespoke tag to orders when they are fulfilled
- Data Mappings allow you to map additional data from Shopify to Shipmate
Version 2.0.0 - April 2021
Following customer feedback we have completely overhauled the Shipmate Shopify plugin to integrate more seamlessly with the Shopify user experience, while offering simpler despatch operations through improved data validation, a clearer layout and bulk change operations.
Updates include:
- New Unified User Interface that closely matches the Shopify user experience
- Simplified despatch operations with improved data validation
- Bulk change operations
- Ability to choose Fulfilment Status option on label creation
Version 1.2.0 - October 2020
Updates include:
- Ability to edit the number of parcels for each individual order
- Ability to choose whether to use the Shopify Order Number or ID within Shipmate
Version 1.1.0 - November 2019
Updates include:
- Ability to choose whether to return Carrier's tracking reference or the Shipmate Unified Tracking Reference
Version 1.0.0 - November 2018
Initial version facilitates integration between Shipmate and Shopify. Features include:
- Single and Bulk order importing
- Saves tracking reference and URL into Shopify
- Print labels using Shipmate WebPrint™
- Select between one label per order or item
- Multi-User Label Printing
- Sets order status to "Fulfilled" when label is generated