Using Shipmate with Brightpearl
Introduction
The Shipmate plugin for Brightpearl allows quick and easy integration between your Shipmate and Brightpearl accounts, giving access to all the carriers and delivery services Shipmate provides, directly inside your Brightpearl account.
This guide explains how to set up the Shipmate Brightpearl plugin and configure your accounts to start despatching your orders in Brightpearl using delivery labels from Shipmate.

Requirements
Before you are able to start printing shipping labels using Shipmate with Brightpearl, you will need the following:
- A Brightpearl account
- A Shipmate account
- At least one active Carrier and Delivery Service
- The Shipmate Desktop Application for Windows
- A compatible printer
If you wish to use Shipmate’s routing rules, you will also need to ensure your inventory inside Brightpearl has accurate and up-to-date weights and dimensions.
If you need any assistance ensuring you have everything you need to link your Brightpearl and Shipmate accounts, please contact support@shipmate.co.uk or call 01332 460 888.
Setup - Brightpearl
Turn On Shipmate App
Within your Brightpearl account, select the ‘App Store’ link from the top menu, located towards the top-right of the screen. This will take you to the Brightpearl App Store, where you can view and enable all the apps available on the Brightpearl platform.
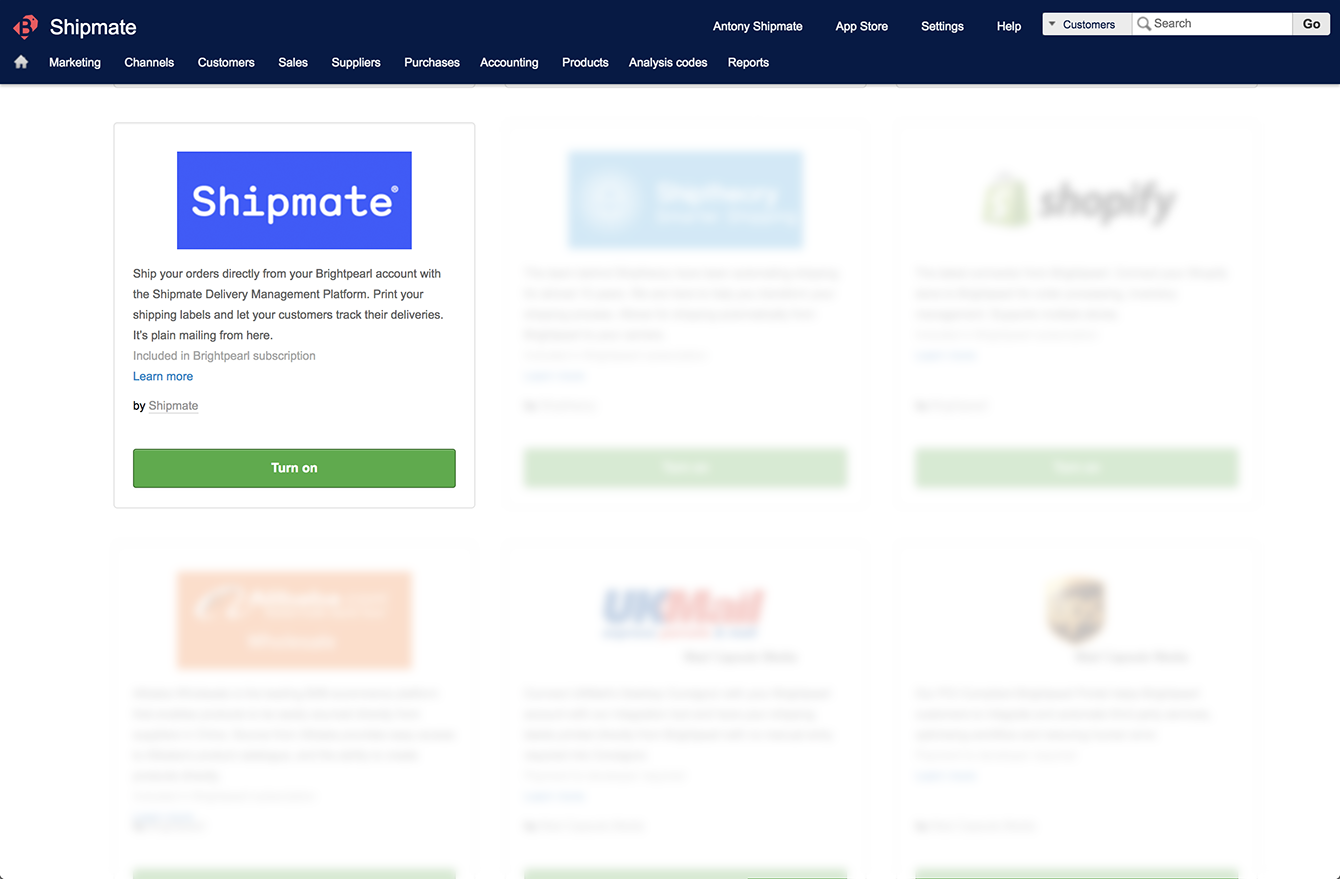
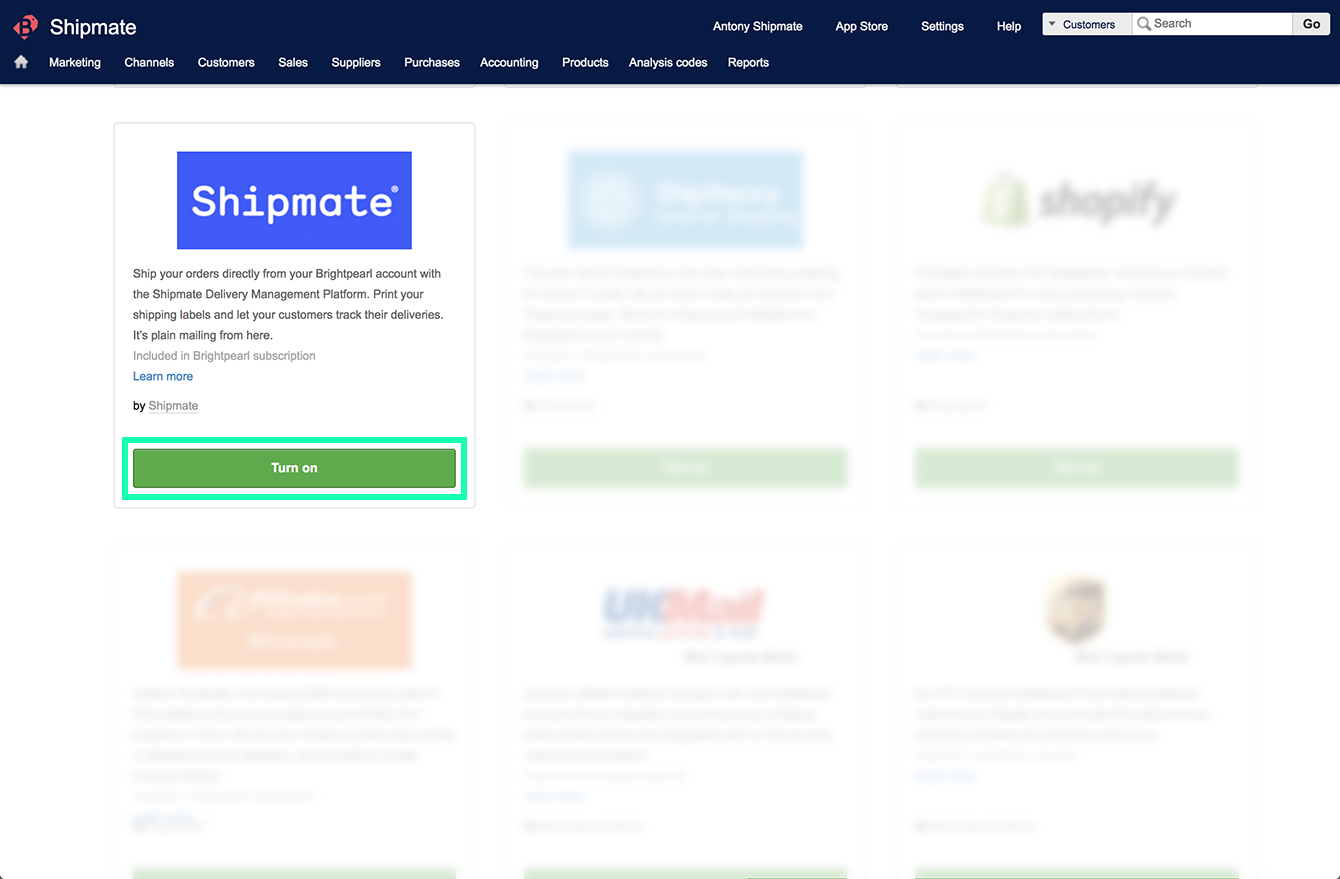
Scroll down until you find the Shipmate app and click the green ‘Turn on’ button. This will establish a link between the Brightpearl and Shipmate servers to begin the process of linking your accounts together.

App Configuration
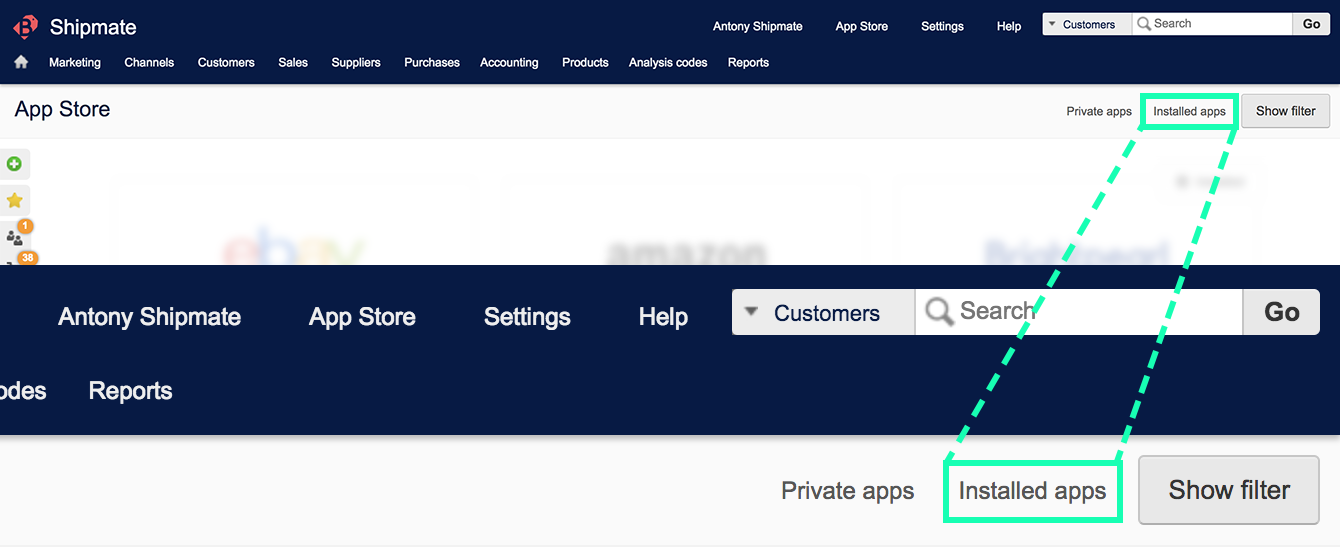
To configure your Shipmate app, first go into the Brightpearl App Store, then select ‘Installed apps’ from the right-hand side of the App Store menu.
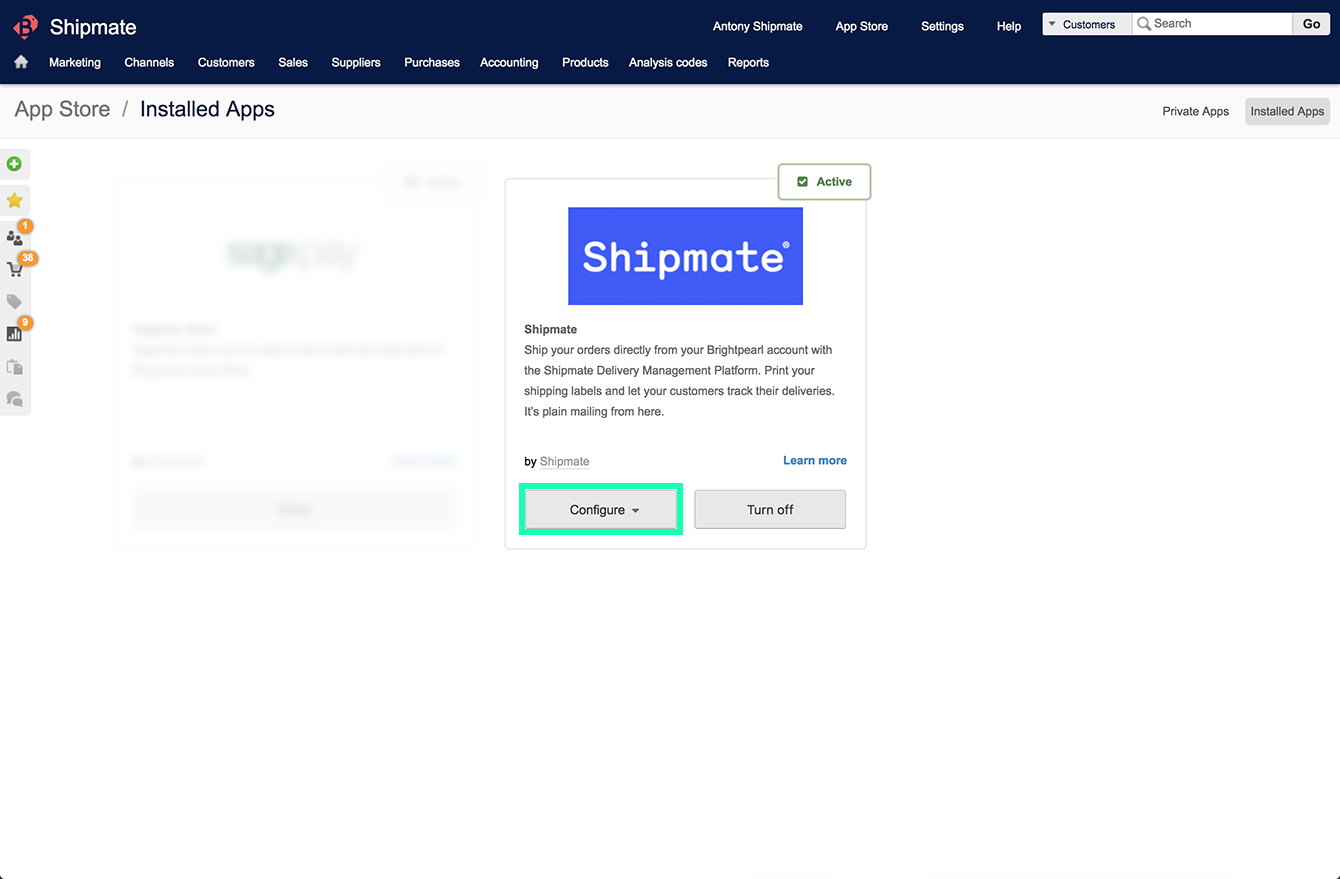
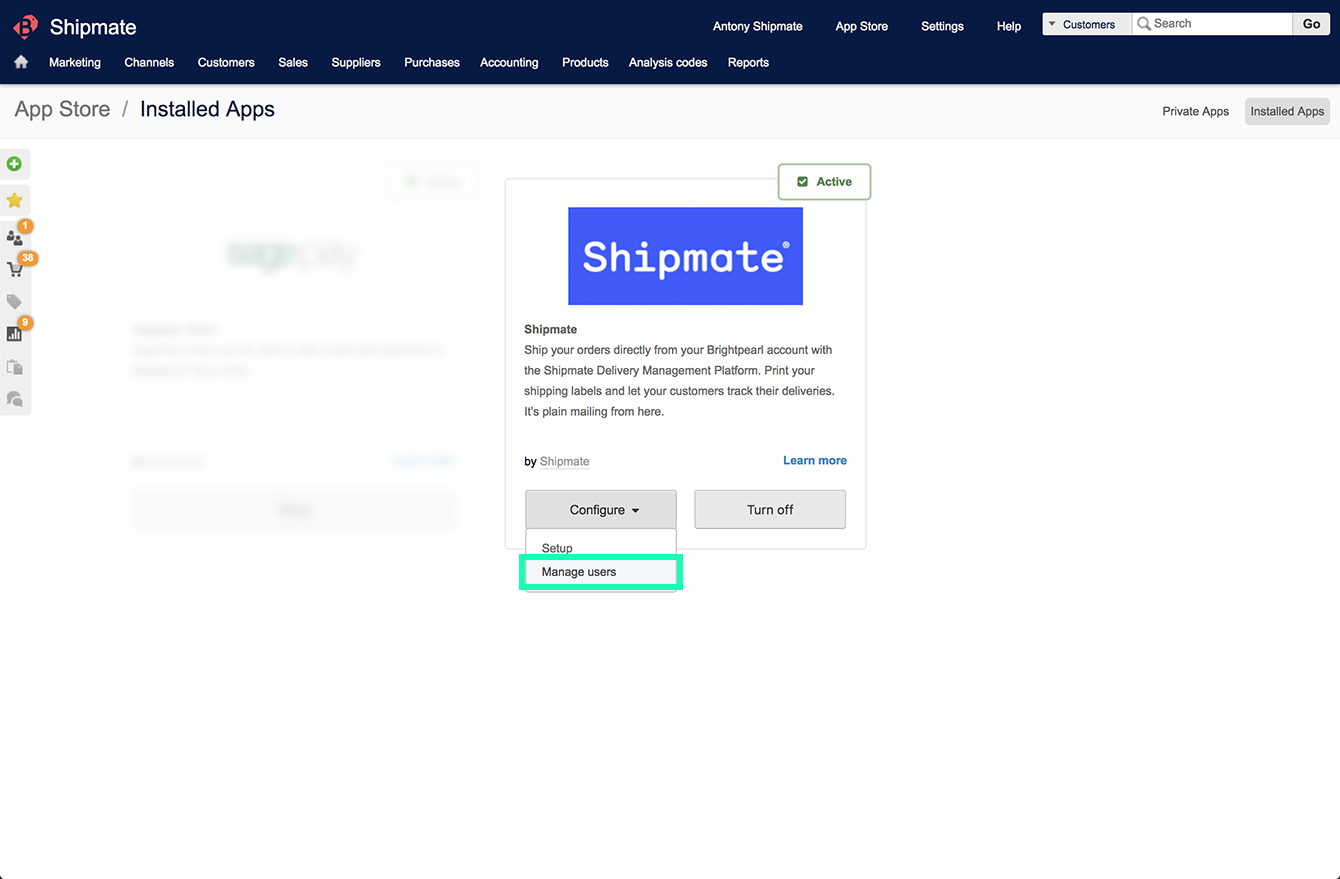
On the Installed Apps screen, you will see a list of installed apps inside your Brightpearl account. If Shipmate is installed, you will see it among your installed apps. Towards the bottom of the app panel, click the ‘Configure’ drop-down button, with options ‘Setup’ and ‘Manage users’. Both of these options are referred to in this user guide..
Granting Staff Access
In order for your staff to access the Shipmate plugin, you will need to grant access for them. This helps you choose who needs access to Shipmate and helps maintain security in your eCommerce environment.
From the Installed Apps screen, click the ‘Configure’ drop-down button on the Shipmate app, then select ‘Manage users’.
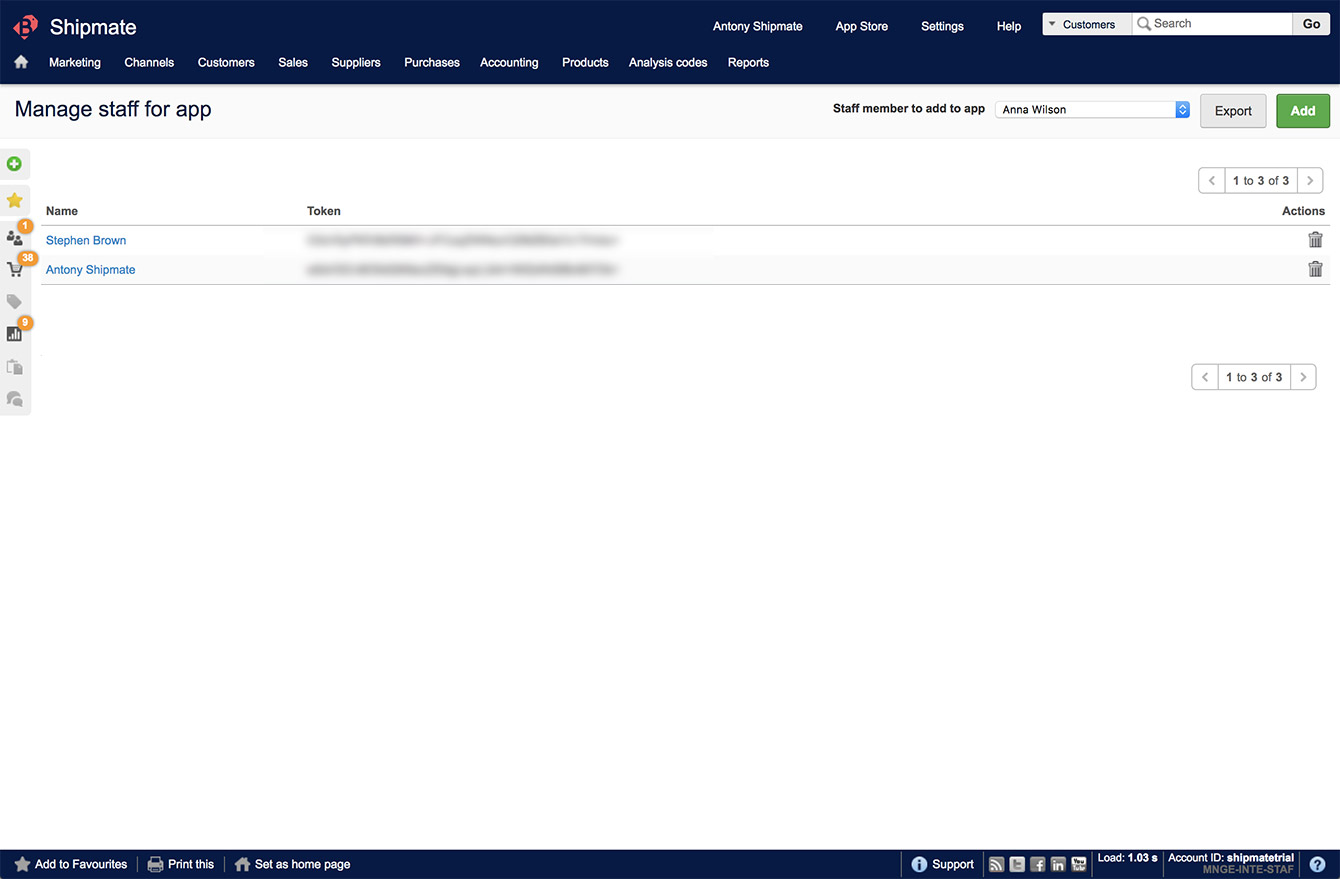
The ‘Manage staff for app’ page will then be shown. Simply choose the staff member you wish to grant access to Shipmate from the drop-down menu, then click the green ‘Add’ button.
If the staff member was added successfully, you will see a green message box saying the user was added to the app, and the staff member will be displayed in the table, together with their access token.


Removing Staff Access
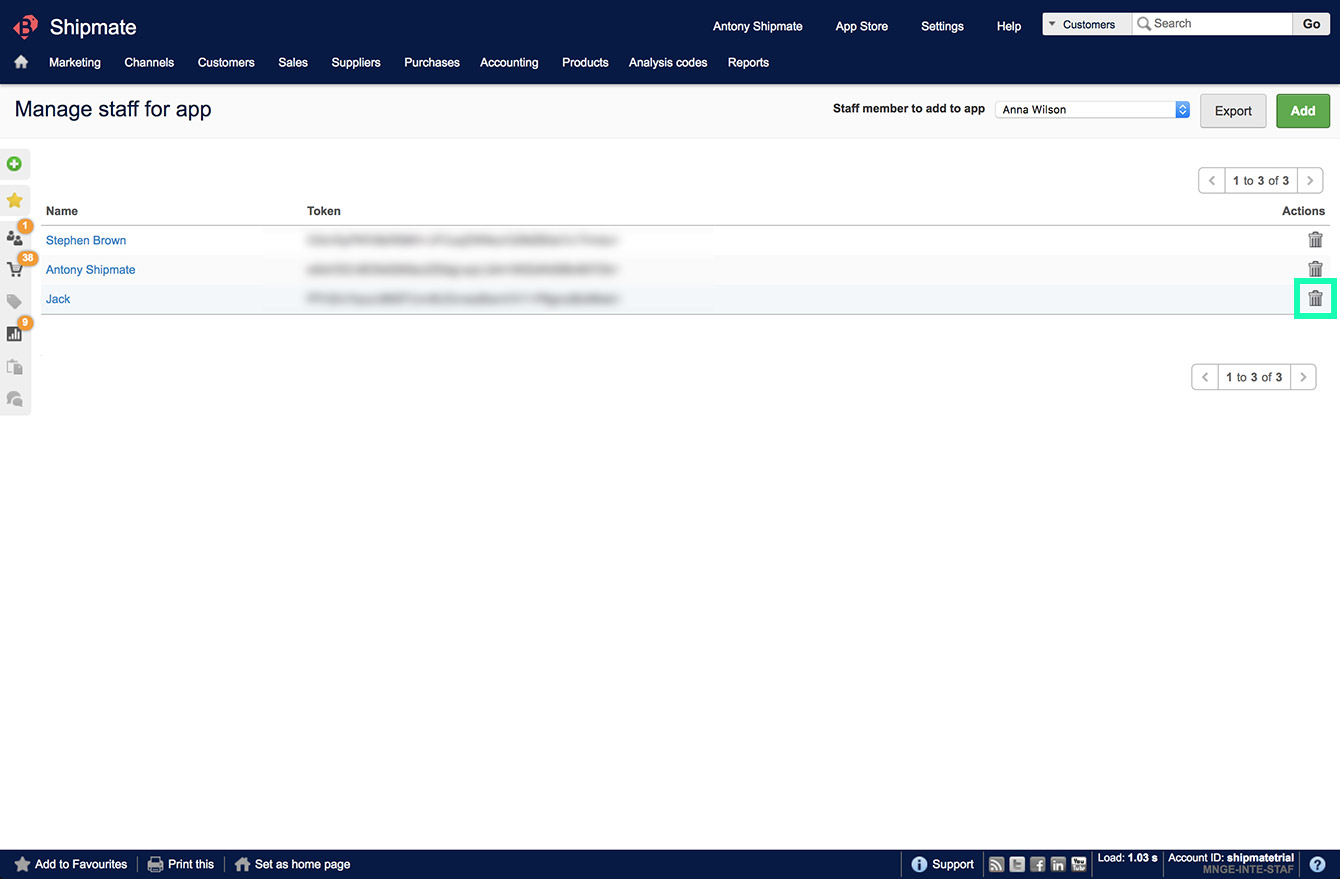
If you no longer wish for a staff member to access the Shipmate plugin, you can easily remove them from the ‘Manage staff for app’ page inside Brightpearl. Simply select the dustbin icon next to their name from the table of users.
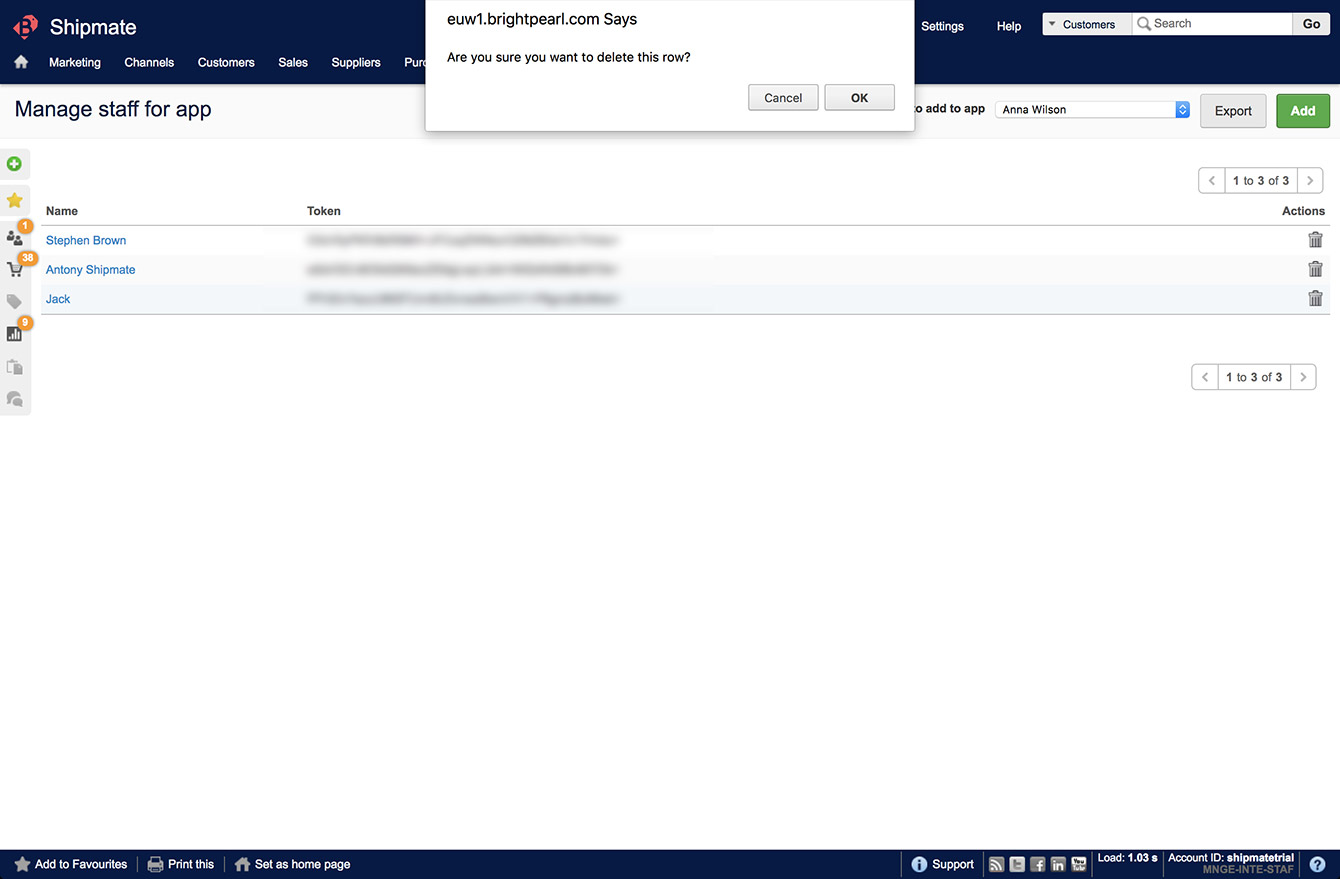
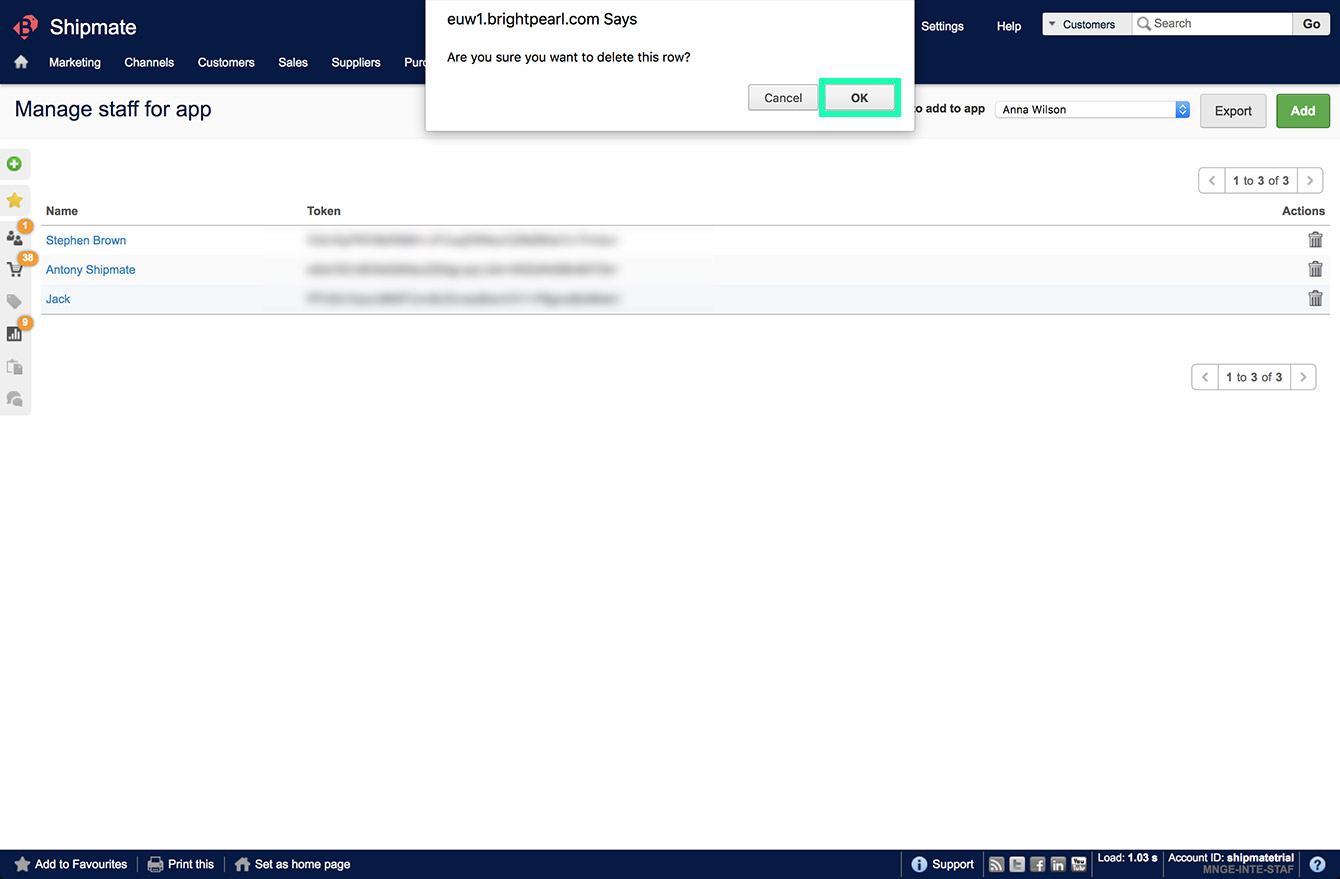
A warning dialogue box will appear asking if you are sure you wish to remove access from that staff member. The message asks ‘Are you sure you want to delete this row?’. Click OK to remove access or cancel to clear the message.
If the user is removed successfully, their name will be removed from the table and their access token removed, thereby preventing their access to the Shipmate plugin.
Setup - Shipmate
Enabling Brightpearl
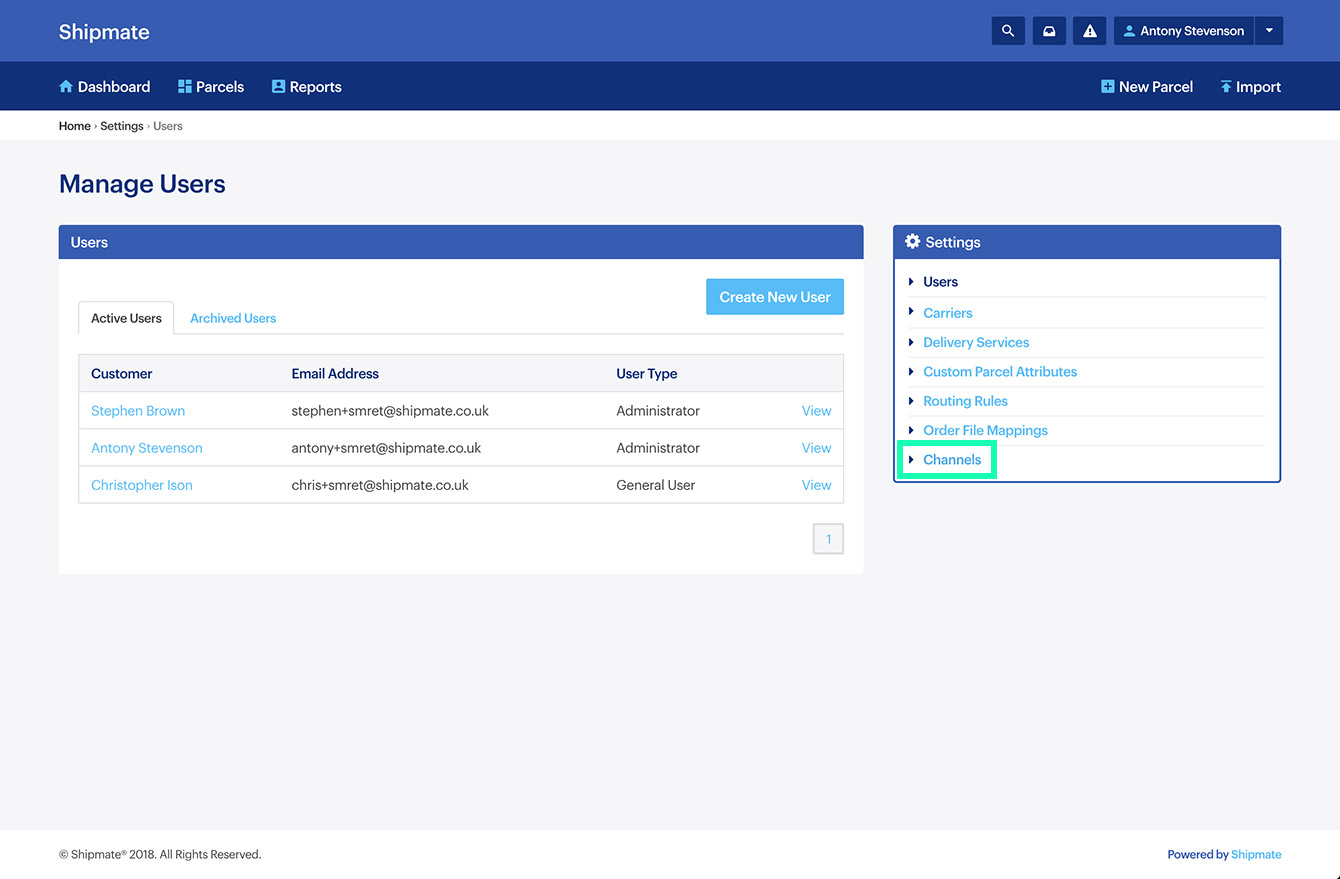
Before you can start using Shipmate with Brightpearl, you need to enable Brightpearl as a Channel inside Shipmate. To do this, you need to be logged in as an administrative user on your account, then simply navigate to your profile menu then click Settings.
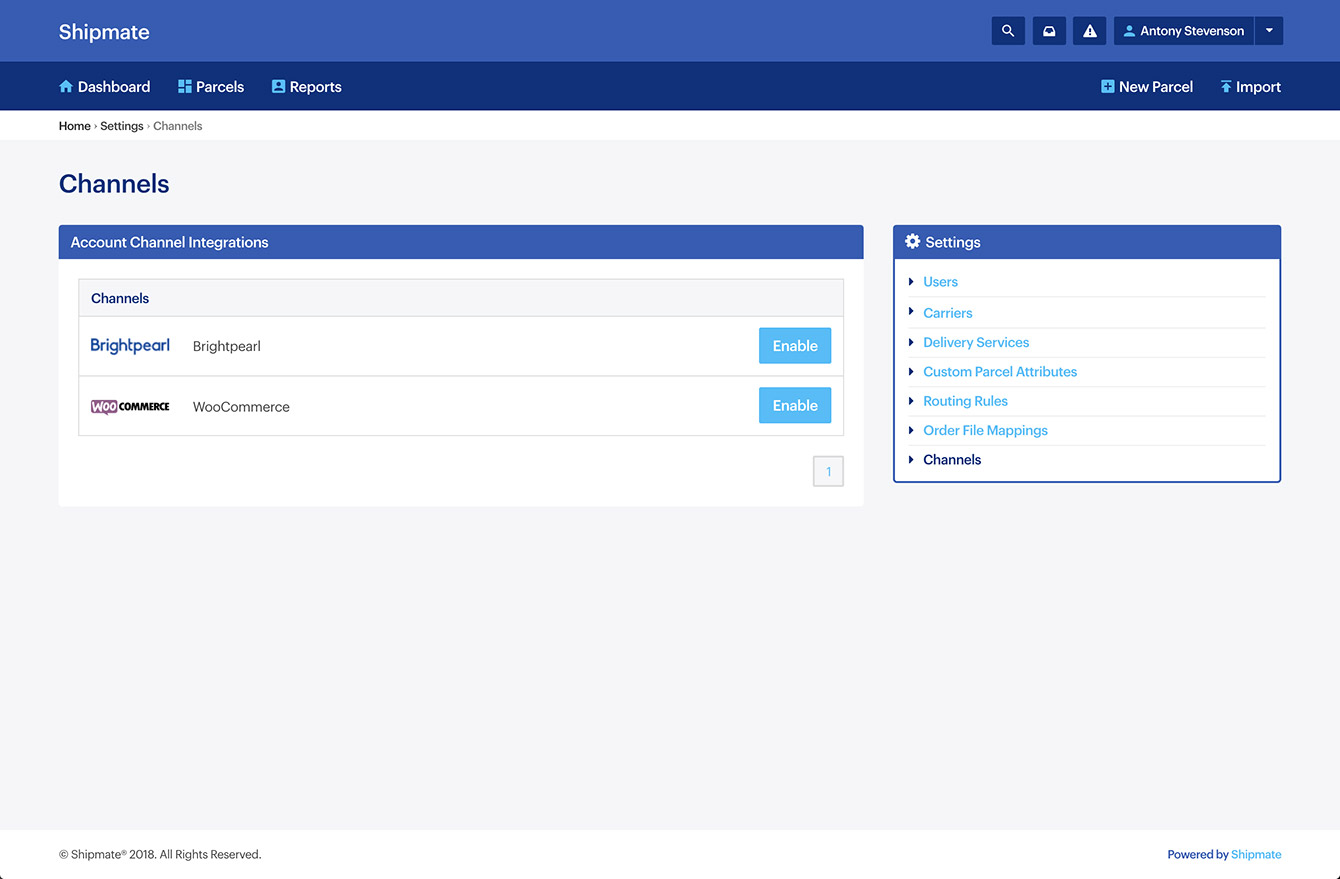
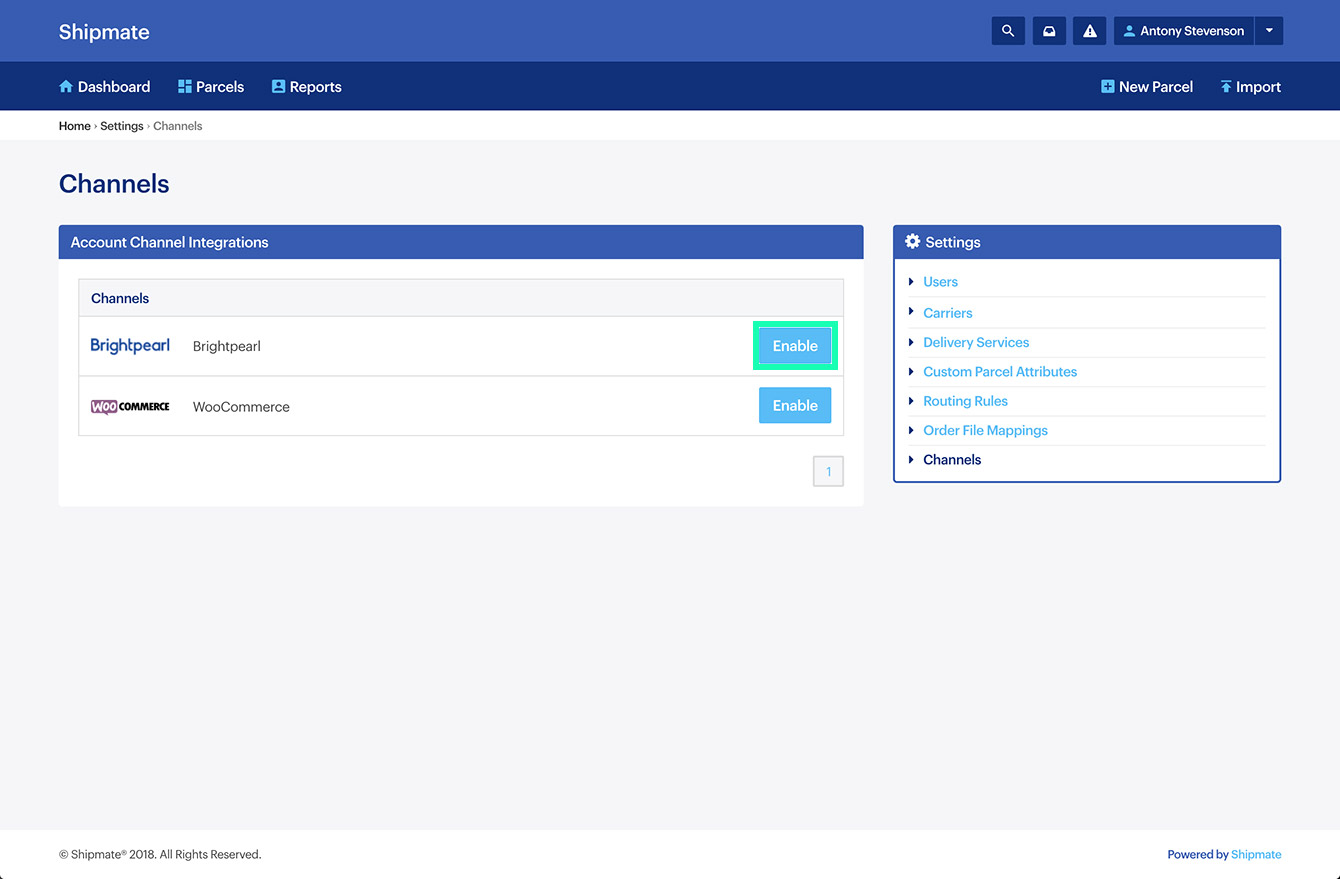
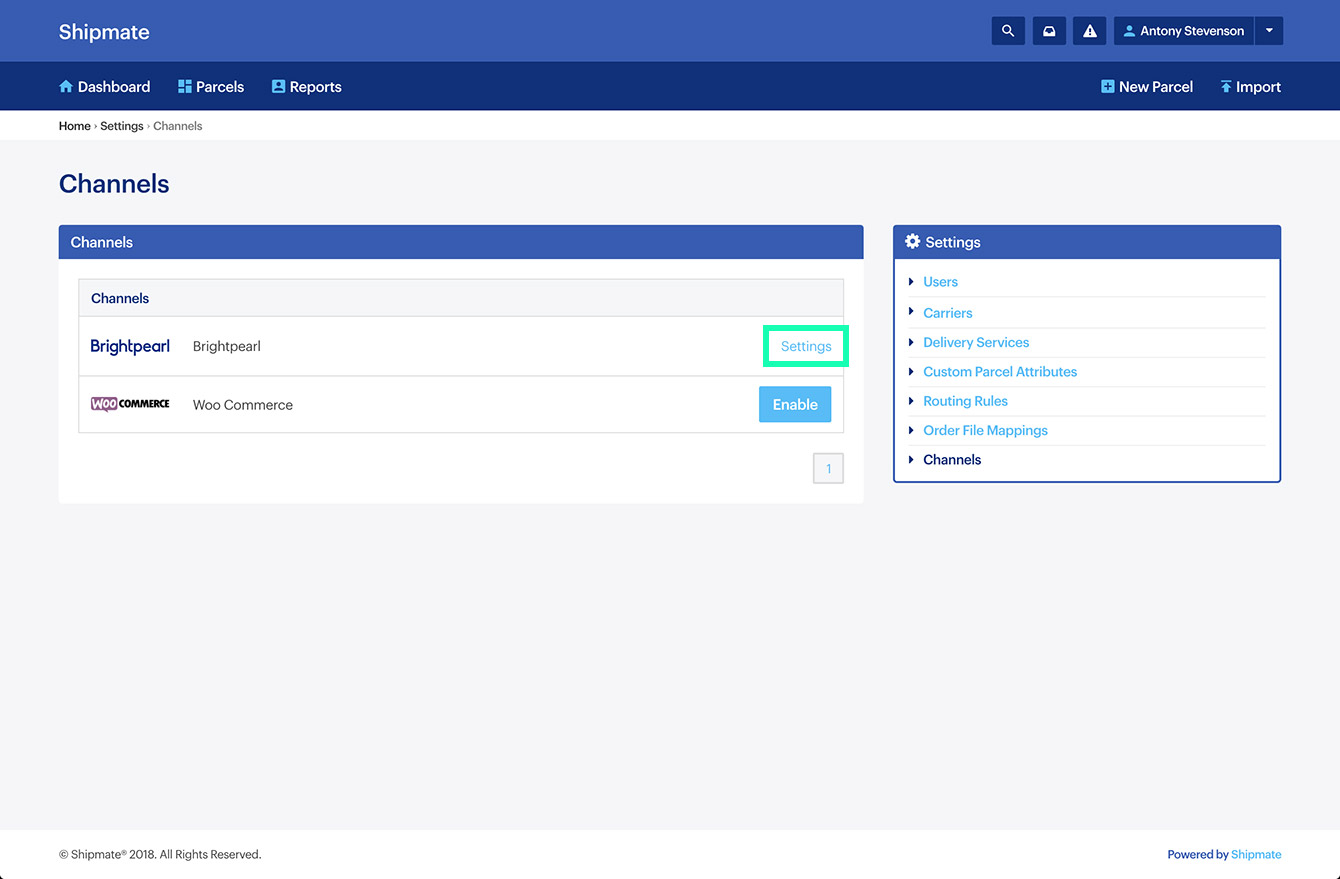
From the Settings screen select Channels. This will open a page listing all of the available channels on your account. Simply click the blue ‘Enable’ button next to the Brightpearl logo.
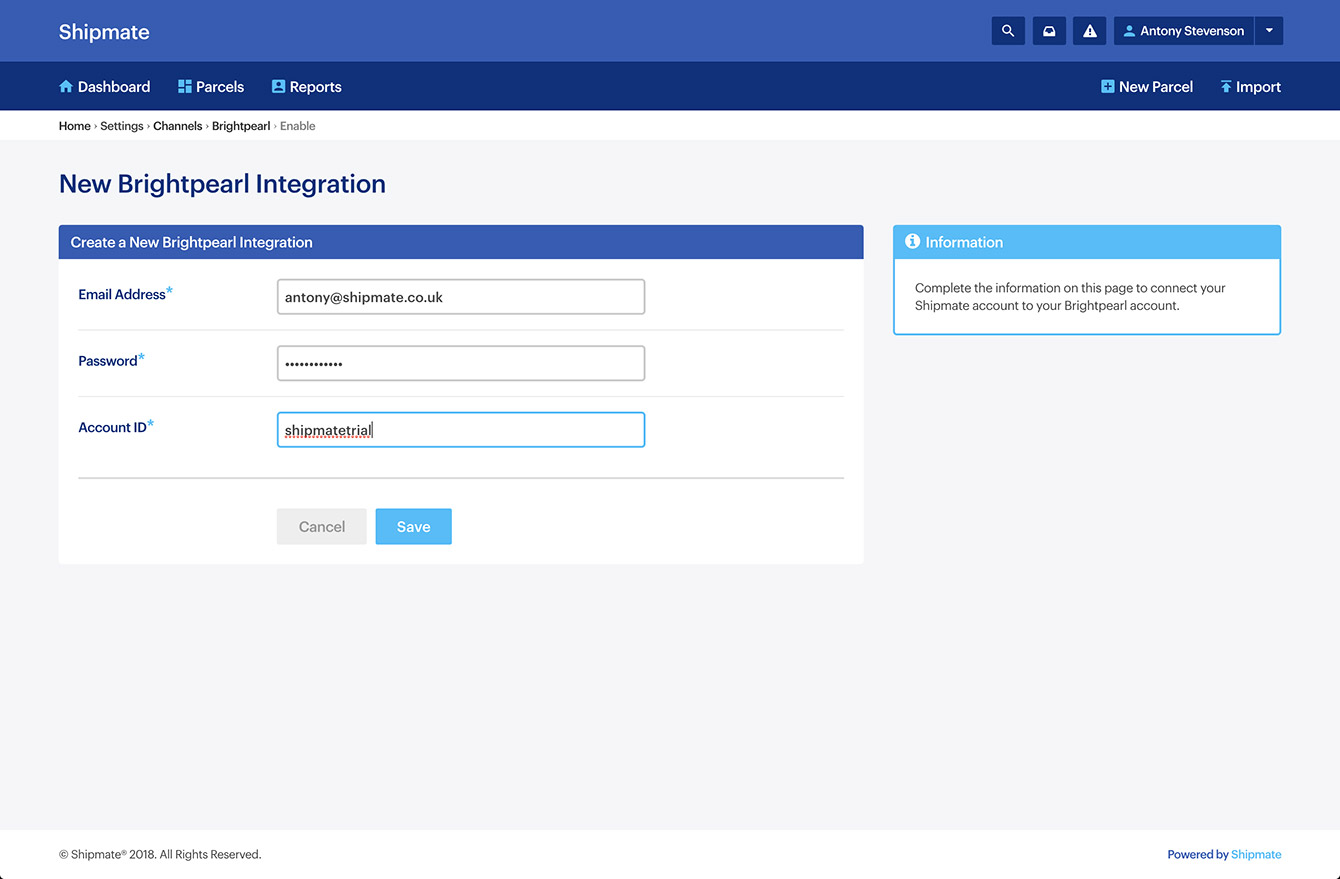
This will take you to a screen where you can enter your Brightpearl login details. You will need your Brightpearl Account ID, Username and Password to link your Brightpearl account to Shipmate. Once you have completed the form click the blue ‘Save’ button.
If the link was successful, you will be taken to a page showing details about your Brightpearl integration. If there were any issues these will be displayed on the login details page - ensure the details you have entered are correct and that you have sufficient access within your Brightpearl account and try again. If issues persist please contact Shipmate or Brightpearl support for further assistance.


Channel Settings
To amend your Brightpearl Channel settings inside Shipmate, you need to be logged in as an administrative user on your account, then simply navigate to your profile menu then click Settings.
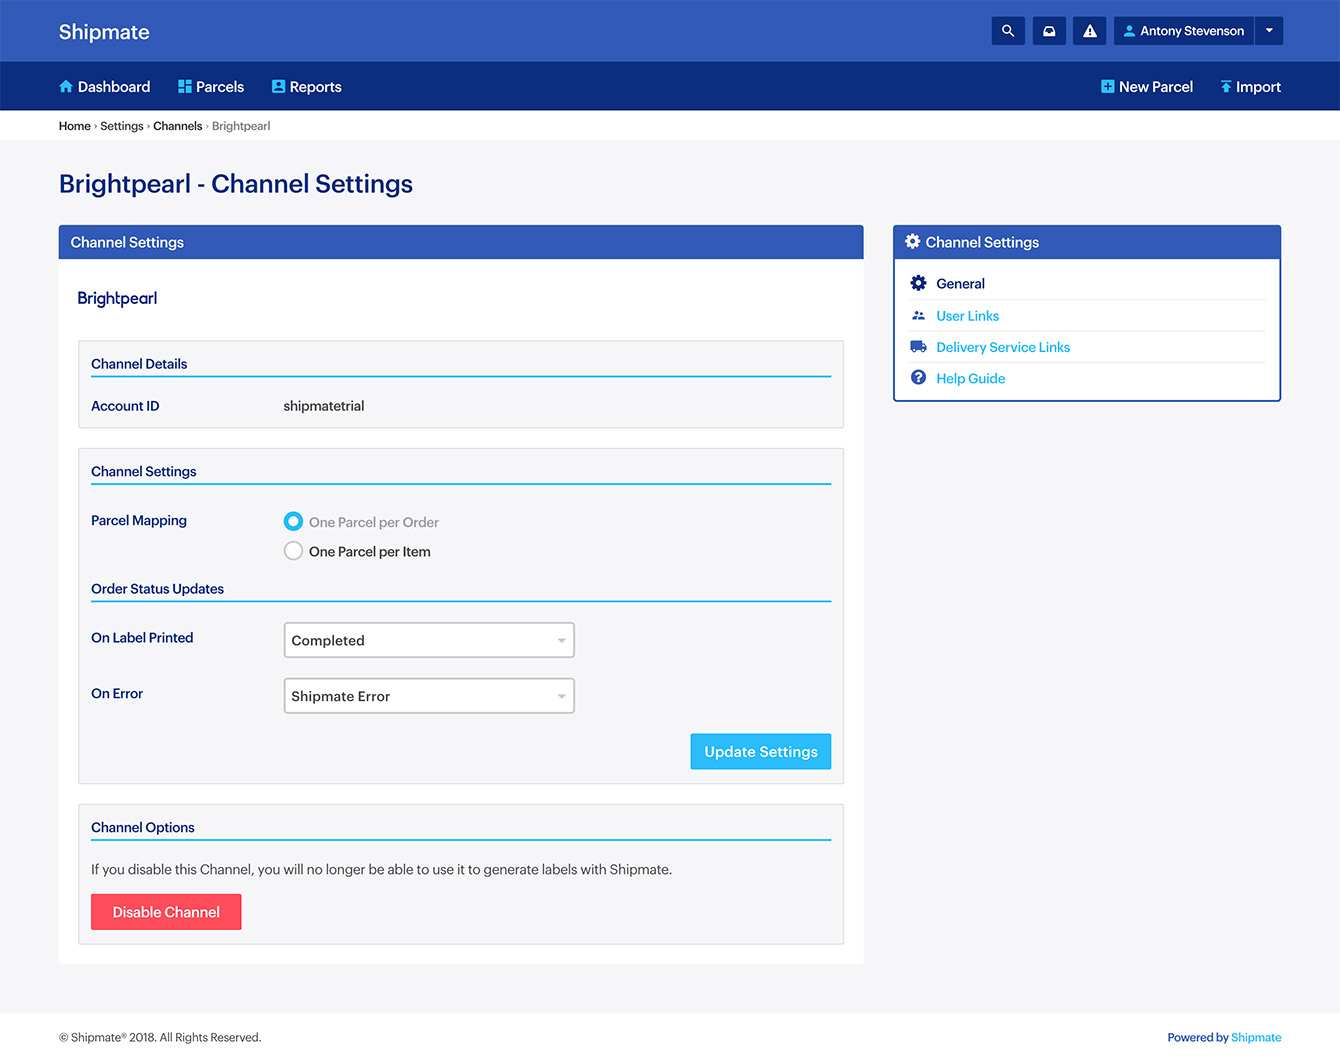
From the Settings menu select Channels. This will open a page listing all of the available channels on your account. Simply click the blue ‘Settings’ link next to the Brightpearl logo. This will open the Brightpearl Channel Settings page.


Parcel Mapping
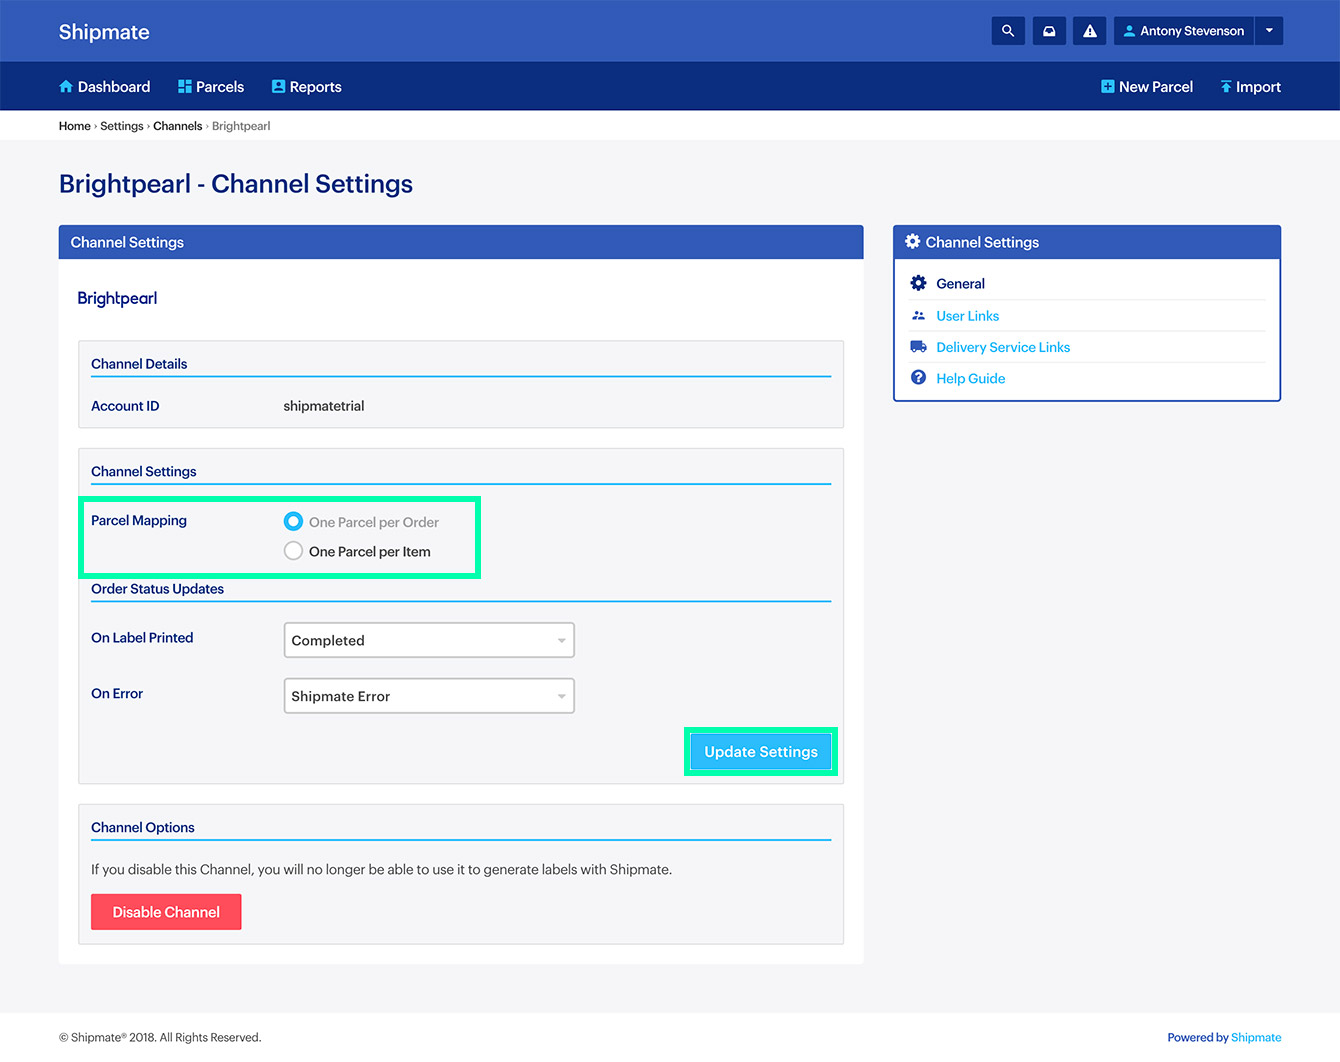
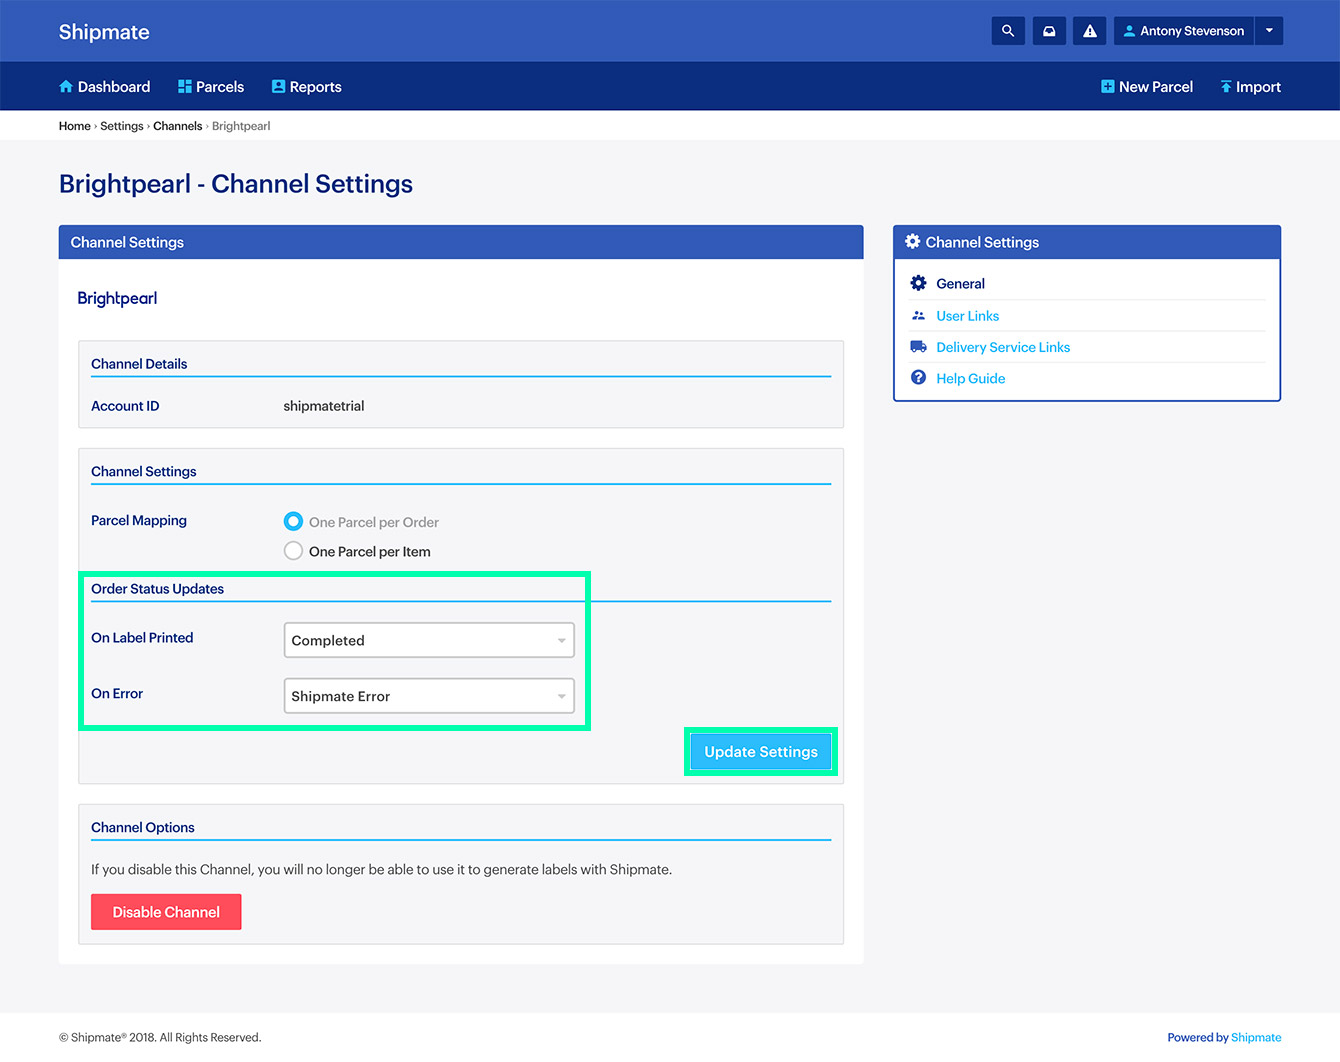
The Shipmate Brightpearl plugin currently handles two types of parcel mapping for your Brightpearl orders: one parcel per order or one parcel per item.
You can change which option you wish Shipmate to use from the Brightpearl Channel Settings screen. Simply select the option of your choice, then click ‘Update Settings’.
Order Status Updates
Shipmate can automatically update the status of your orders inside Brightpearl as various actions and outcomes take place. You can determine which order status an order is changed to on the successful creation of a label and also if an error had occurred on Shipmate.
Simply select the order status from the corresponding drop-down menu then click ‘Update Settings’ to save your selection.
Linking User Accounts
When you enable the Brightpearl Channel, Shipmate will attempt to automatically associate user accounts based on email address - so if your users have the same email address inside both Brightpearl and Shipmate, you shouldn’t need to do anything else for your users to start printing labels individually.
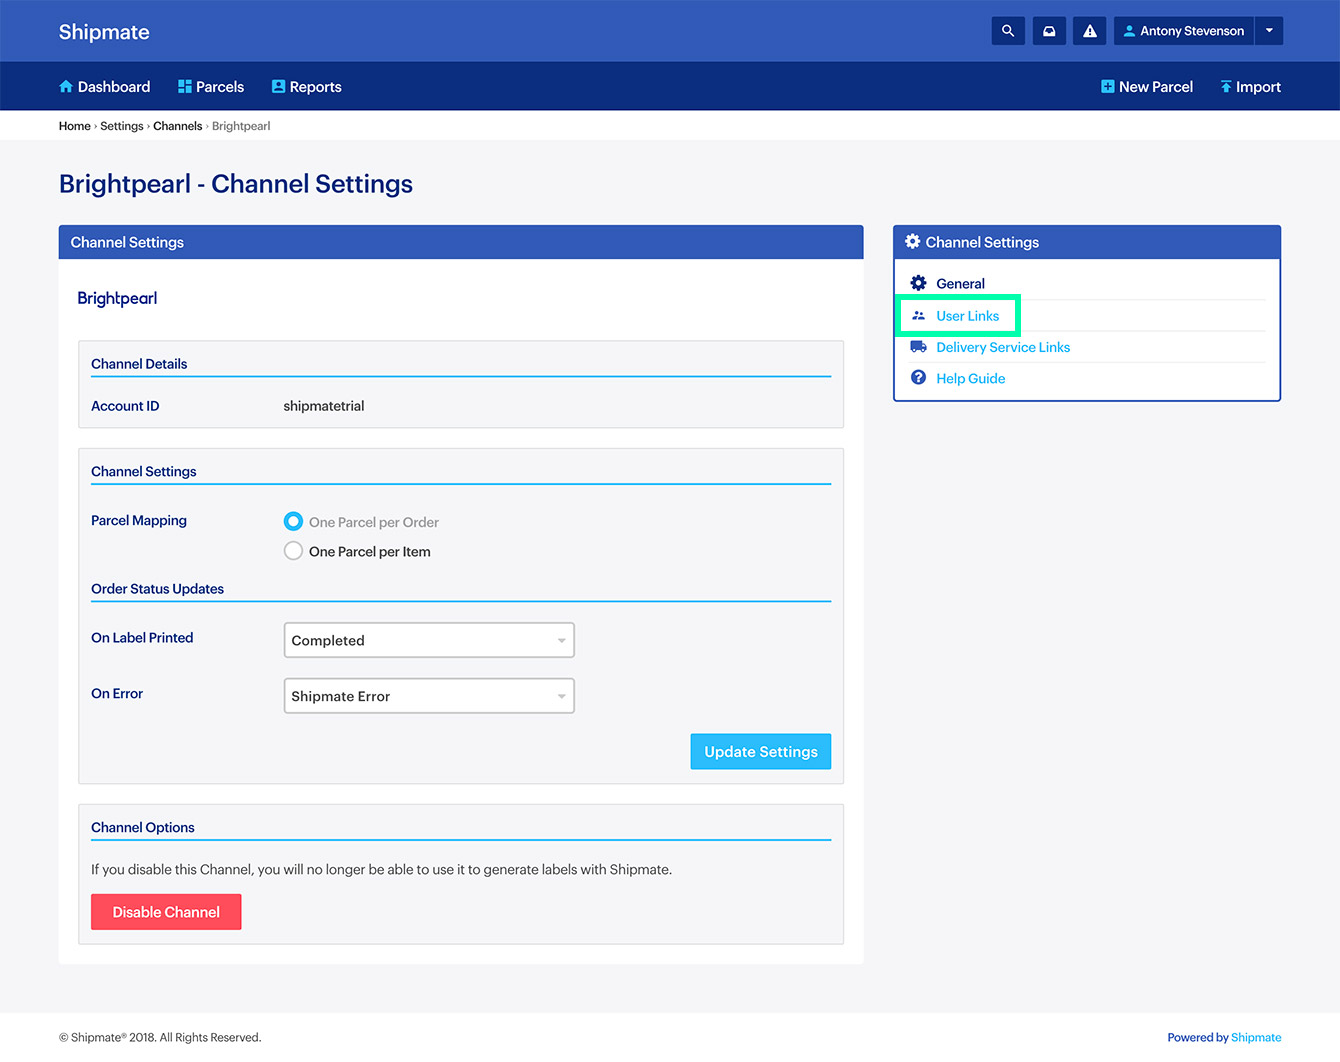
If however you have different accounts, or wish to link accounts in a different way - this is possible through the Brightpearl User Linking feature. To access this, click the User Links option from the Channel Settings menu.
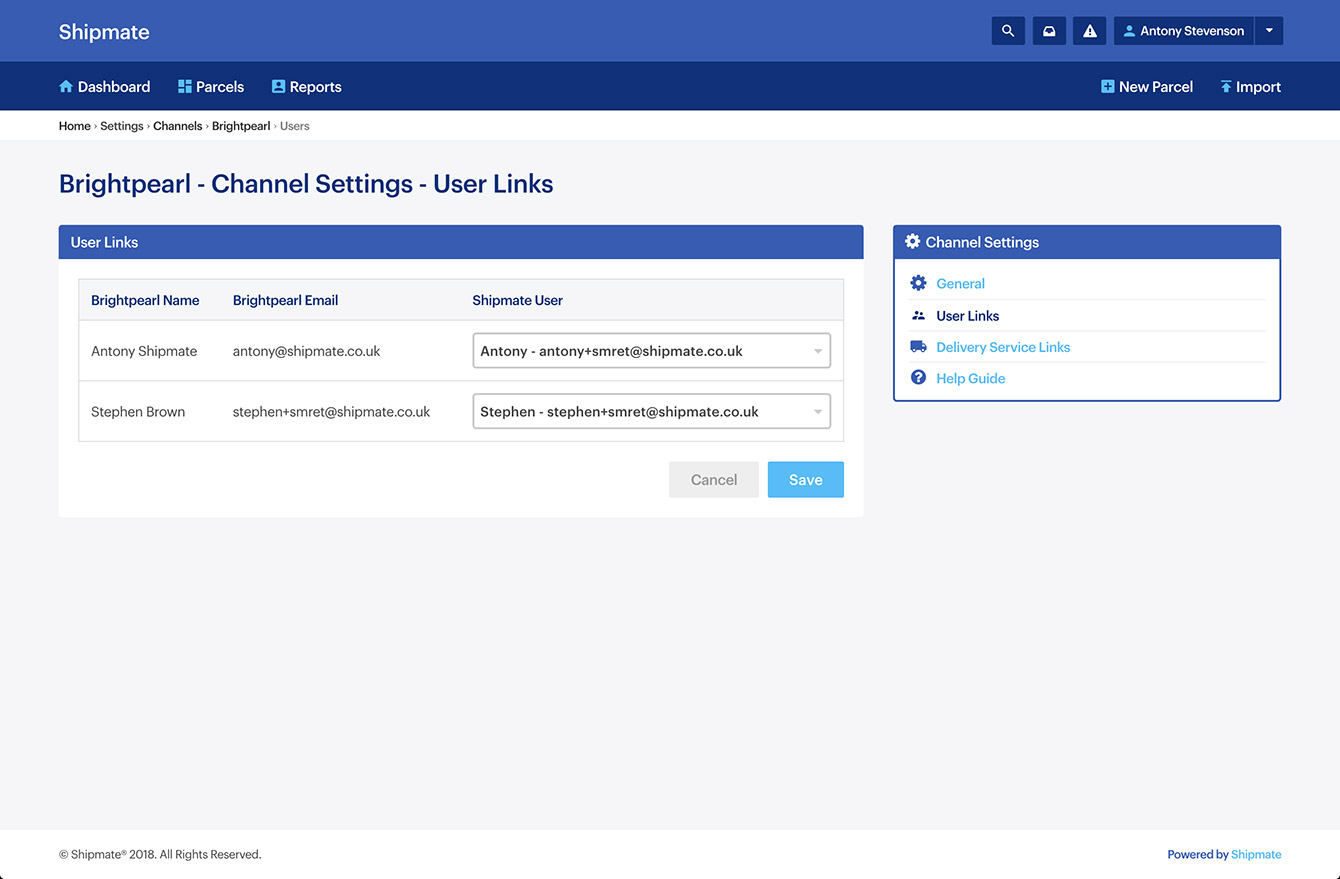
Inside the Brightpearl User Links page you can associate Brightpearl and Shipmate users by selecting the drop-down menu next to the Brightpearl user and select a Shipmate user you wish to associate with that account, then click ‘Save’.
From then on, whenever that user requests a label inside Brightpearl, Shipmate will treat it as if the mapped user requested it. This is especially helpful if you share a computer or label printer and don’t log off between user sessions.
Linking Delivery Services
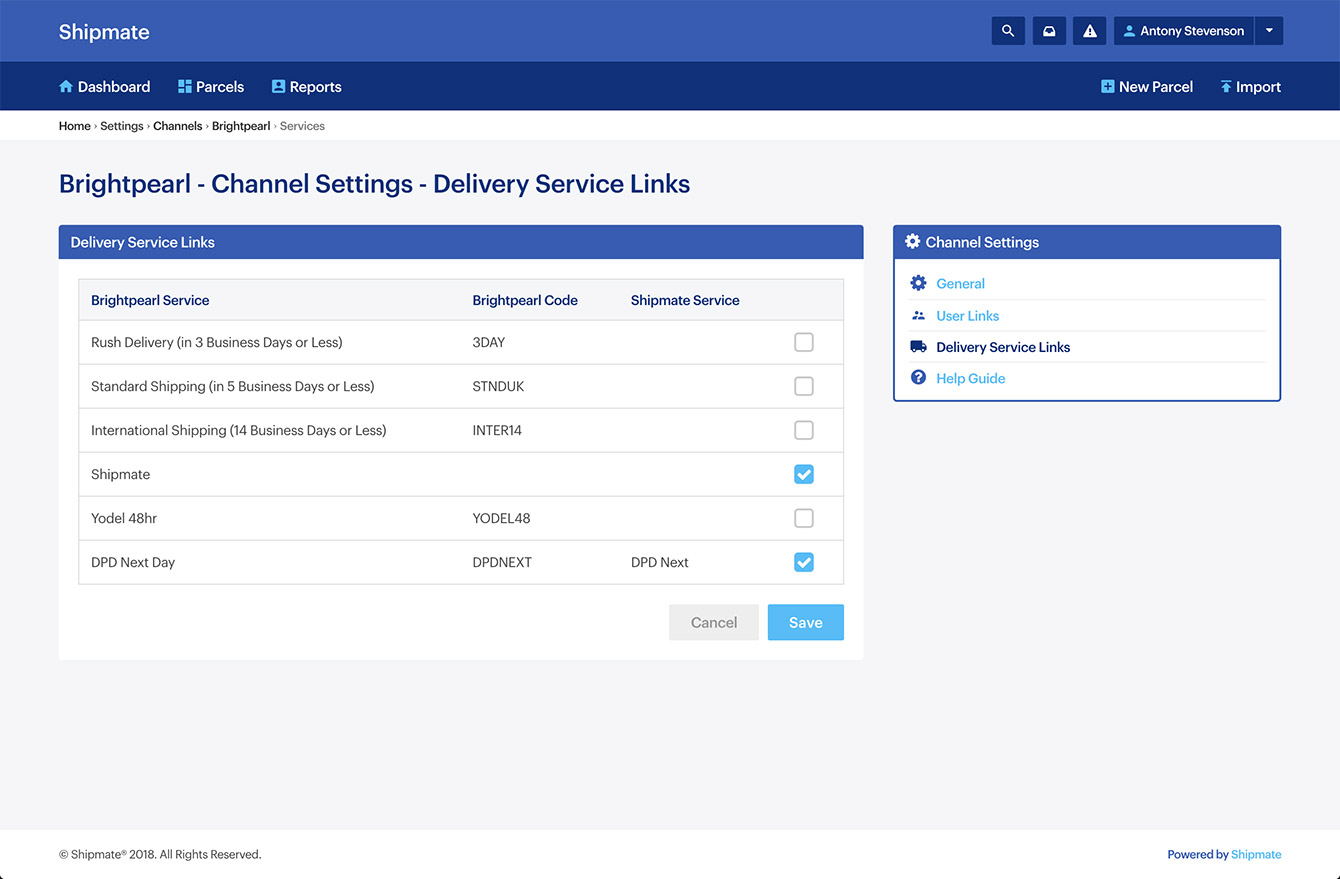
In order for Brightpearl to know when to send label requests to Shipmate, you must first link your Shipmate Delivery Services to Brightpearl Shipping Methods by enabling them inside Shipmate.
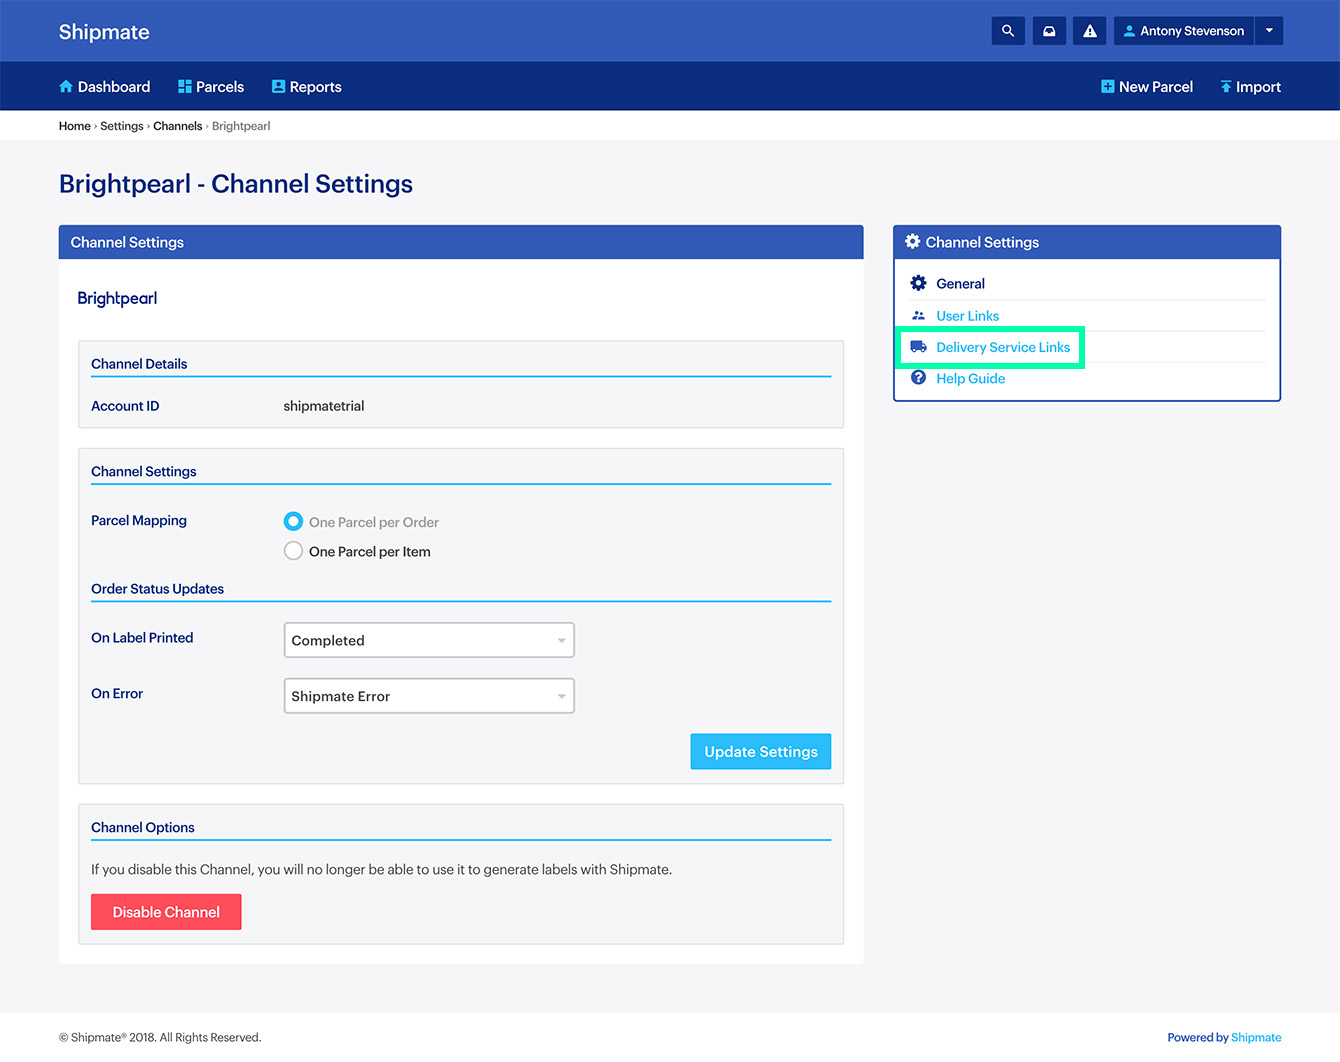
To link your Delivery Services, from the Brightpearl Channel Settings screen, select the ‘Delivery Service Links’ button from the Channel Settings menu. This will take you to the Delivery Service Links screen.
On the Delivery Service Links screen, you will see a list of all available Shipping Methods from your Brightpearl account. In here you can select the methods you wish to assign to Shipmate by ticking the checkboxes next to the Shipping Methods.
If you have provided a Code inside your Brightpearl Shipping Method that matches a Delivery Service Key inside Shipmate, that specific service will be used on a “try and fail” basis - i.e., Shipmate will only attempt to use that specific service. If the Code has been left blank, Shipmate will use your Routing Rules and apply the most suitable Carrier and Delivery Service according to the criteria you have configured.
Once you are happy with your selection, click the ‘Save’ button to save your changes.
Shipmate Desktop App
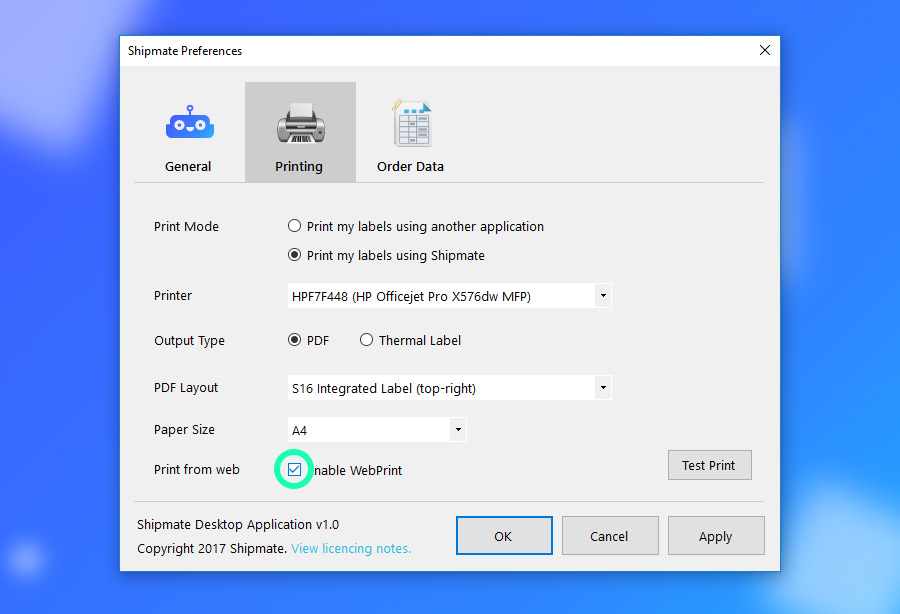
In order to print shipping labels using Shipmate with Brightpearl, you must download the Shipmate Desktop App for Windows, configure the app to use your label printer and enable WebPrint™.
Removing Brightpearl
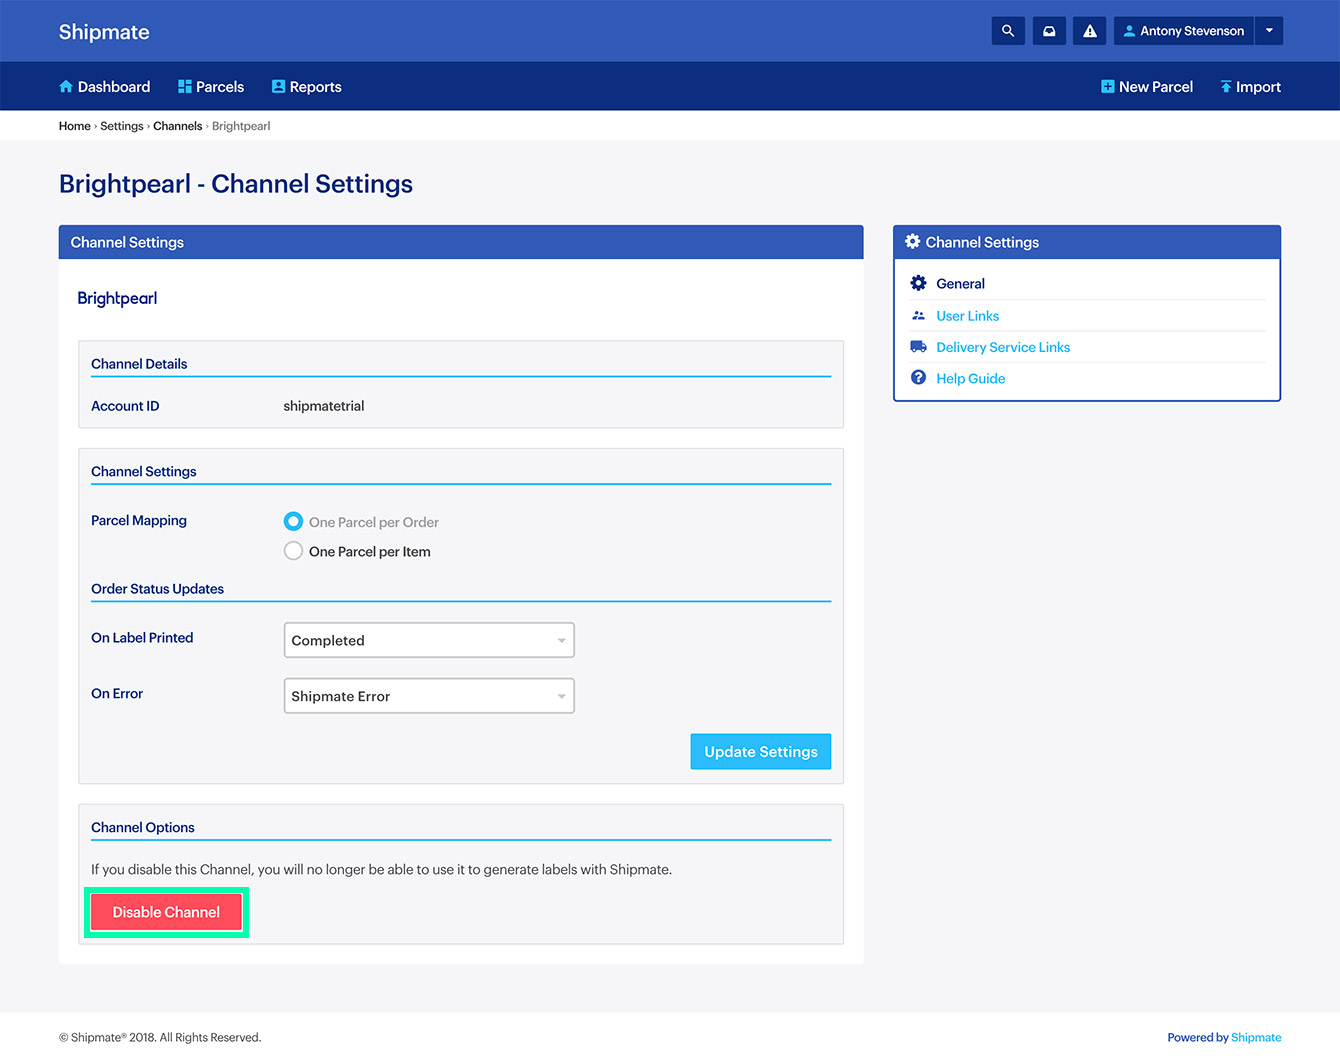
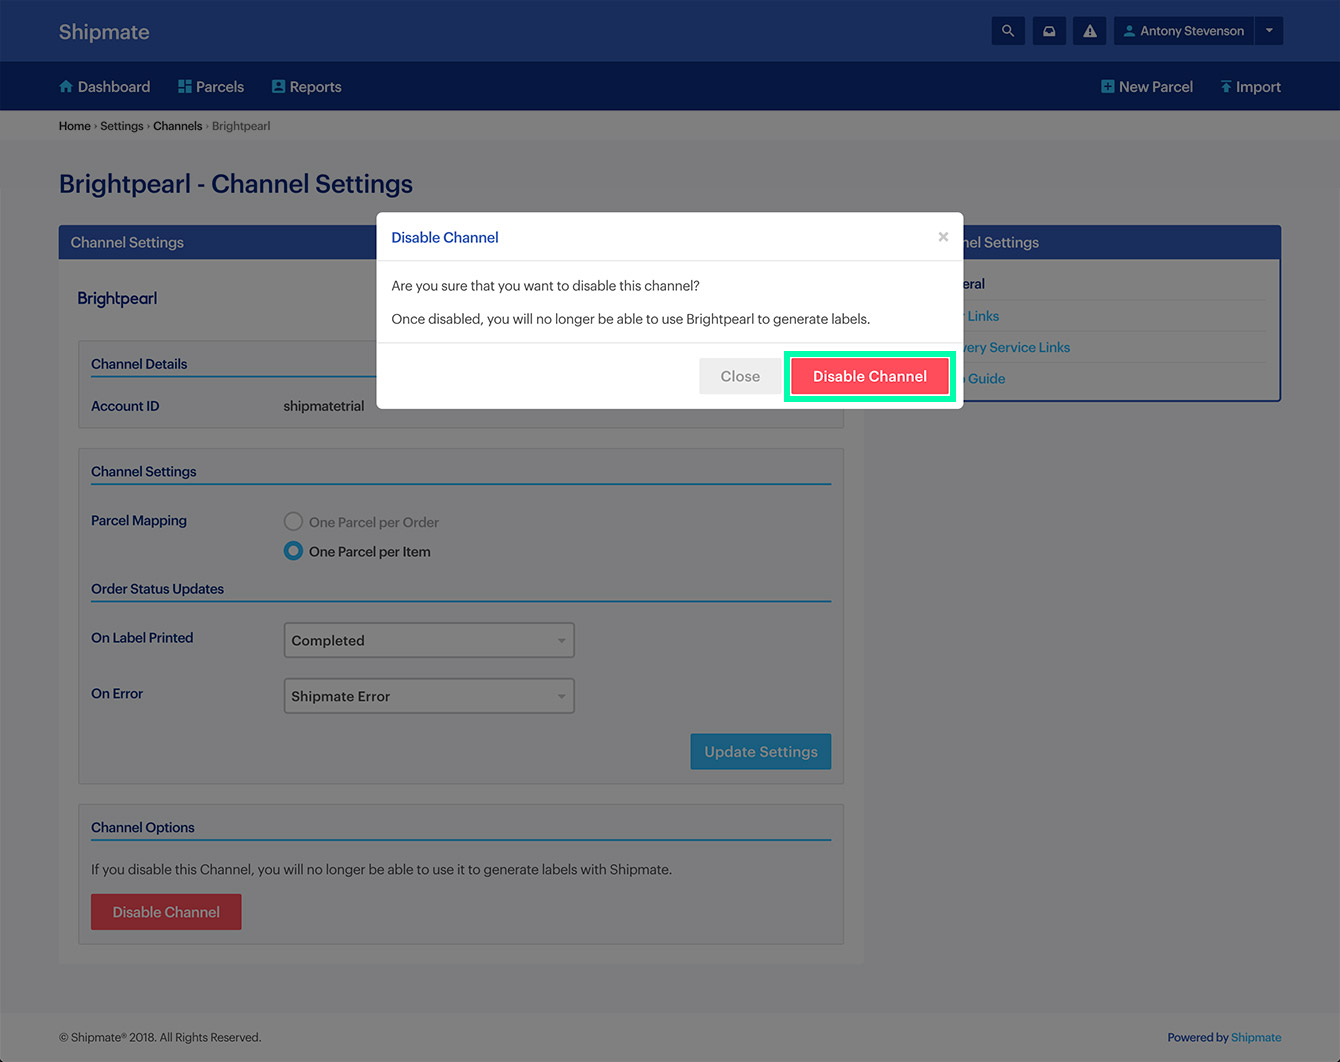
If you no longer wish to use Brightpearl with your Shipmate account, simply click the 'Disable Channel' button from the Brightpearl Channel settings page. A pop-up dialogue box will ask you to confirm whether you wish to disable the integration.
Simply click the red ‘Disable Channel’ button to confirm that you wish to disable the integration. You will then be returned to the Channels page, where you can view, enable or re-enable your Channels.

In Use
Printing Labels
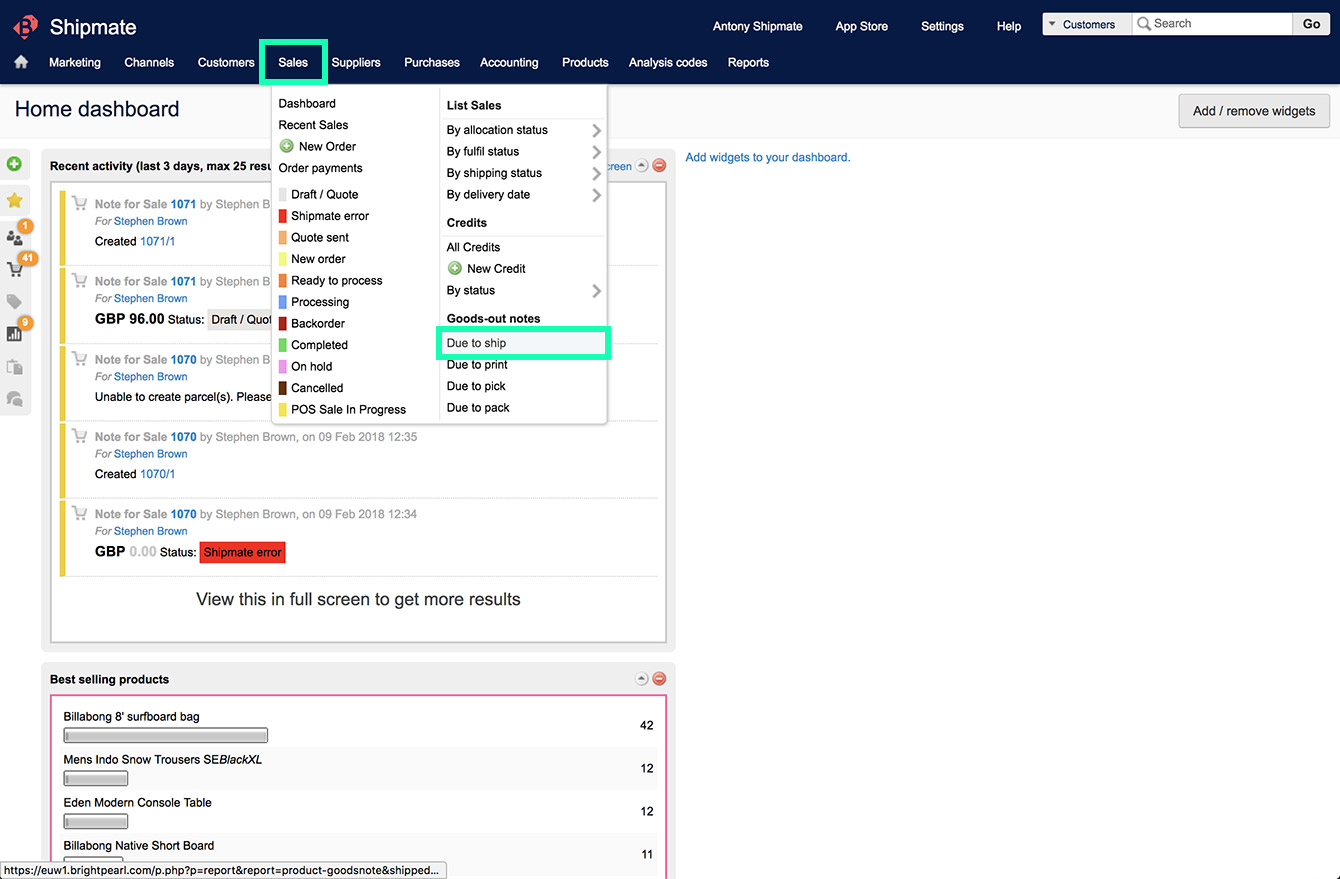
In order create your shipping labels from Shipmate, click the ‘Sales’ option from the Brightpearl top-menu, then select ‘Due to ship’ from the Goods-out Notes sub-section. This will load the Goods Notes page with a list of orders that are ready for shipping.
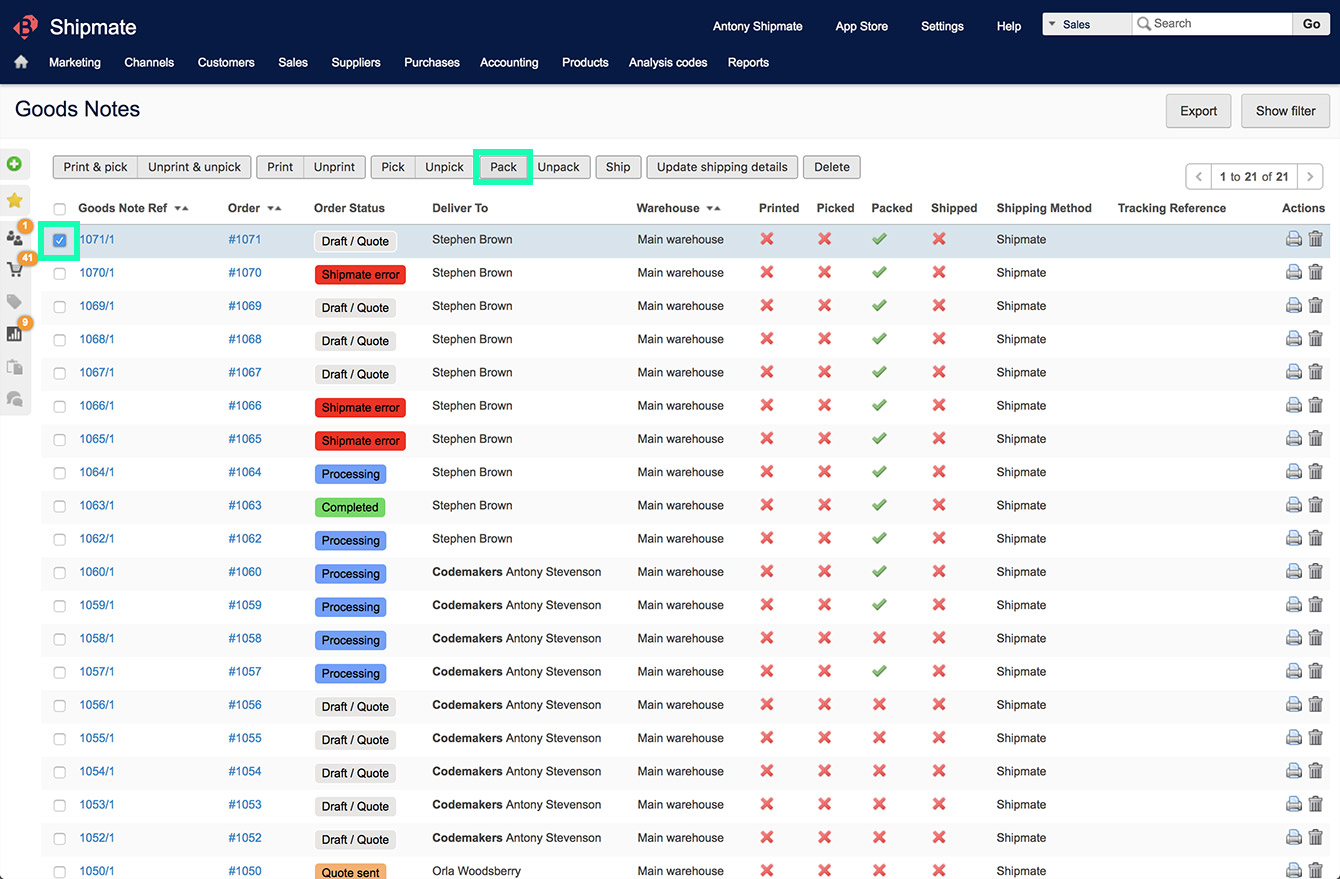
Select the order or orders you wish to generate labels for, then click ‘Pack’.
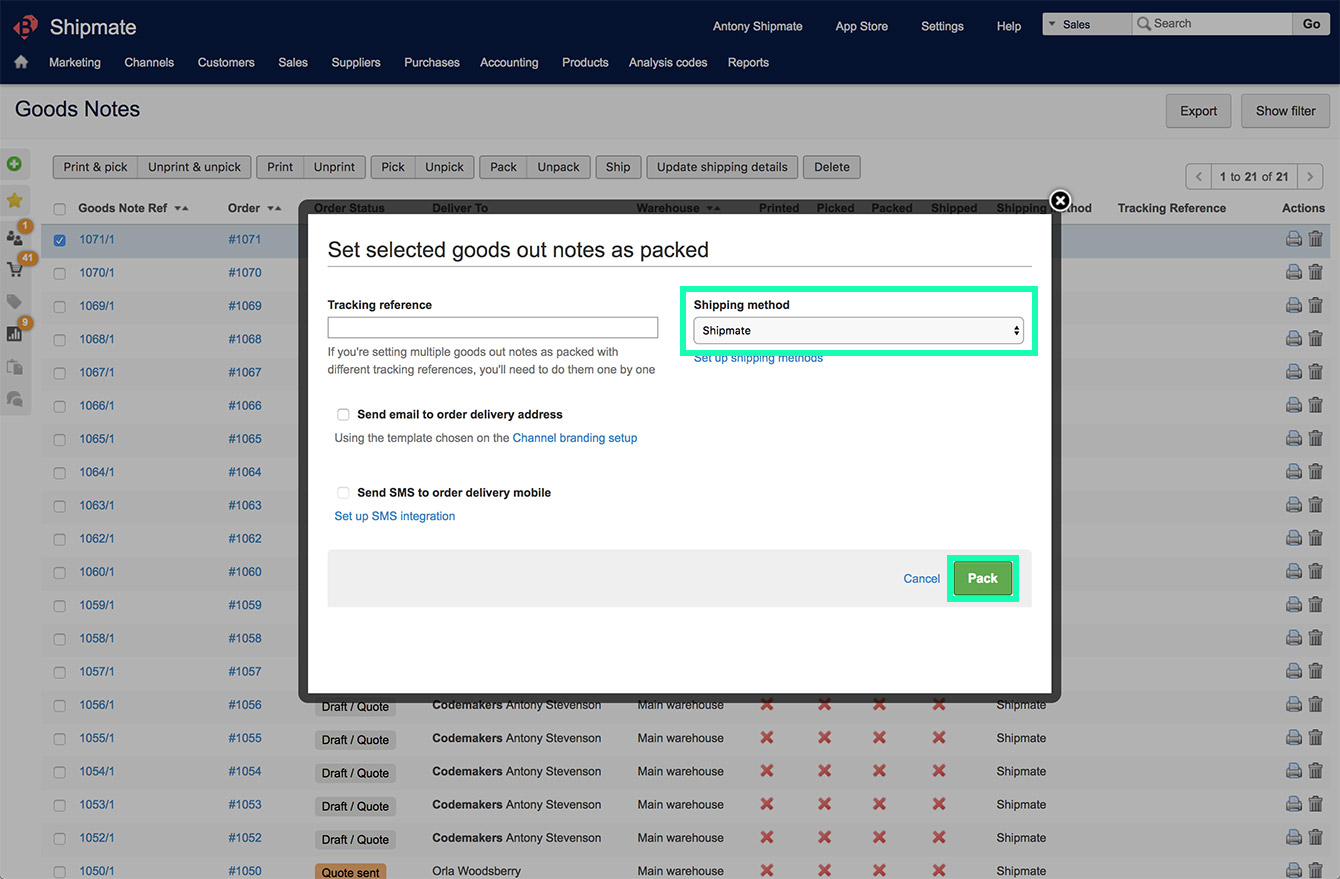
From the Pack pop-up window, ensure the shipping method is correct, then click the green ‘Pack’ button. This will send the order details over to Shipmate for processing your delivery label.
Provided WebPrint™ is enabled and your label printer is switched on, the label will begin to print almost immediately. If there has been a problem printing the label, the order status will be updated to the one you selected when configuring the Brightpearl Channel Integration, which is Shipmate Error by default.
Reprinting Labels
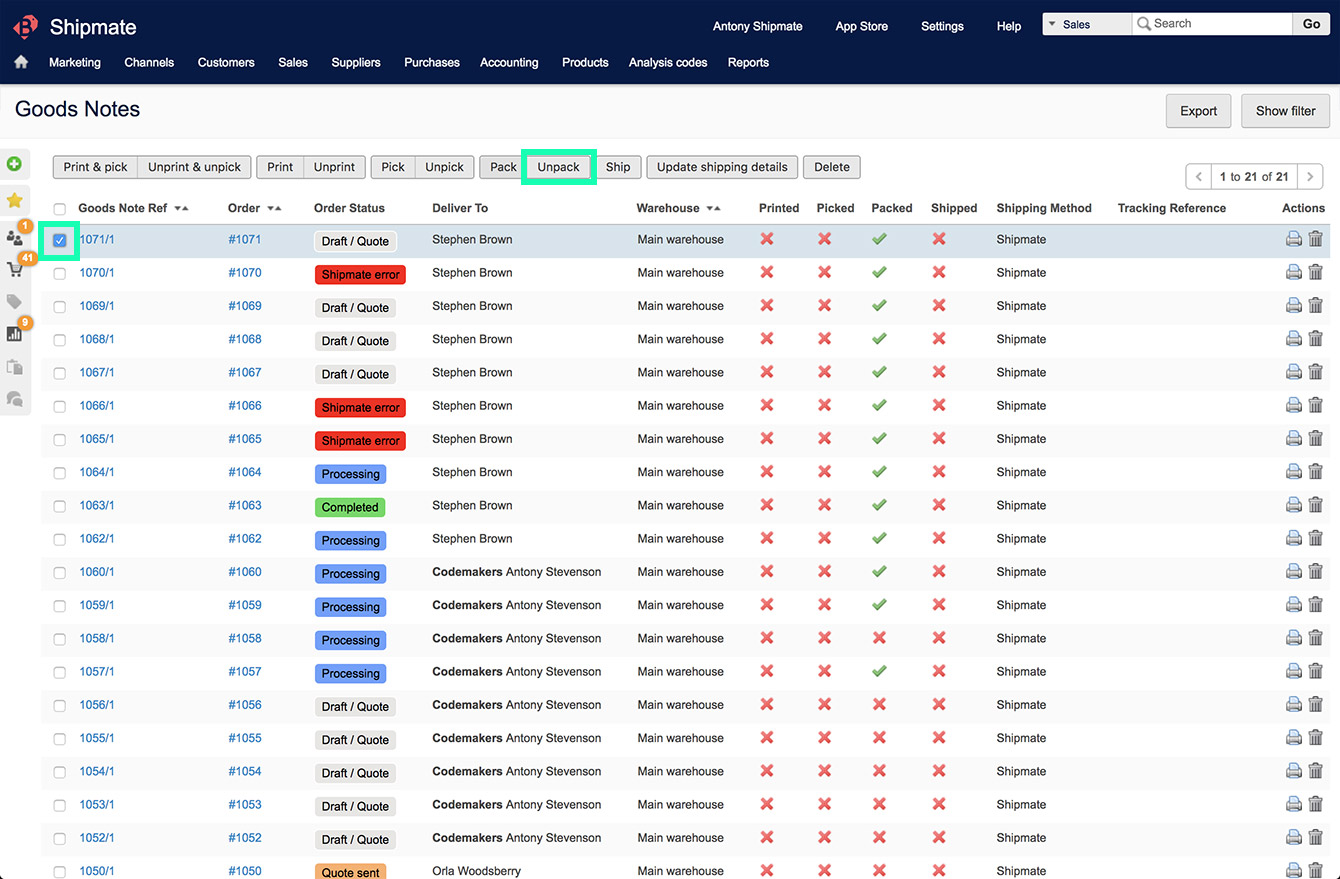
If there has been a problem printing a label, once you have rectified the issue, simply select the order from the ‘Due to ship’ Goods Notes page and click ‘Unpack’.
Then re-select the order and click ‘Pack’, then follow the process as you would normally for printing labels.
Changing Delivery Service
If you have printed a label and subsequently wish to change the delivery service, first Unpack the order by selecting the order from the ‘Due to ship’ Goods Notes page and click ‘Unpack’.
Inside Shipmate, find the order by your order number and Cancel the delivery.
Back inside Brightpearl, follow the Printing Labels instructions and select the new delivery service before clicking the green ‘Pack’ button.

Troubleshooting
Labels Not Printing
There are many reasons why a label might not print when generating a label inside Brightpearl. First check the order status - if the status is ‘Packed’, or the status you otherwise chose for successfully packed orders - the label was successfully generated on Shipmate, otherwise if the status is ‘Shipmate Error’, or the status you otherwise chose for orders in an error state, there was a problem processing the order details.
If your label was successfully generated and the label hasn’t printed, check that the Shipmate Desktop Application is running, that WebPrint™ is enabled and that your printer is turned on, available to use on your computer and has sufficient paper or label stock inside. You can then try reprinting the label from inside Brightpearl or Shipmate.
If the issue persists, the most likely cause is a problem between Shipmate and your printer, or perhaps your printer itself. Check network settings, printer settings and check whether Windows attempts to send the label to your printer by opening the Print Queue when printing the label. If a label enters the print queue but doesn’t print, the issue is most certainly with your printer. If you don’t see the label entering the print queue, try restarting the Shipmate Desktop App and try again.
‘Shipmate Error’ Status
The most likely causes of an order status being set to ‘Shipmate Error’ inside Brightpearl are either that the delivery details are incorrect or insufficient (e.g., missing address lines or a badly formatted postal code), or that the parcel is unable to be delivered using the selected delivery service (e.g., too heavy, or the carrier doesn’t deliver to that address).
Check and amend your order details where necessary, ‘Unpack’ the order and then ‘Pack’ the order again to try generating a new label.
We are currently working on improving error messages sent from Brightpearl to Shipmate so you are able to find out exactly why an issue has occurred. If in the meantime the issue persists, please contact Shipmate support on support@shipmate.co.uk or call 01332 460 888.
Further Information
Brightpearl Support
For any support relating to your Brightpearl account, please contact your customer service representative or use the Brightpearl customer support helpdesk.
Further details about contacting Brightpearl support can be found on the Brightpearl website.
Version History
Version 1.0.0 - February 2018
Initial version facilitates integration between Shipmate and Brightpearl. Features include:
- Simple user configurable setup
- Print labels using Shipmate WebPrint™
- Select between one label per order or item
- Multi-User Label Printing
- Associate Brightpearl Users with Shipmate Users
- Adds "Shipmate Error" status to orders for problem labels
- Sets order status to "Despatched" when label is generated